

How to connect FluentCRM to Albato
IN THIS ARTICLE
FluentCRM is a powerful email marketing automation tool designed to help businesses manage their customer relationships more effectively. By integrating FluentCRM with Albato, you can streamline your marketing efforts, automate workflows, and ensure that your customer data flows seamlessly between platforms.
Available Trigger
Triggers are events that trigger an automation. All triggers run in real time; that is, data is transferred the moment the event occurs.
- New Contact (Beta Vesion)
Available Actions
Actions are what Albato performs when your automation is running. Actions also allow you to transfer data to other apps and systems.
- Create a new contact
- Update contact
- Custom API request
- Search Contact
- Create a new email template
Before setting up automations with FluentCRM, connect the app to Albato. To do this, go to the Apps section and click the Add a connection button.

Select the app and click the Add a connection button.

FluentCRM versions earlier than 3.0
Enter the required parameters and click the Continue button.

You can create the application password using the WordPress user editing page.
Please make sure that the user has access to FluentCRM. We recommend creating an application password from within FluentCRM. Navigate to FluentCRM -> Settings -> Managers and then create a manager. Make sure the manager is not an "Administrator" user role. Select the permissions you want to give this user for FluentCRM.

Then Go to FluentCRM -> Settings > Rest API and Create the new key corresponding to manager.

Once you confirm, it will give you the username and application password. Please note that you cannot retrieve the application password later. So save it for future use.
Paste the values into the Albato connection fields. Click the Continue button.

The connection is ready!
FluentCRM version 3.0 or later
If you are using FluentCRM version 3.0 or later, some steps will need to be completed differently.
The "Rest API" section that previously existed under FluentCRM > Settings, as described in the instructions above, has been completely removed in version 3.0.
In this case, we will follow a similar process, but instead of generating an API key from FluentCRM, we will generate a new API credential using WordPress' native functionality.
In short, authentication is now handled entirely through WordPress Application Passwords, which is WordPress' built-in feature, rather than a key generated from within FluentCRM itself.
To begin, first make sure to create a dedicated WordPress user with the Administrator role, to be used exclusively for the Albato integration.
For this step, in the WordPress dashboard, go to Users and then click Add New User.
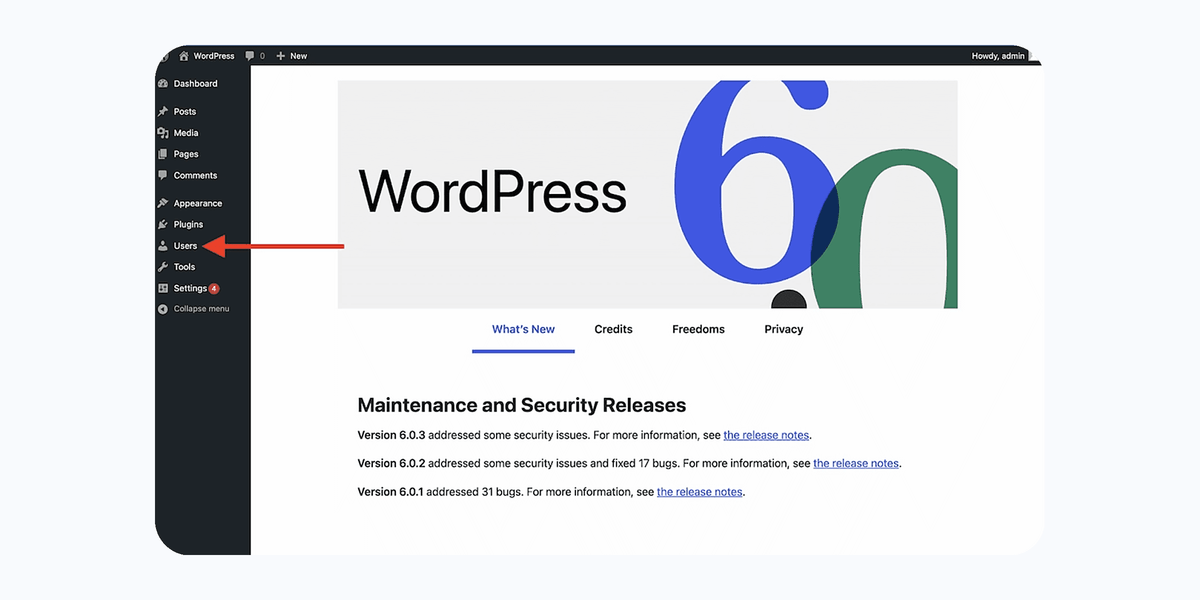
If you have any questions during this step, WordPress support or specialized WordPress forums may be able to assist you.
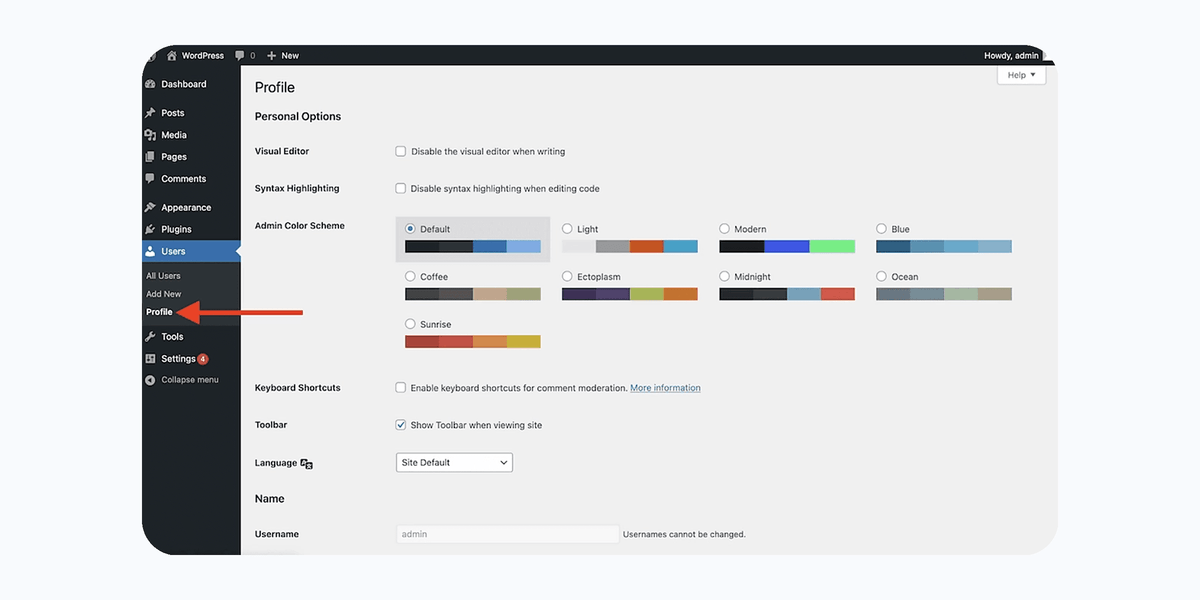
Once the user has been created, click on Profile.
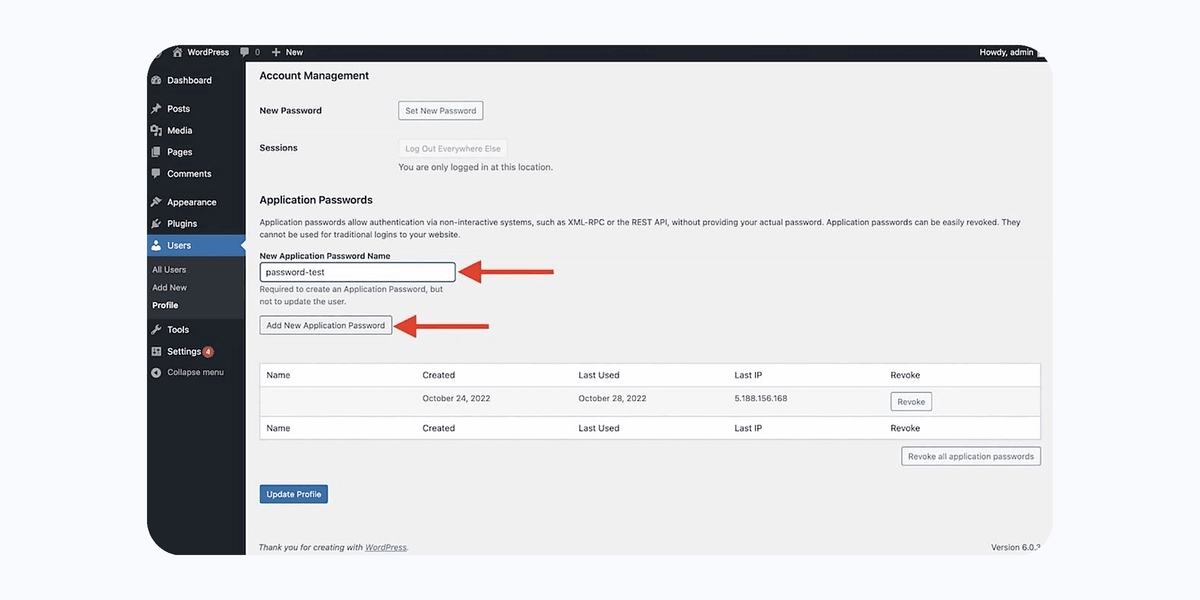
Then select Add New Application Password.
The generated password is displayed only once, so make sure to copy and save it securely.
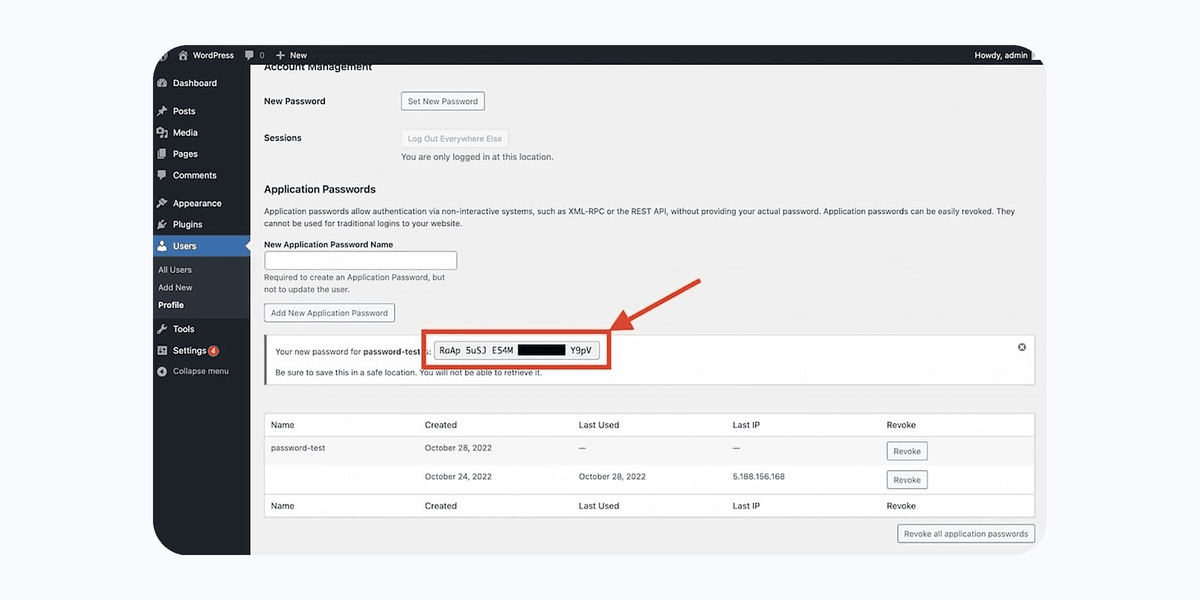
Enter your WordPress login (the dedicated administrator username or email address) and paste the copied password into the Albato connection fields.
After completing this step, just like with the previous method, your connection will be ready to use in your automations!
Did this answer your question?