

How to Create a Monthly WooCommerce Orders Backup in Google Drive
IN THIS ARTICLE
Manually exporting WooCommerce orders every month can take time and makes it easy to miss records or save files in different places. A monthly backup automation keeps order data organized outside the store. In this example, we will show how to create an automation that collects orders from the last 30 days, creates a Google Docs file for each order, exports it as a PDF, and saves the files to a monthly folder in Google Drive.
This example uses WooCommerce, but the same logic can be adapted for other e-commerce platforms, such as Hotmart or Shopify.
Connecting the apps
First, connect the apps used in this automation.
- Go to the Apps section and click Add a Connection.
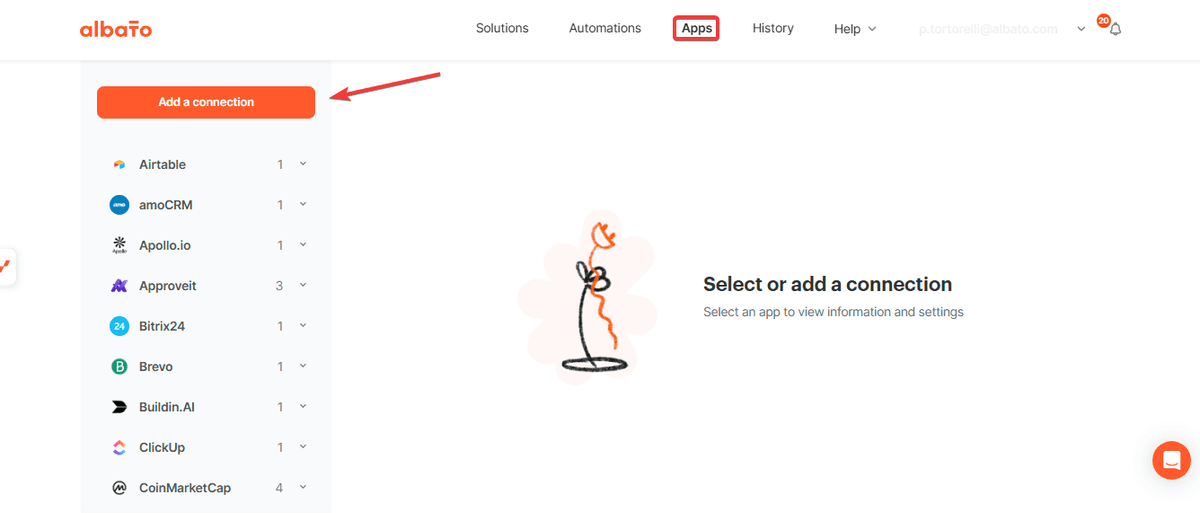
Then, search for the apps we will use and follow the instructions that will appear until you reach the confirmation message that the connection was successfully created.
Repeat the process individually for each of the apps: WooCommerce (or another app you use for your online store), Google Drive, and Google Docs.
How to create your automation
- Go to the Automations section and click Create New Automation.
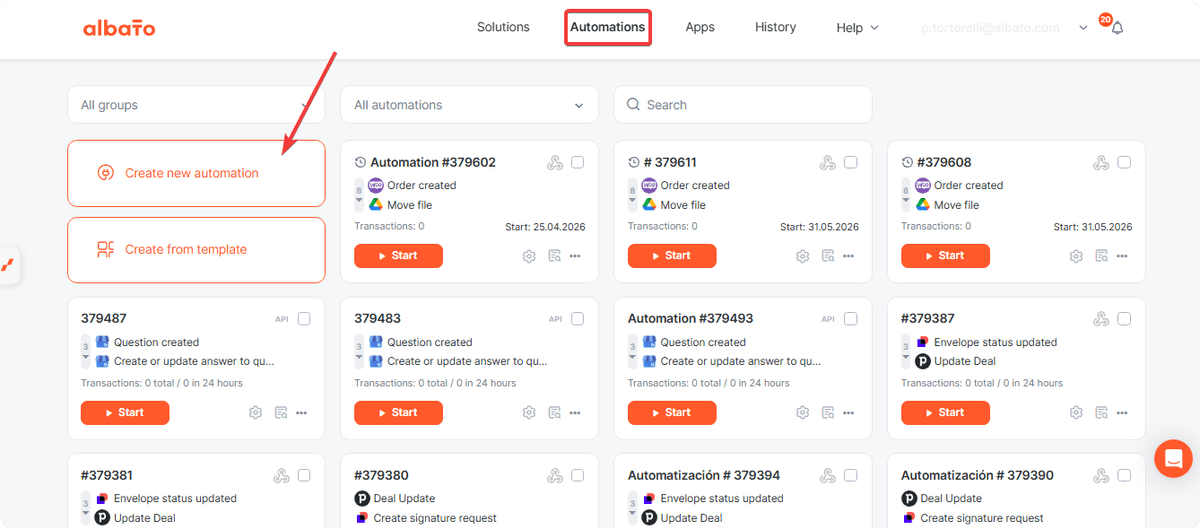
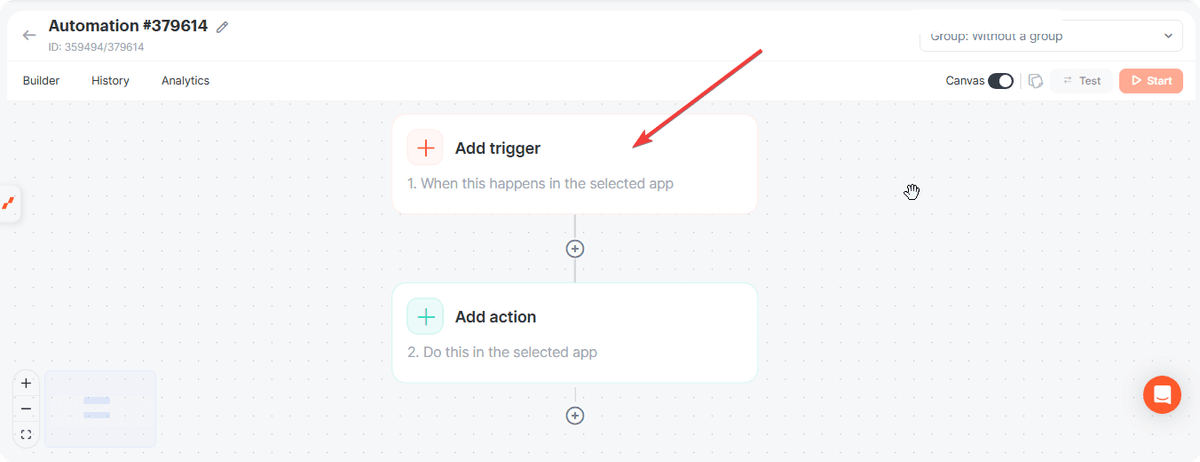
Click the highlighted button to add a trigger to your automation.
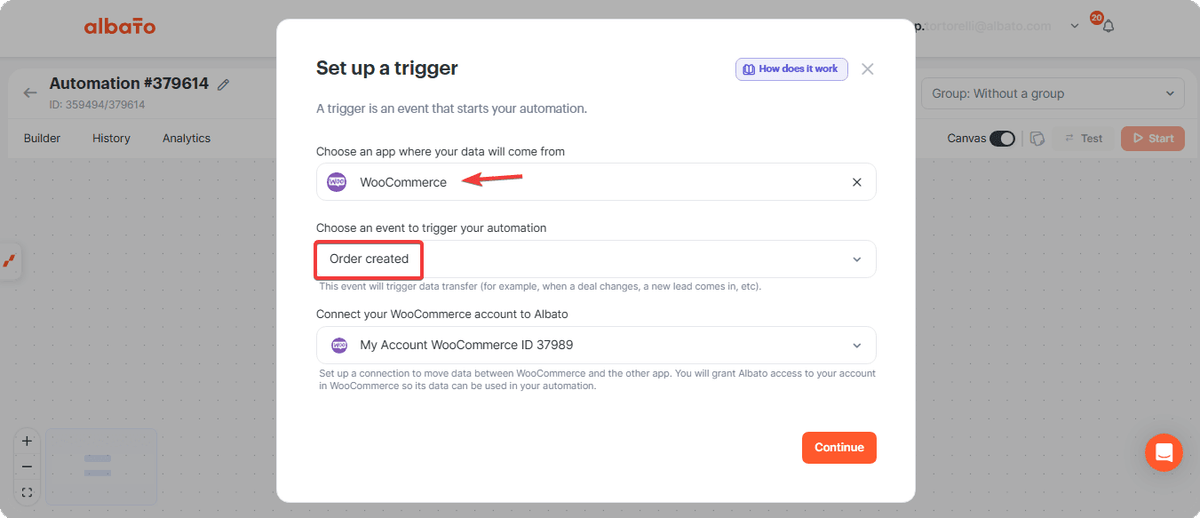
Select the WooCommerce app and the Order Created event.
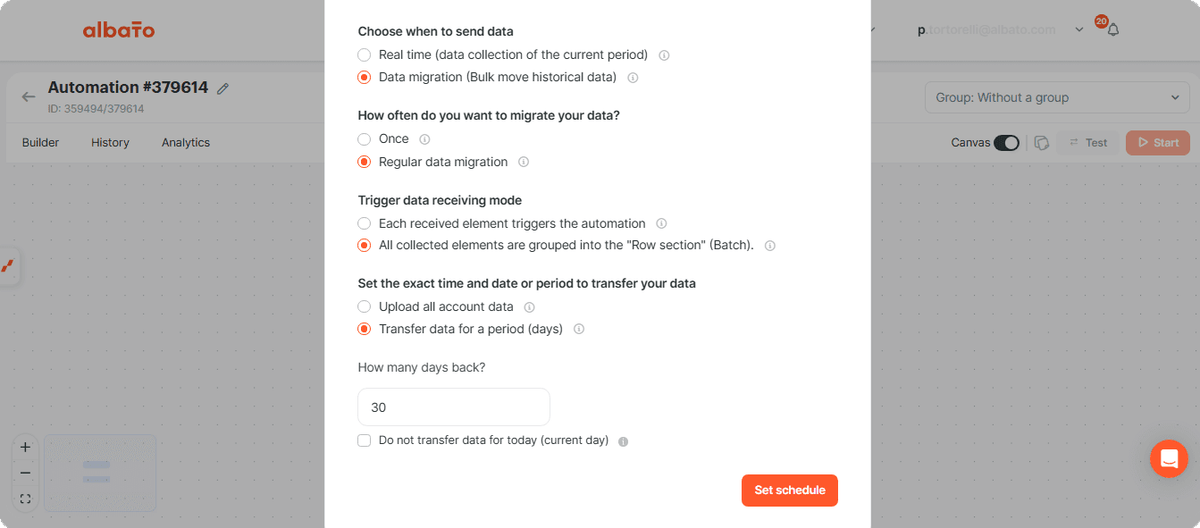
Then, select Data Migration and use these settings.
- Frequency: Regular data migration.
- Mode of data received in the trigger: All collected items are grouped into a string section in batches.
Then, define that the date should be transferred by days and set it to 30 days.
In the end, it will look like this.
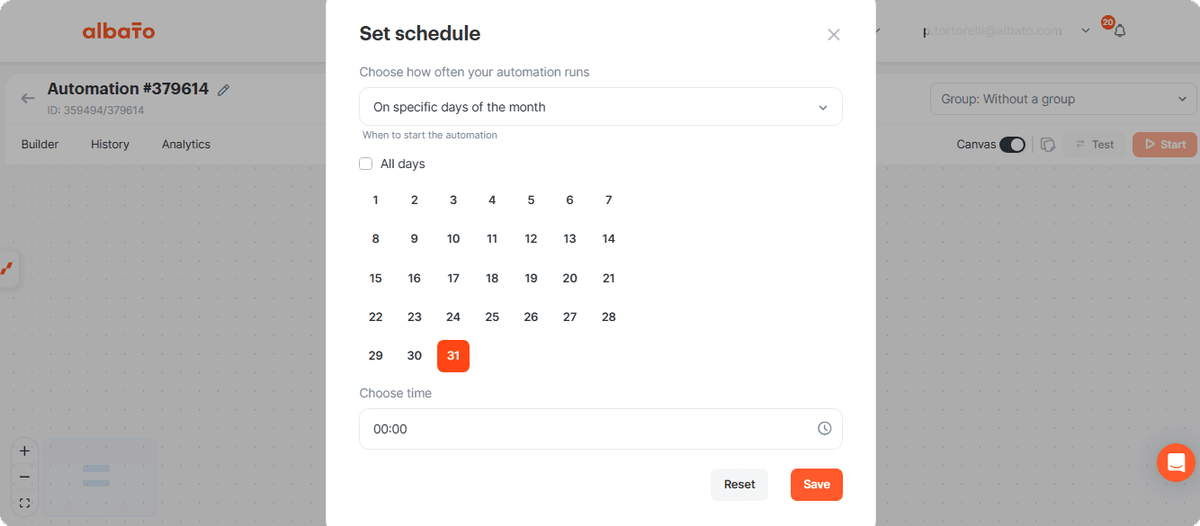
Click Save and then define that the automation should run on a specific day of the month, preferably on the last day of the month.
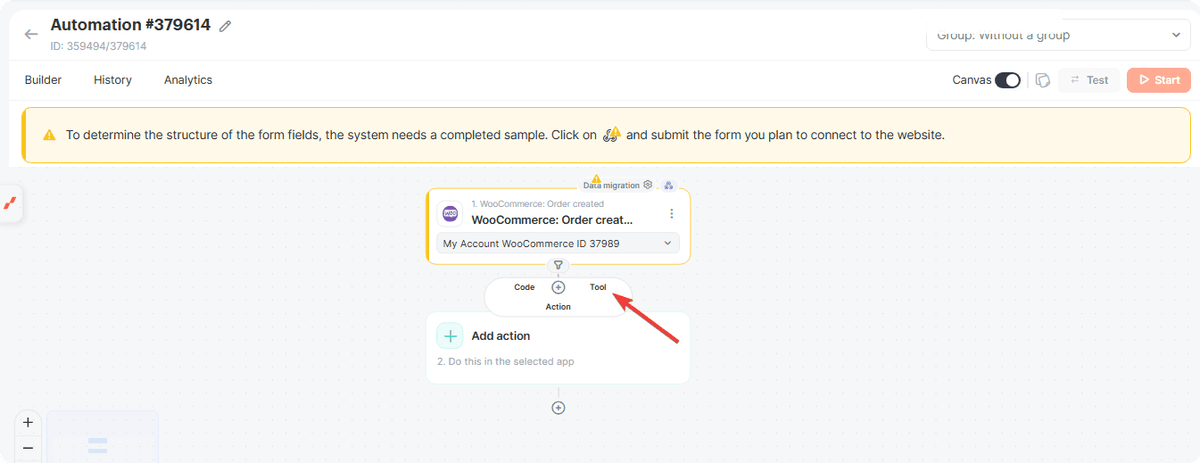
Click Save and then click the highlighted button to add a tool.
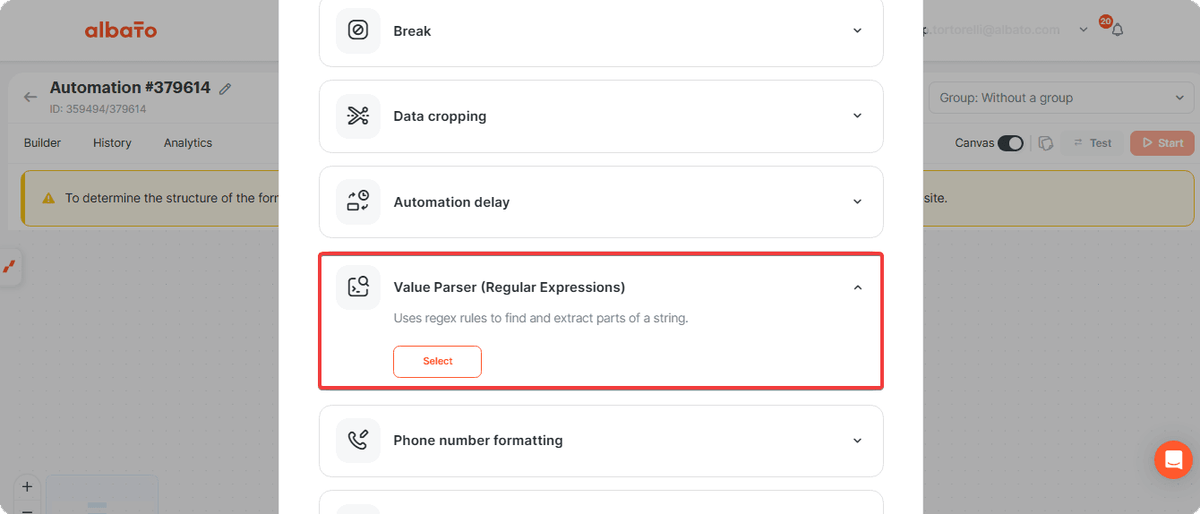
Select the Convert values (Regex) tool.
Configure this step as follows.
In the field for the value to process, enter the date and time field from the Albato system.
In the replacement template field, use this code.
^\d{4}-(\d{2})-\d{2} \d{2}:\d{2}:\d{2}$And in the replacement value, enter this value.
$1In the end, it will look like this.
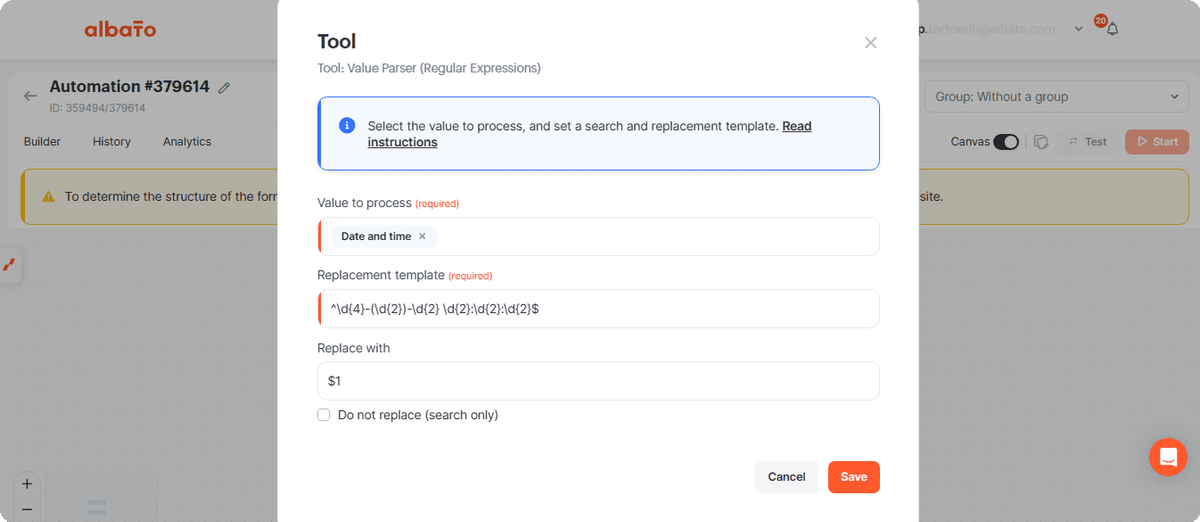
This step will be responsible for identifying the month of the order we are working with.
Next, add a new action.
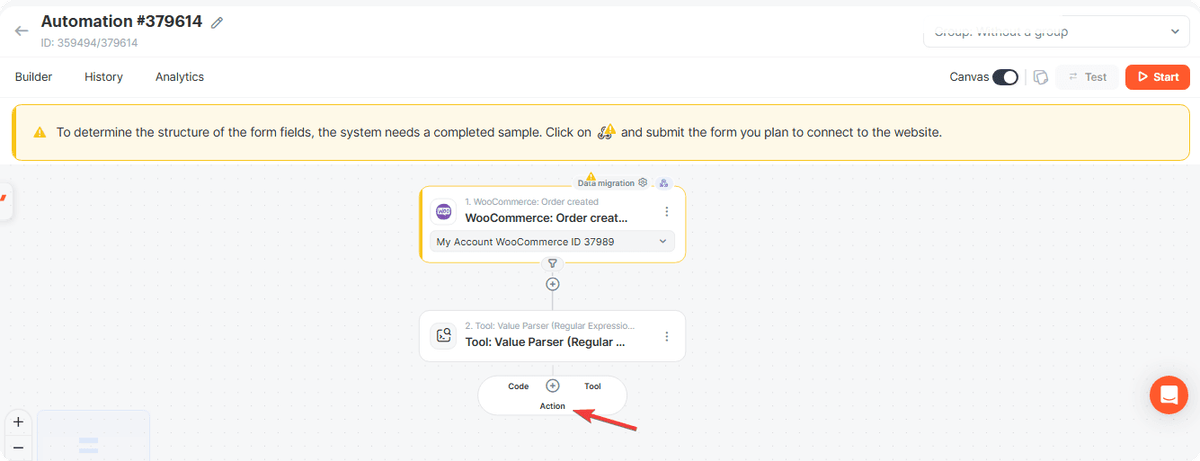
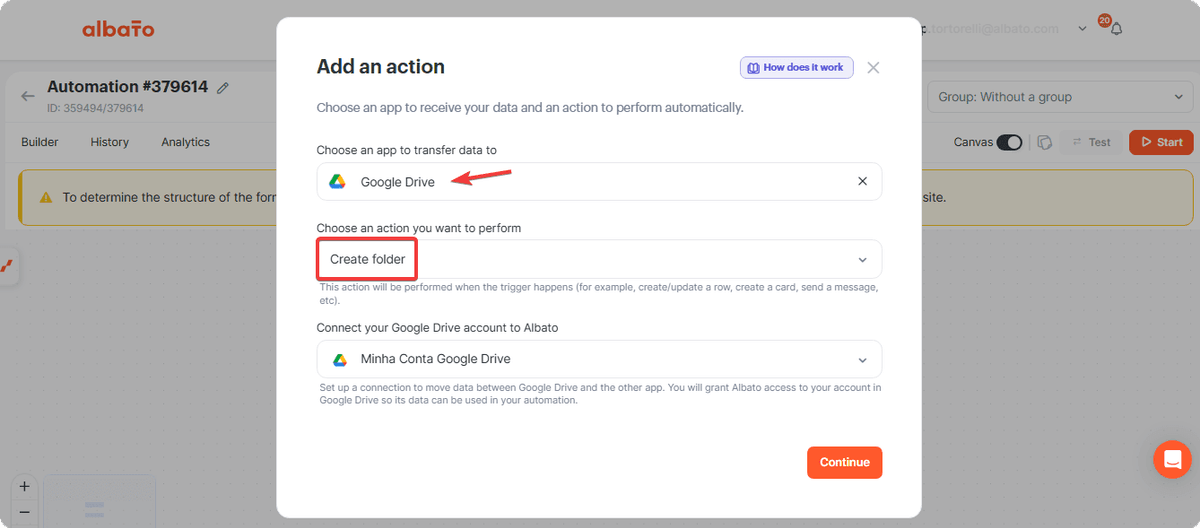
Select the option to create a folder in Google Drive.
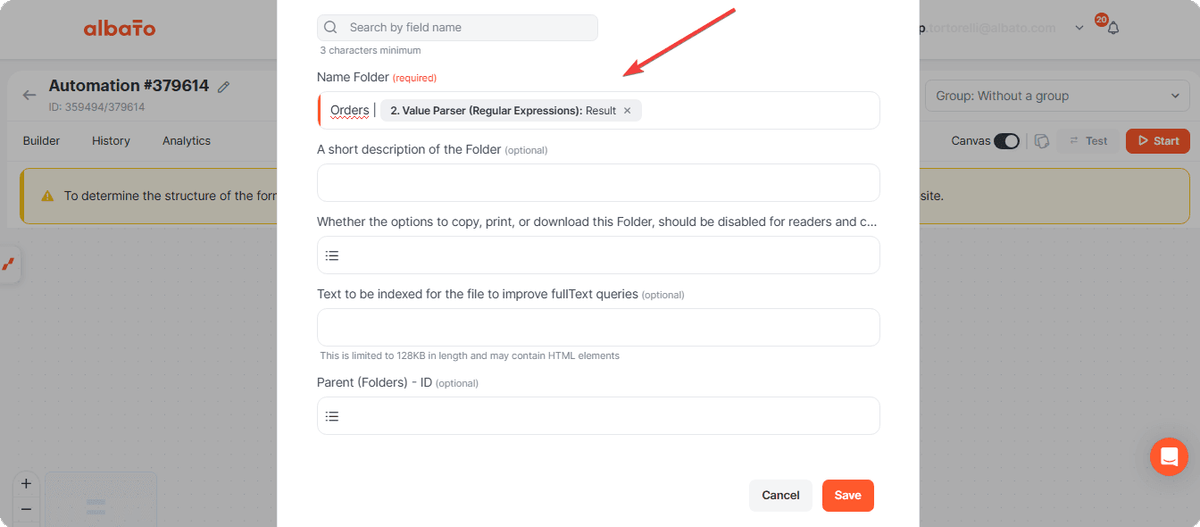
Then, in the folder name, use the result from the regular expression step. You can also combine this value with some fixed text, for example: Orders |
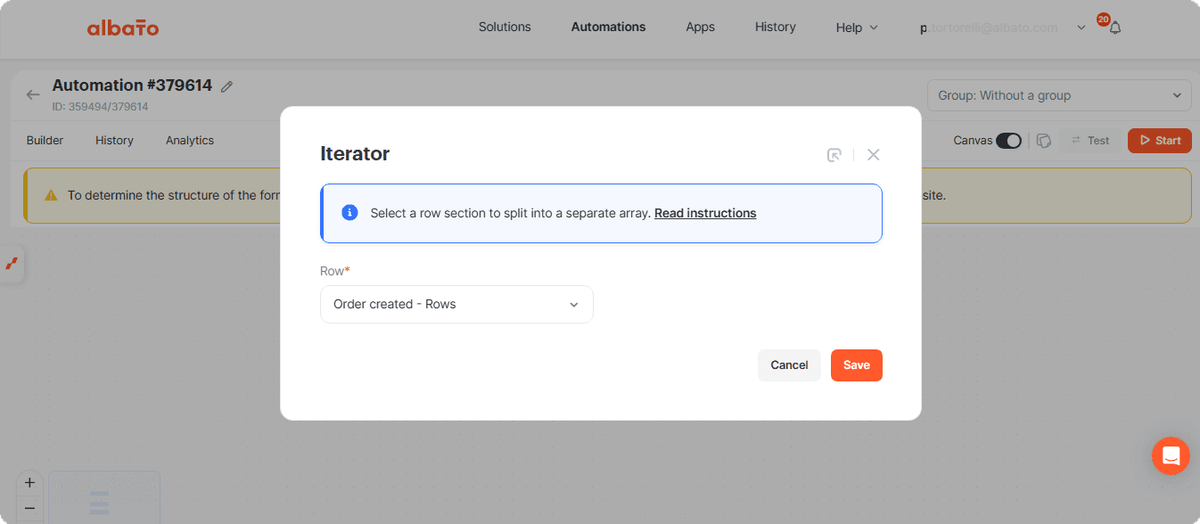
Add again a tool, but this time the Iterator.
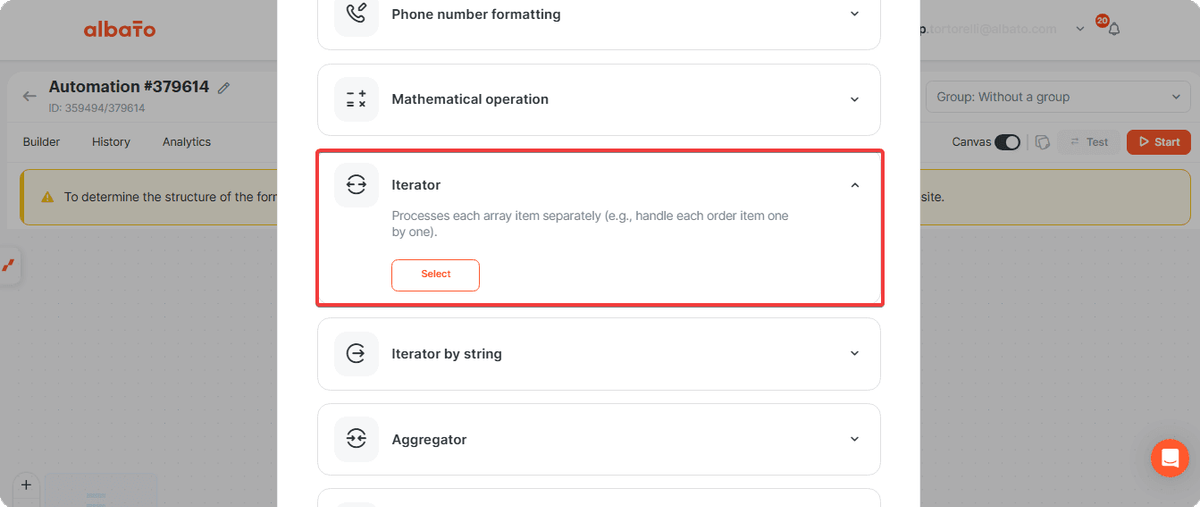
And configure it as follows (this will process each order received in the last month separately).
Then, add a Google Docs step to create a document from a template.
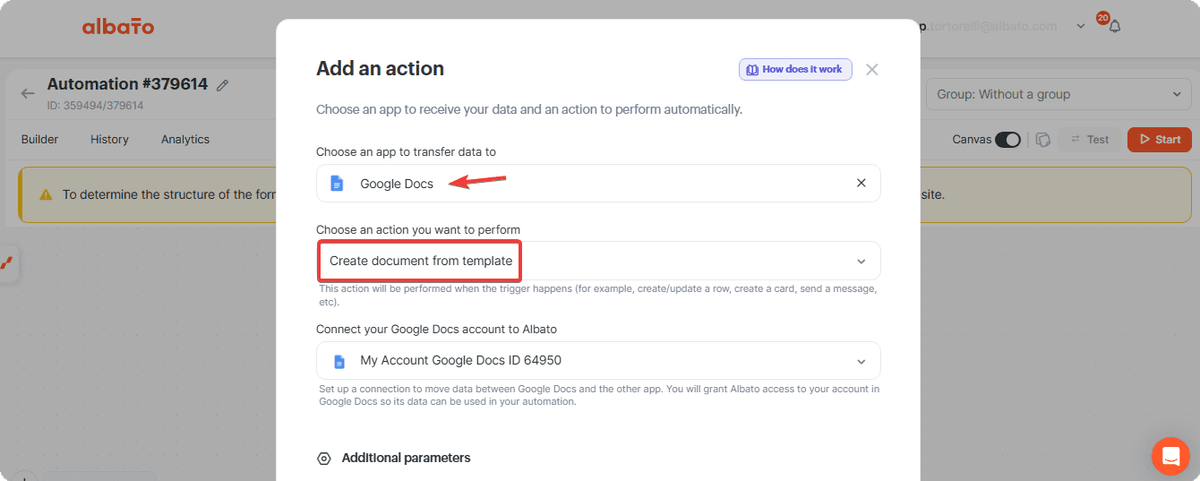
In this step, you can customize your template as you prefer. Learn here how to create a custom template. Then, fill in this step with the values you want each document to contain.
Now add an HTTP Request: Get File by URL action and click Add a Connection.
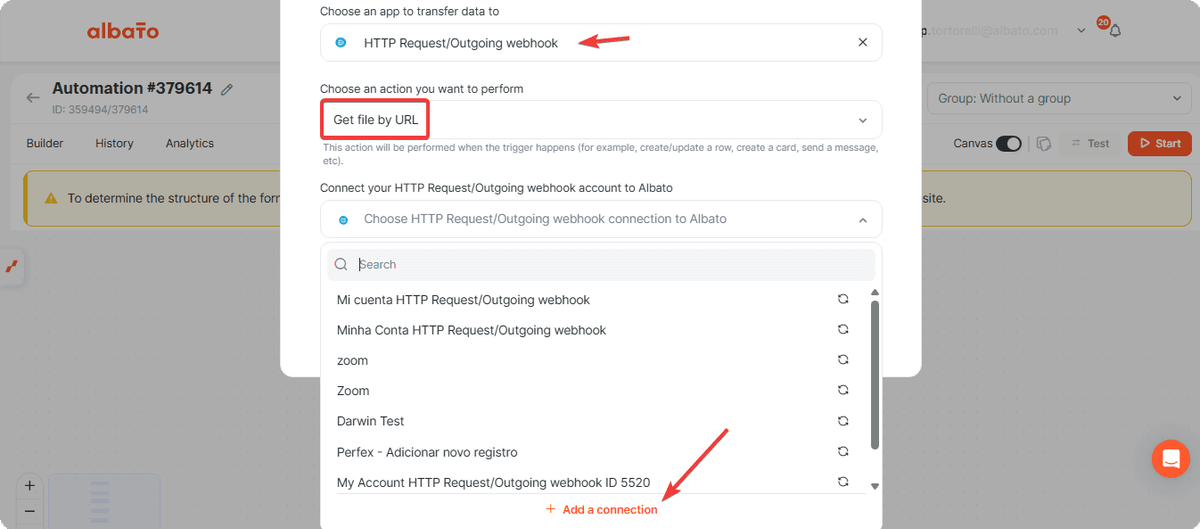
Configure it as follows.
Use this URL in the request.
https://www.googleapis.com/drive/v3/files/ID/export?mimeType=application/pdf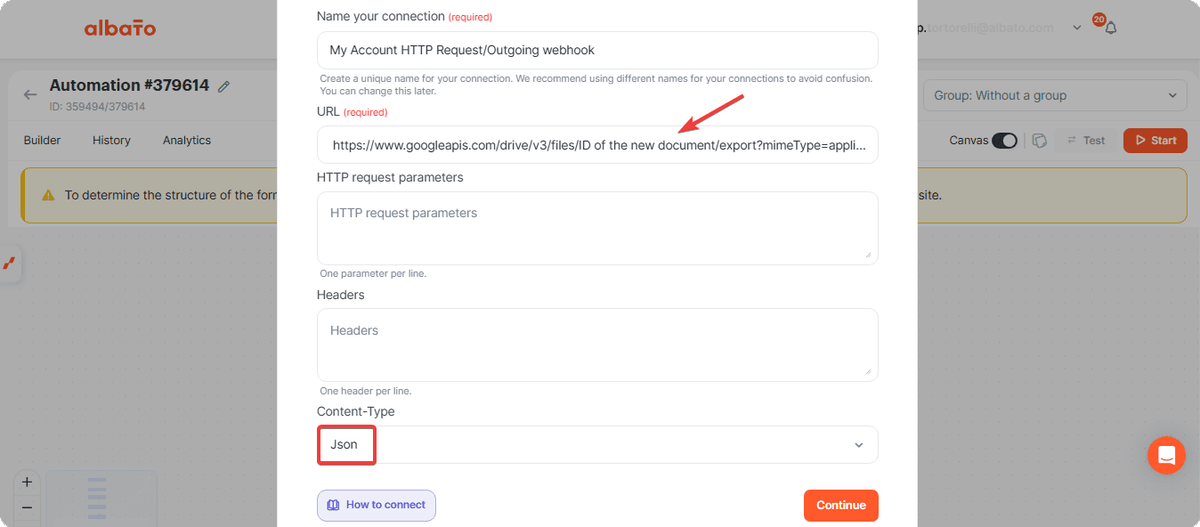
Then configure the request.
- **Method:**GET.
- **Request Header:**authorization / String / your access token.
It will look like this.
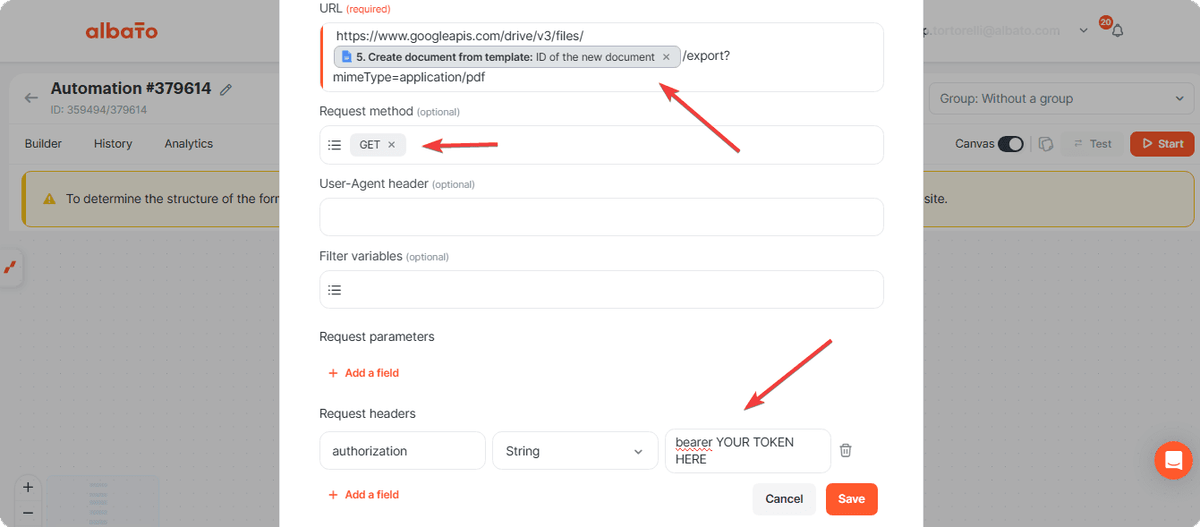
Attention: note that it is necessary to add the ID of the document generated in the previous step in the URL and the access key of your Google Docs in the authorization field.
Now add a step to add the file to Google Drive.
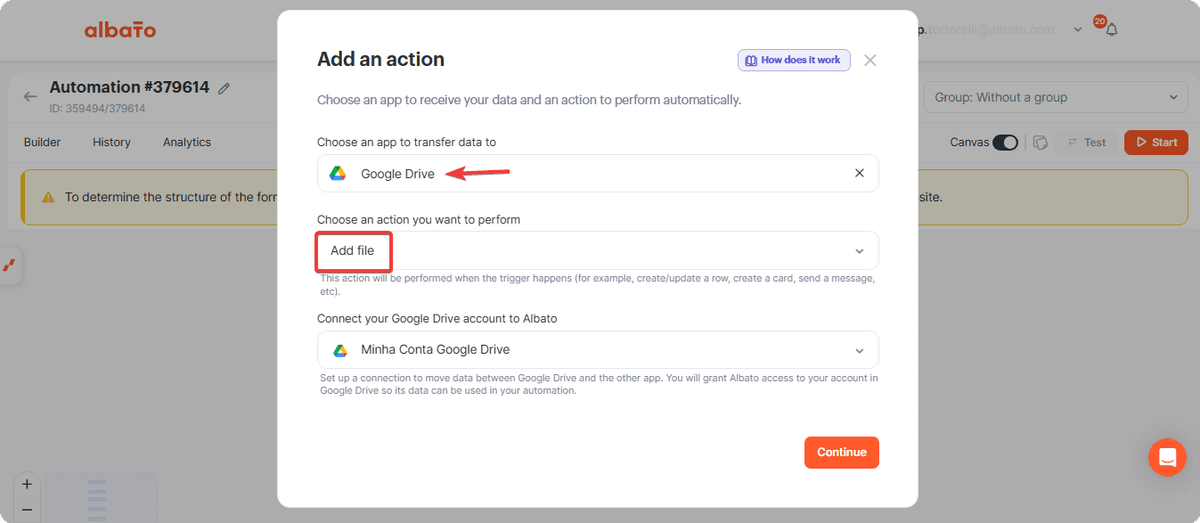
Configure this step in the File field by placing the File parameter coming from the previous HTTP Request step, and in the Name field, customize it as you prefer, for example using the customer name collected from the Iterator.
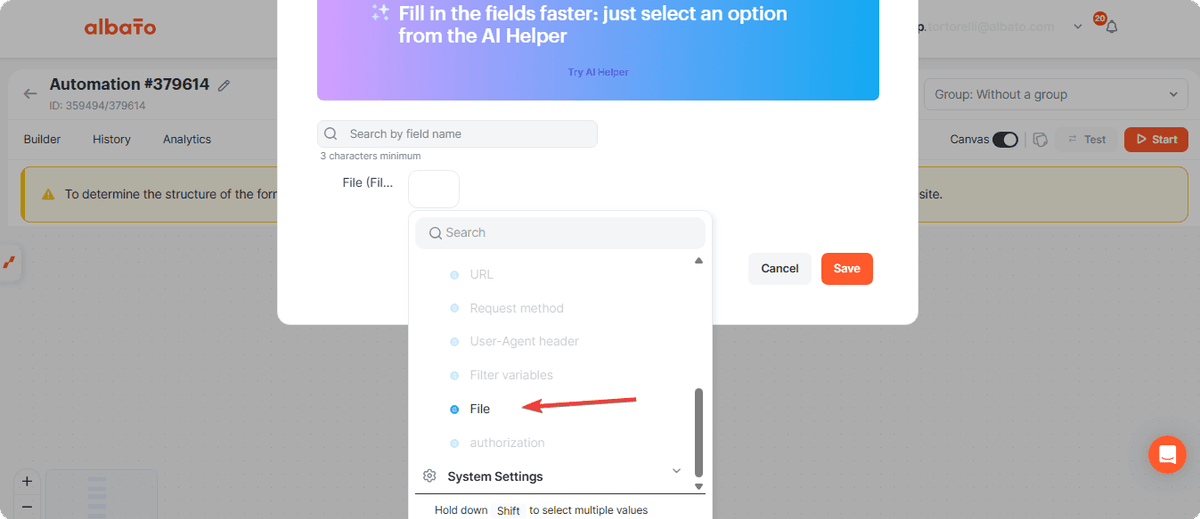
Next, add a Google Drive step to move the file to a specific folder.
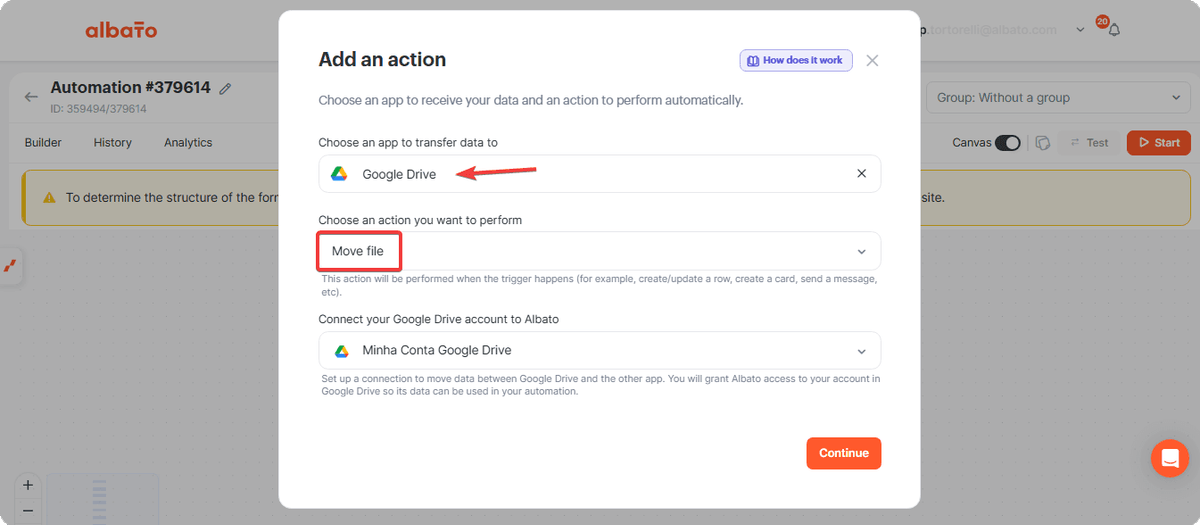
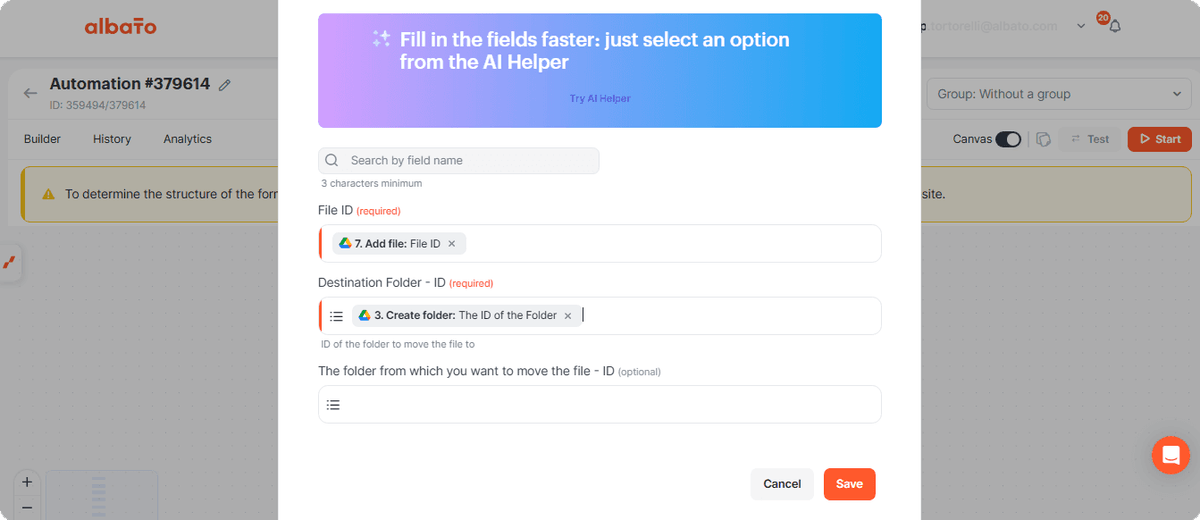
In the file ID, use the value from the previous file creation step. In the destination folder, use the folder ID that was created in the third step of the automation.
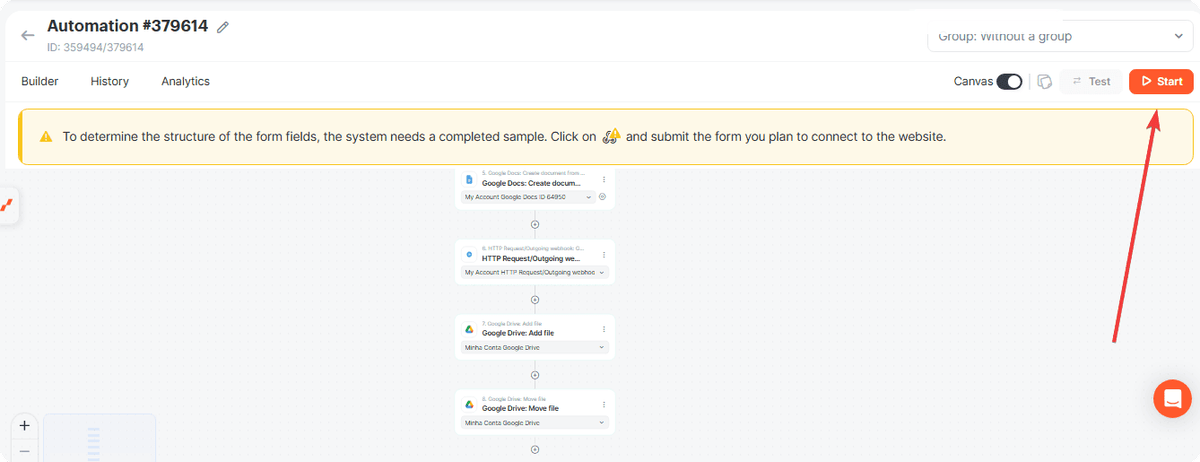
Click Save. Your automation should now look like the example below. Activate it when you are ready to start the monthly backup.
Now Albato will collect WooCommerce orders on schedule, generate order documents, and save the files to the selected Google Drive folder. If you have any questions, reach out to the support team via the chat.
Related Articles
- Iterator Tool
- How to Set Up Automation Start Schedule in Albato
- How to Connect Google Drive to Albato
- How to Connect Google Docs to Albato
Did this answer your question?