

How to Use Albato’s Data Migration for Comparing and Transferring Data
IN THIS ARTICLE
Imagine a scenario where you need to bring in historical data or configure occasional information migrations according to a specific predefined time period.
Albato’s Data Migration feature helps you collect historical records for a selected period and send them to another app without exporting files manually.
This feature can be especially useful when changing CRM systems and transferring your business processes to another platform, or for example, when you want to compare records saved in a specific platform, such as monthly expenses or orders created during a certain period.
Below, we will show how to configure this mode in Albato.
Check if the Trigger Supports Data Migration
Each app has its own predefined triggers and actions. The events that Albato can monitor and execute depend on the external platform.
Following the same logic, the Data Migration feature will also vary and may or may not be available for the desired app.
The first step is to check whether the workflow you have in mind is possible.
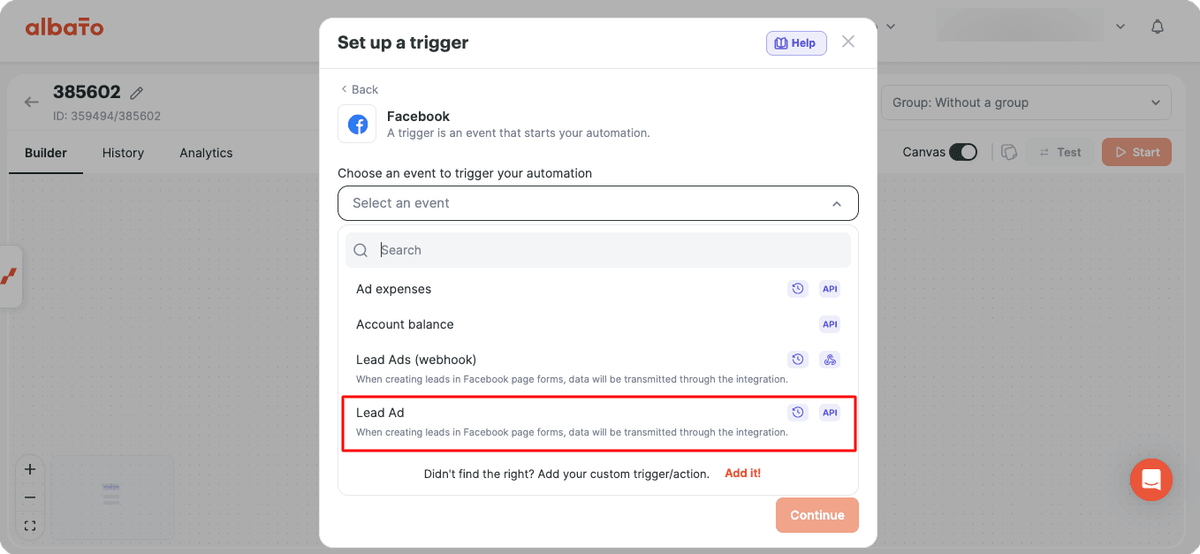
After entering your automation and selecting the desired app and trigger, you need to check whether this option appears next to the selected event:
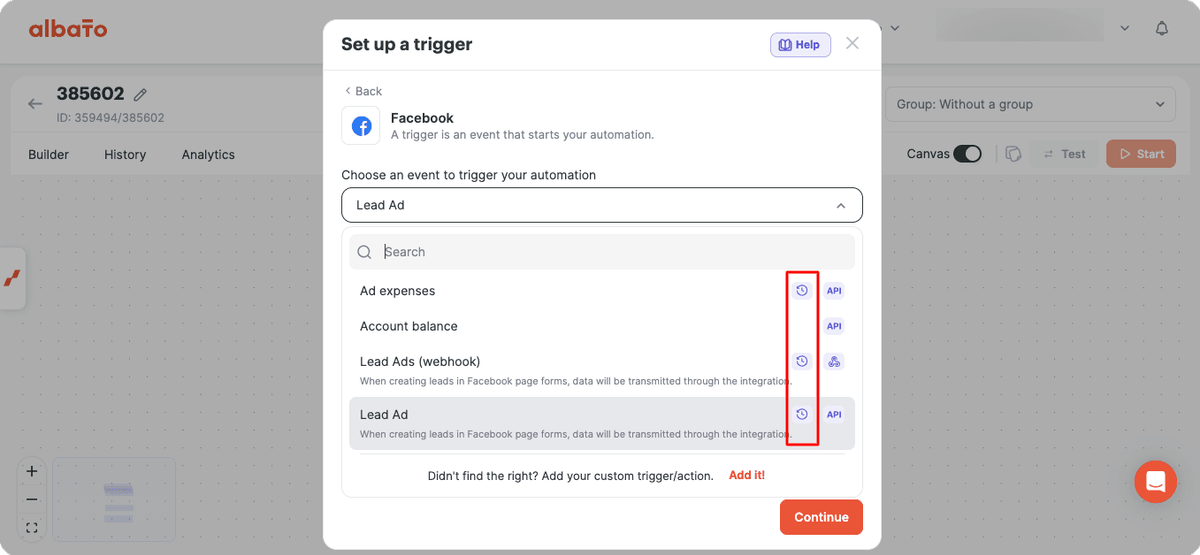
If it does, this means that the trigger supports the Data Migration feature.
Since triggers can also offer the Real-Time option, select Data Migration:
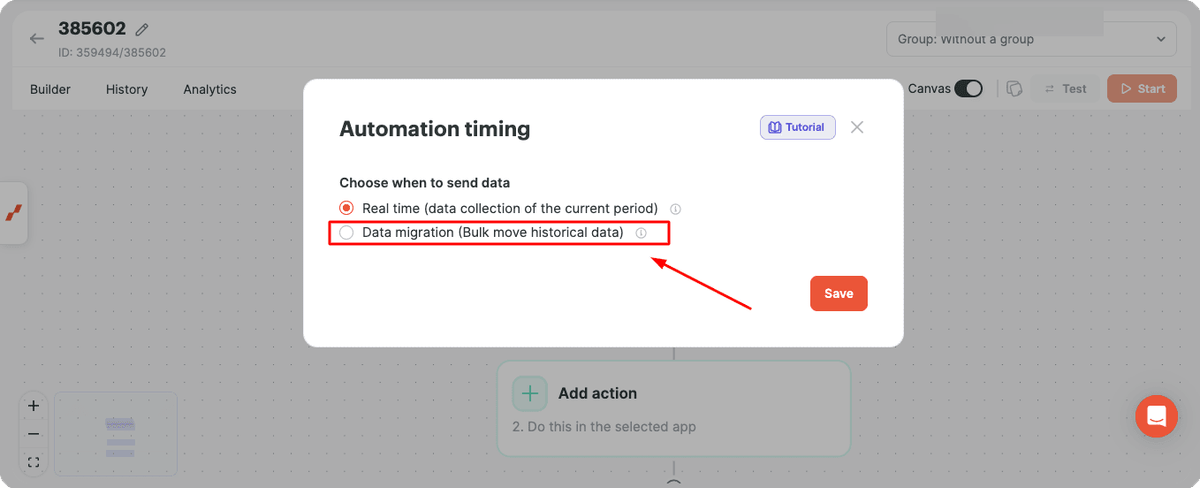
Configure Data Migration
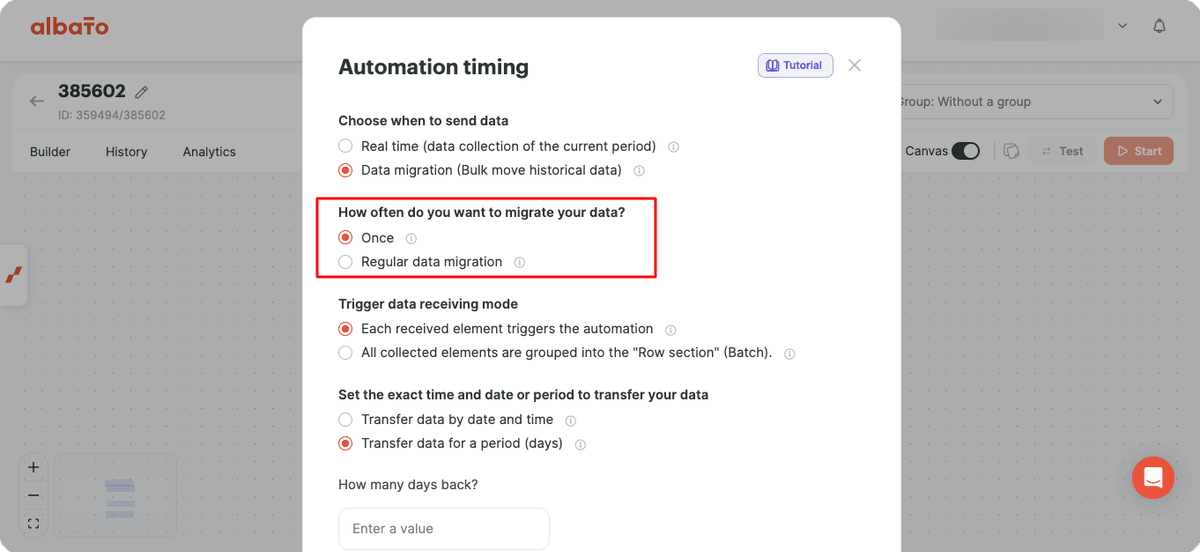
The first step is to define whether this automation should run Once, meaning it will execute only one time and collect data from the predefined period, or whether it should run multiple times periodically (Regular Data Migration).
Next, we have an option called Trigger data receiving mode.
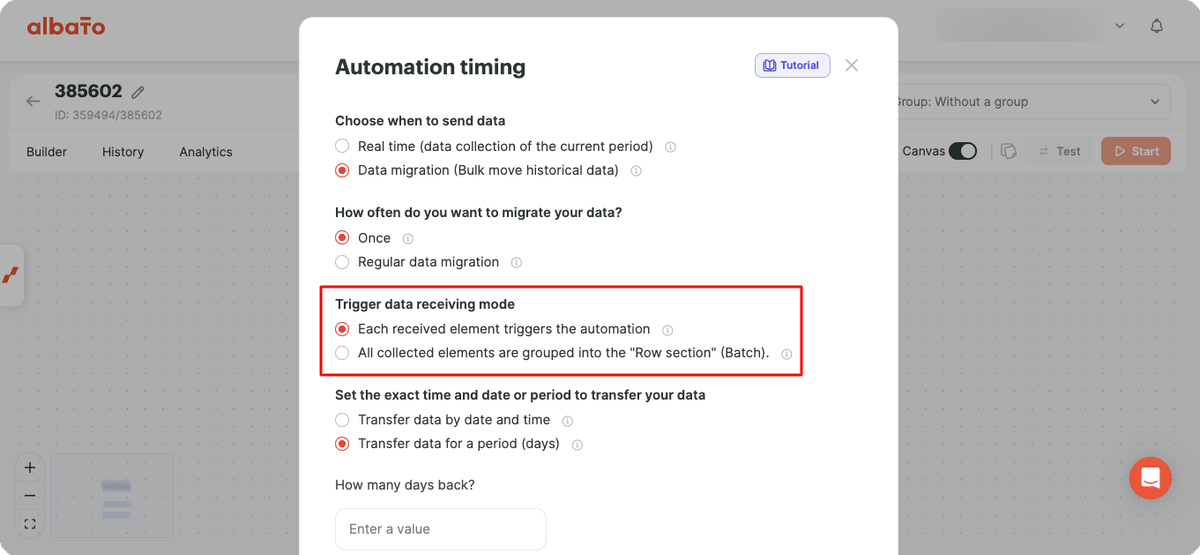
Here, you can choose whether each trigger execution should activate the automation independently, or whether all records should trigger the automation only once and all collected data should be received as groups (rows).
The option you choose here depends on your intended use case and the data format accepted by the destination app.
For example, let's imagine that the goal is to send leads from one CRM to another.
In this case, you should choose to process the data independently, because each record will create a separate new contact in the destination CRM.
However, let's imagine that you want to save data about products sold in different ecommerce orders.
You can receive all data as an array (data rows) and save this information in a Google Spreadsheet, which supports this type of format.
In the final option, if you choose a Regular Migration, you will need to provide how often the automation should run.
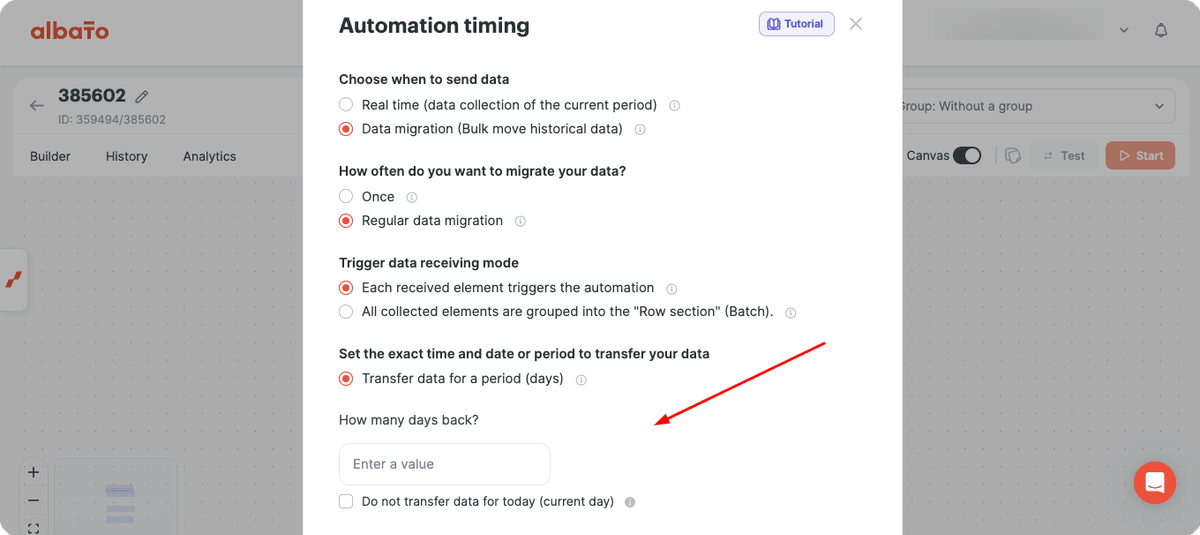
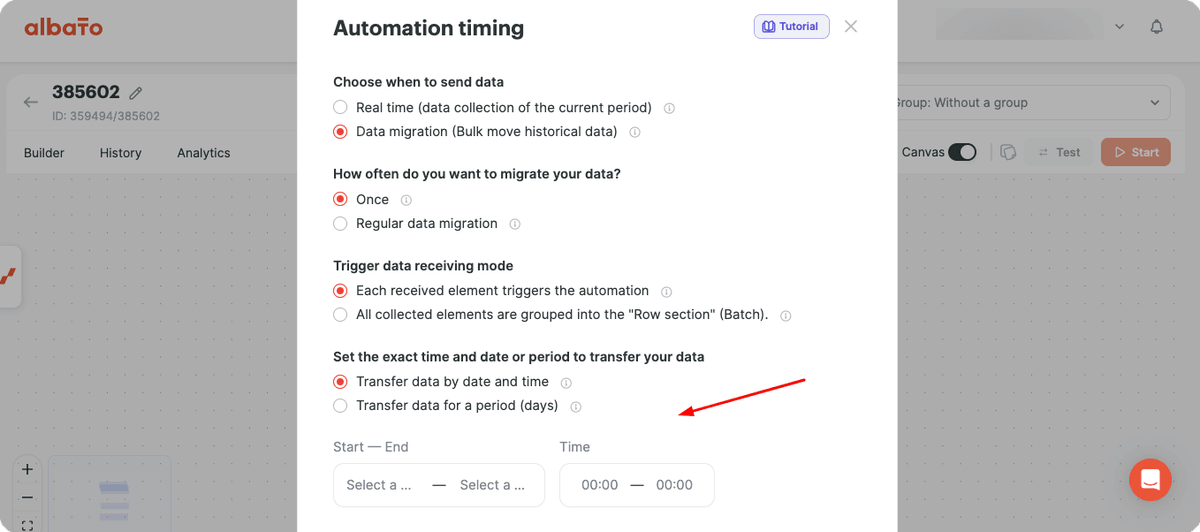
If it is a One-time Migration, you can specify how many days in the past the migration should collect data from, or manually define a specific predefined time range.
Finally, you can configure your automation normally by adding the next desired steps.
After activating the automation, you will see a progress bar indicating whether the data migration has already been completed or how much time is remaining.
You can also check the complete execution history, as usual, in the automation history section.
Examples of Using Data Migration
- Migrate a contact database from one CRM to another
- Update sales records weekly or monthly in a spreadsheet
- Analyze Google Analytics data and compare different time periods
- Migrate products from one ecommerce platform to another
Next, let's see a practical example of a real and very useful use case for many companies.
How to Send Existing Facebook Leads to HubSpot
In this example, HubSpot will receive the contacts collected from Facebook Lead Ads.
The first step is to create a new automation and select the Facebook Lead Ads trigger.
Then, select the Data Migration mode.
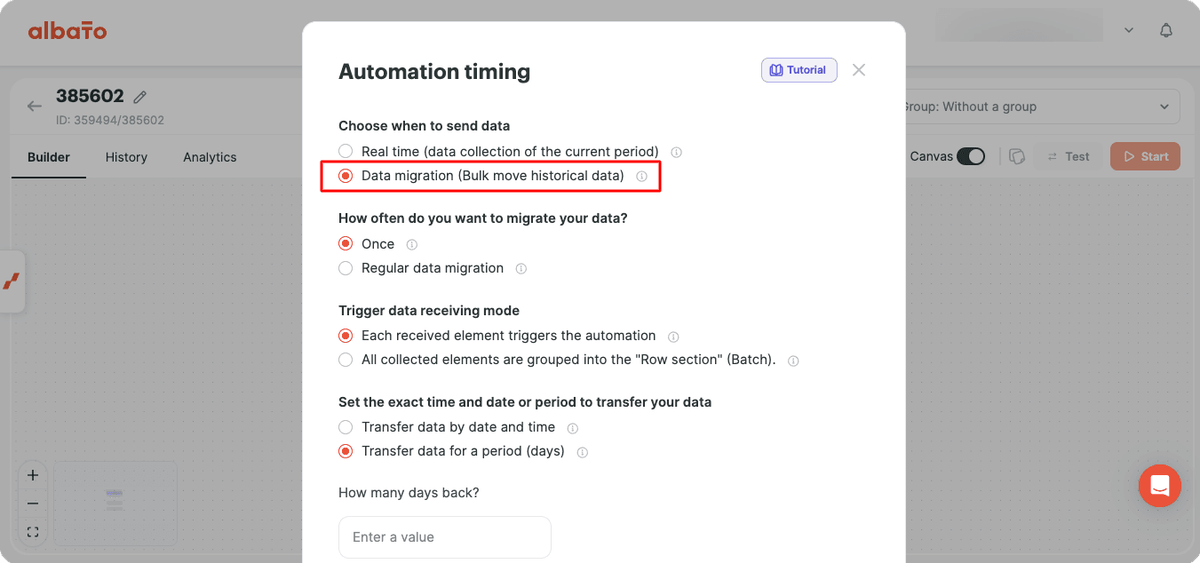
Define that the automation should run only once.
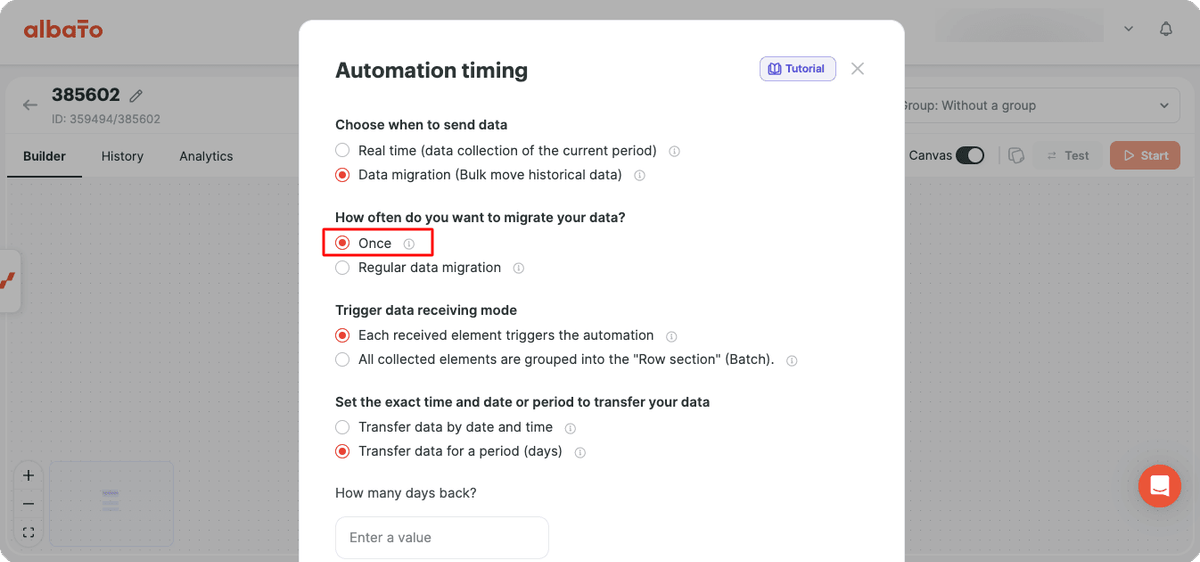
Attention: If you want to continue updating HubSpot with new Facebook leads, you can create a new automation after this one and choose the Real-Time mode. This way, whenever a new lead arrives, the data will automatically be sent to HubSpot, avoiding the need to create new Data Migration automations in the future to bring historical data.
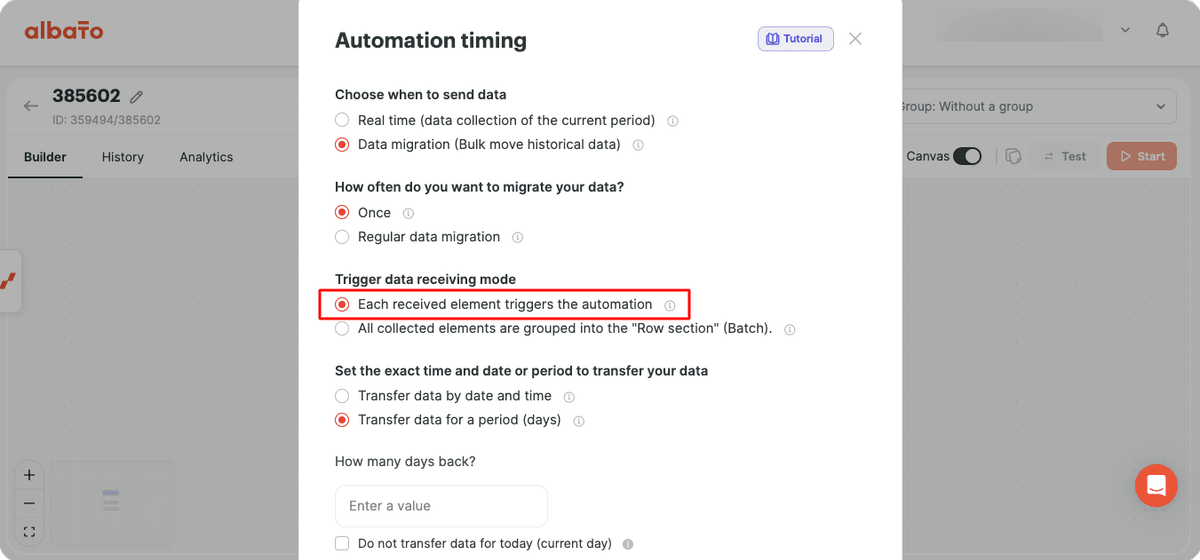
In the data mode settings, define that each lead found should execute the automation individually. This ensures that each contact creates a separate contact in HubSpot.
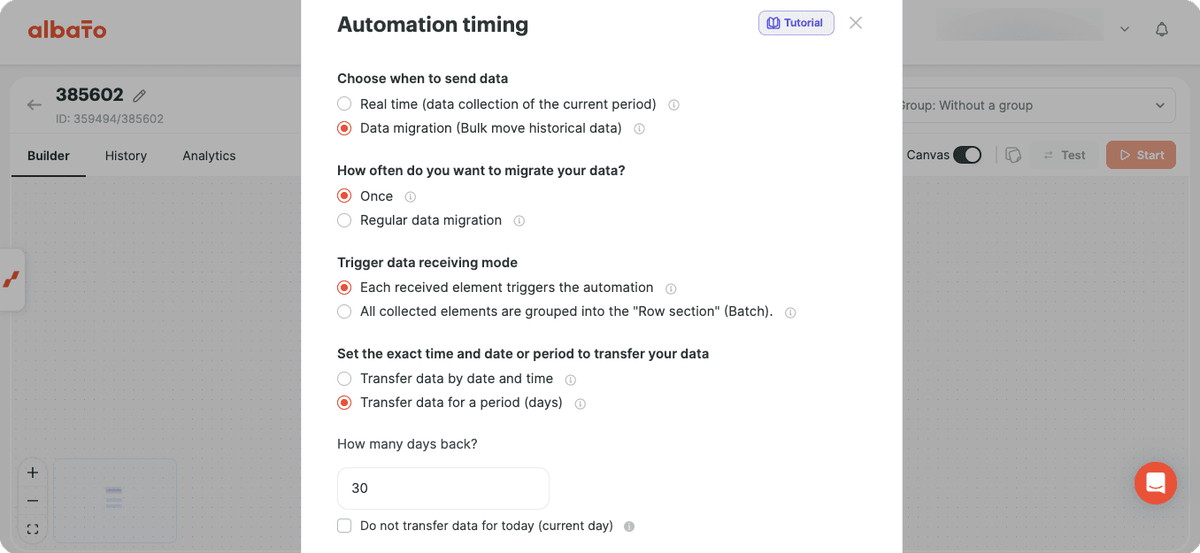
Now, choose whether you want to collect data from a specific time range or from a certain number of days in the past.
In our example, let's assume that I started using Facebook Lead Ads last month, so I only have lead records from the last 30 days.
Therefore, I can configure the migration to collect data from this period.
The final configuration will look like this:
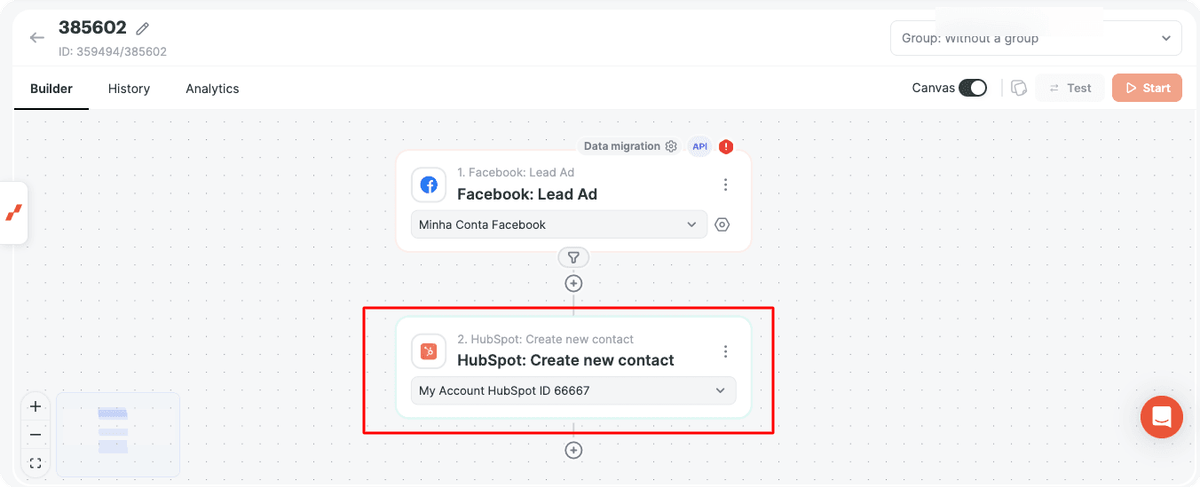
Now, I will add the HubSpot step to Create Contact.
Then, I will map the fields as I would in a regular real-time automation, for example:
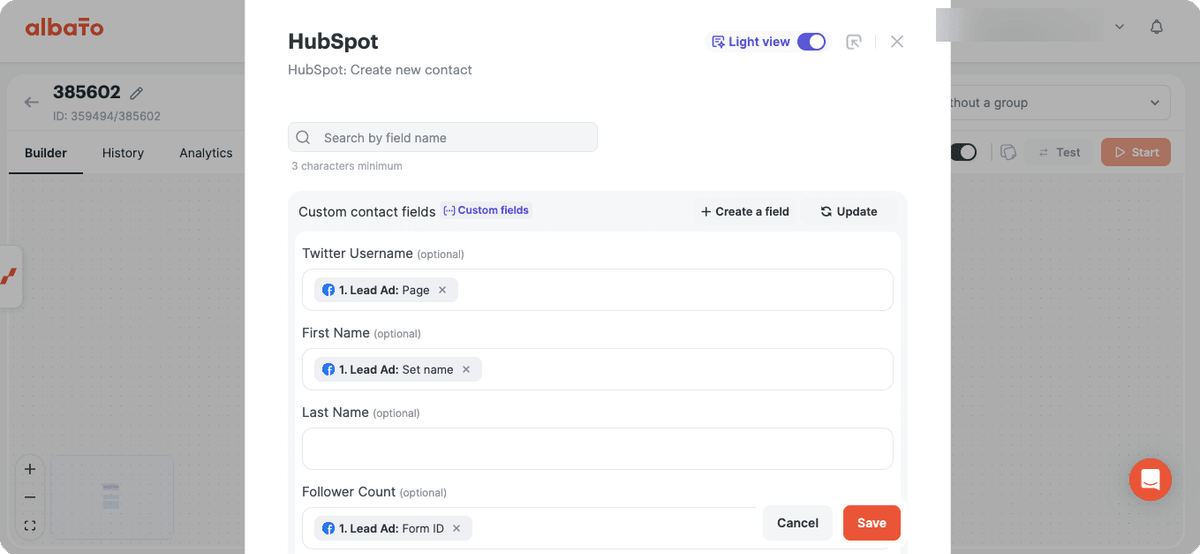
Finally, activate the automation. You will see a progress section showing the migration status, and when it reaches 100%, the selected data will have been transferred.
You can apply this same logic to different apps and adjust the settings according to each specific data collection scenario.
If you have any questions while setting up Data Migration, reach out to the support team via the chat.
Related Articles
Did this answer your question?