How to Create an AI Agent Inside Slack to Help You with Tasks in External Apps
IN THIS ARTICLE
Slack is one of the main places where teams discuss requests, opportunities, meetings, customer questions, and day-to-day company tasks.
The challenge is that many of these conversations turn into actions that need to happen somewhere else: sending an email, creating an event, opening a ticket, adding a CRM record, or saving information in a database.
With Albato, you can create an AI Agent that reads messages in Slack, understands the request, and decides which connected app should be used to complete the task.

You can configure the automation so that when a message arrives in a specific Slack channel, the agent analyzes it and runs the right action in the right app.
Below, we’ll show how to configure this type of automation and use AI Agent as the decision-making layer between Slack and your external tools.
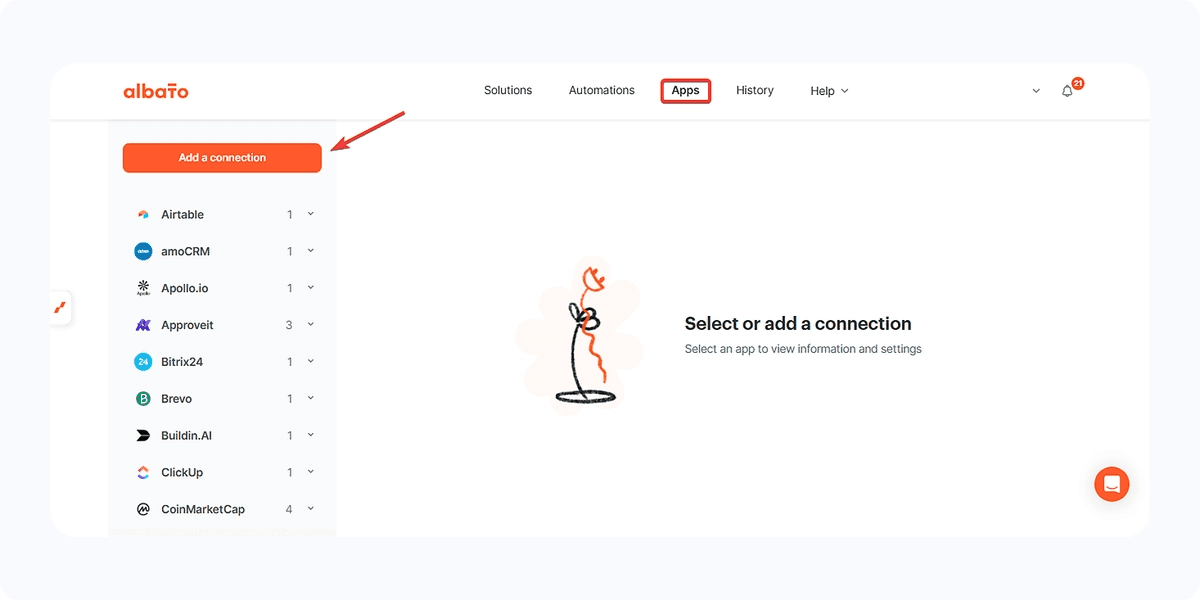
Connecting the apps
First, define which external actions the agent should be able to perform. This helps you decide which apps need to be connected before building the automation.
In our example, we will connect Notion, HubSpot, and Gmail.
To connect the applications, go to the Apps tab and click Add a Connection.
Important: You can connect as many apps as you need. Later, you can pause the automation and add more tools for the agent to use. This article uses a few apps as an example, but the same logic applies to other connected services.
Then, search for the desired app and follow the instructions that will appear until you reach the message indicating that the connection was successfully created.
If you have any questions about a specific step when connecting an app, check our help center for tutorials on how to connect that app.
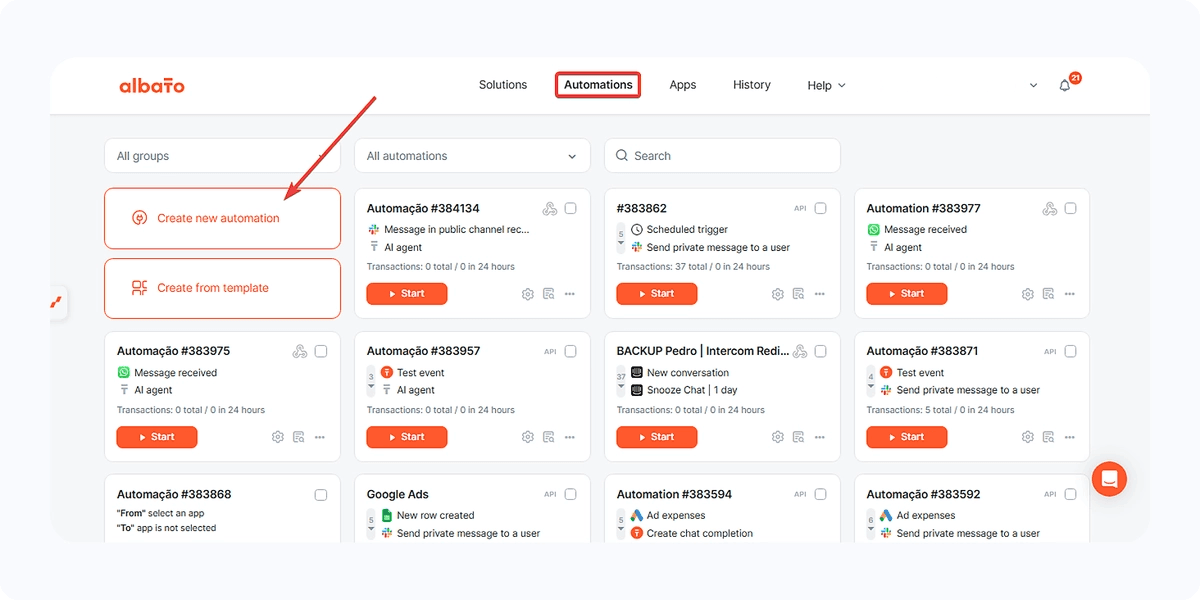
Creating the automation
Go to the Automations tab and click Create new automation.
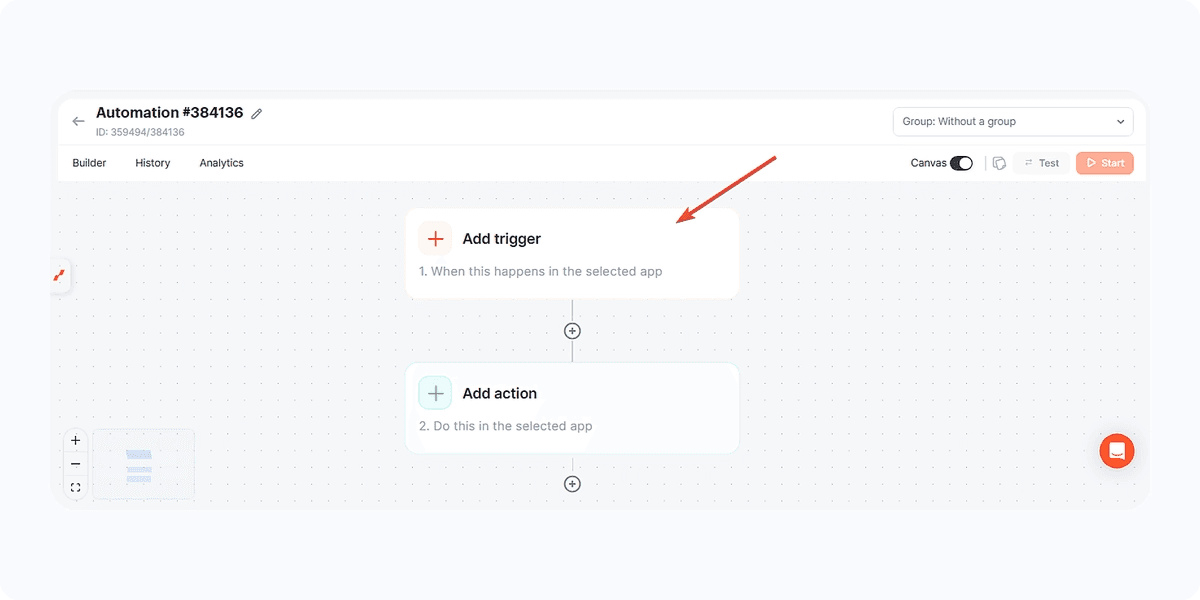
Next, click here to add the trigger.
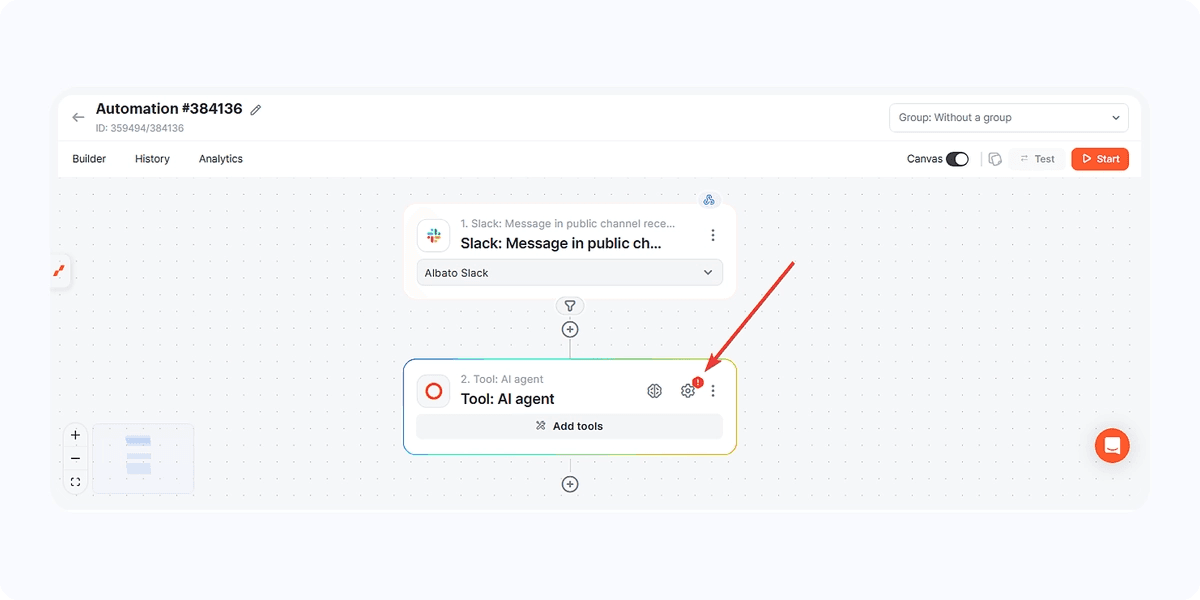
In this case, we will select the Slack app and the event for a message received in a public channel.
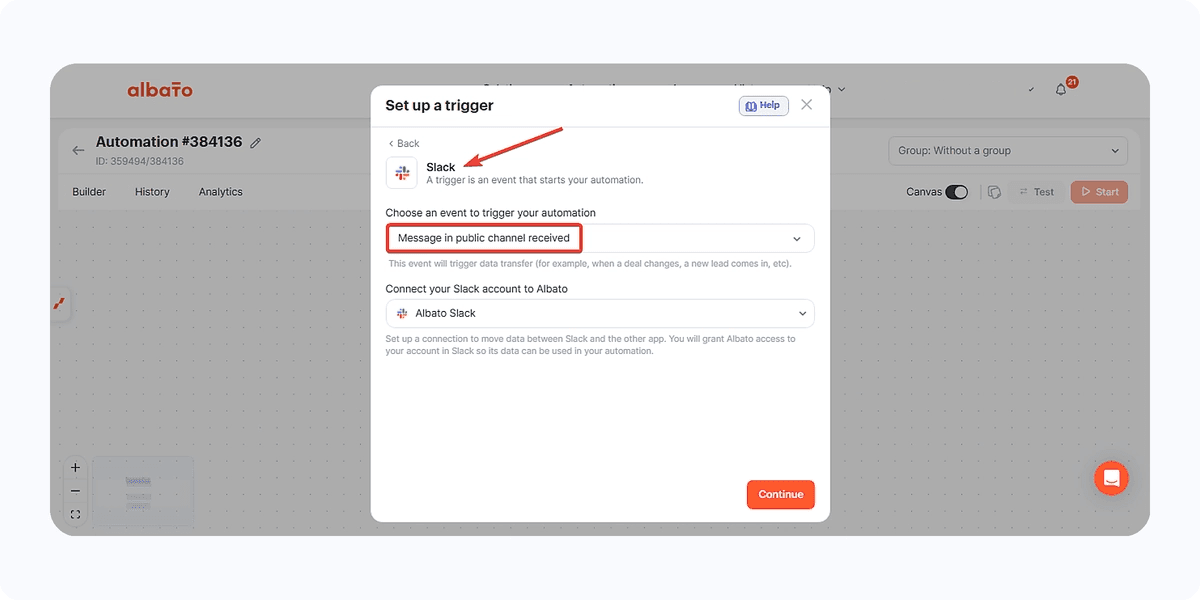
You can choose different other Slack triggers depending on what you consider most relevant for you.
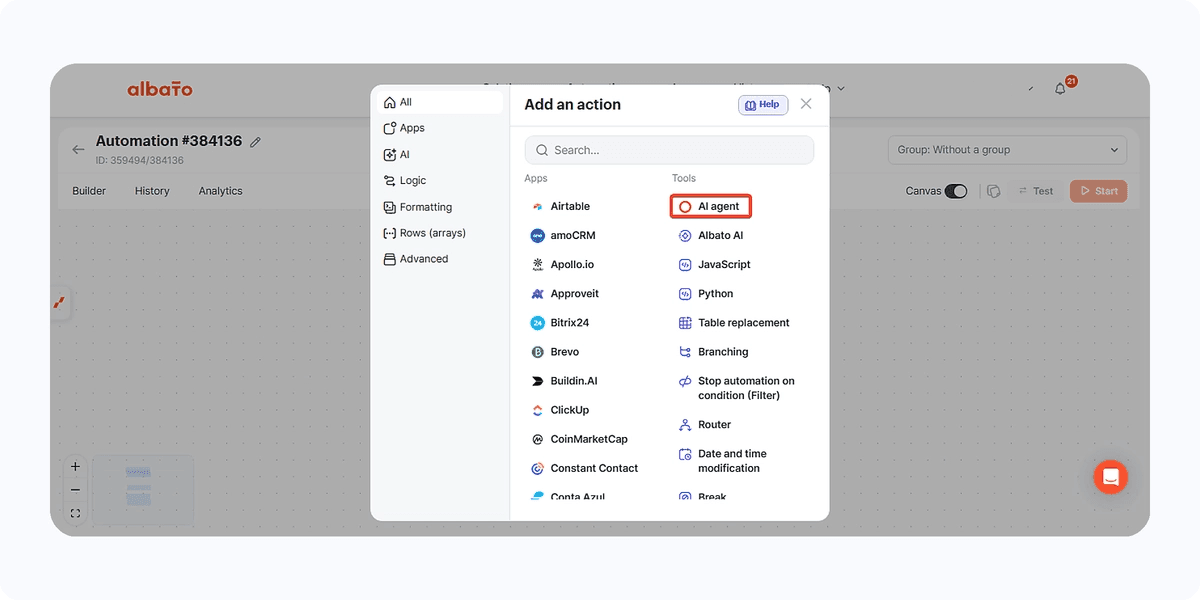
Then click here to add an action.
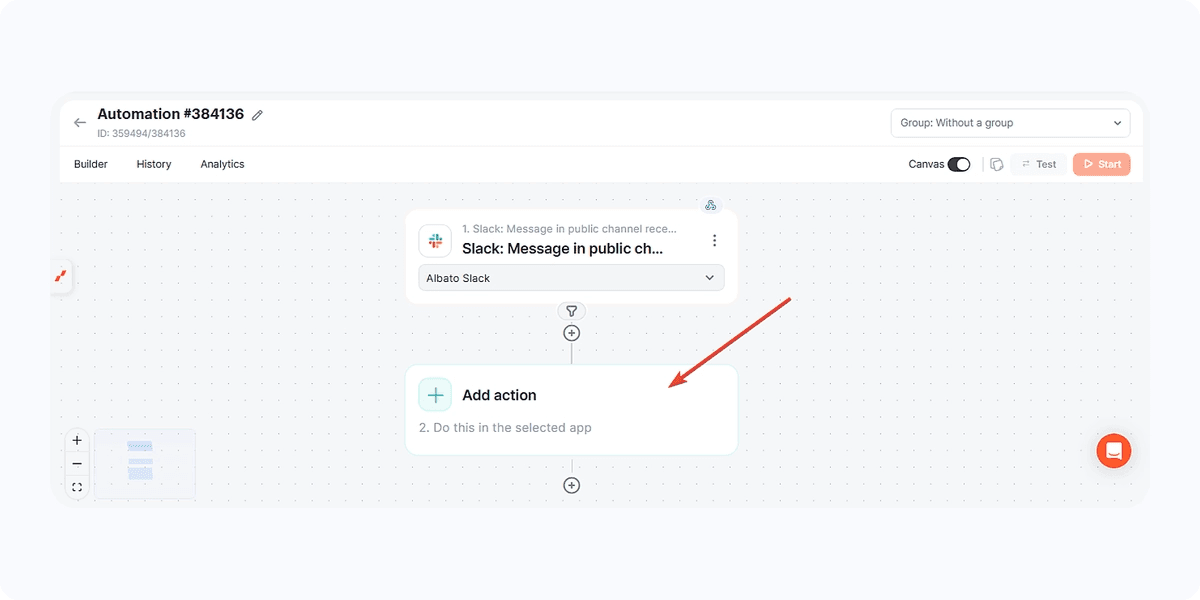
This time, select the AI Agent.
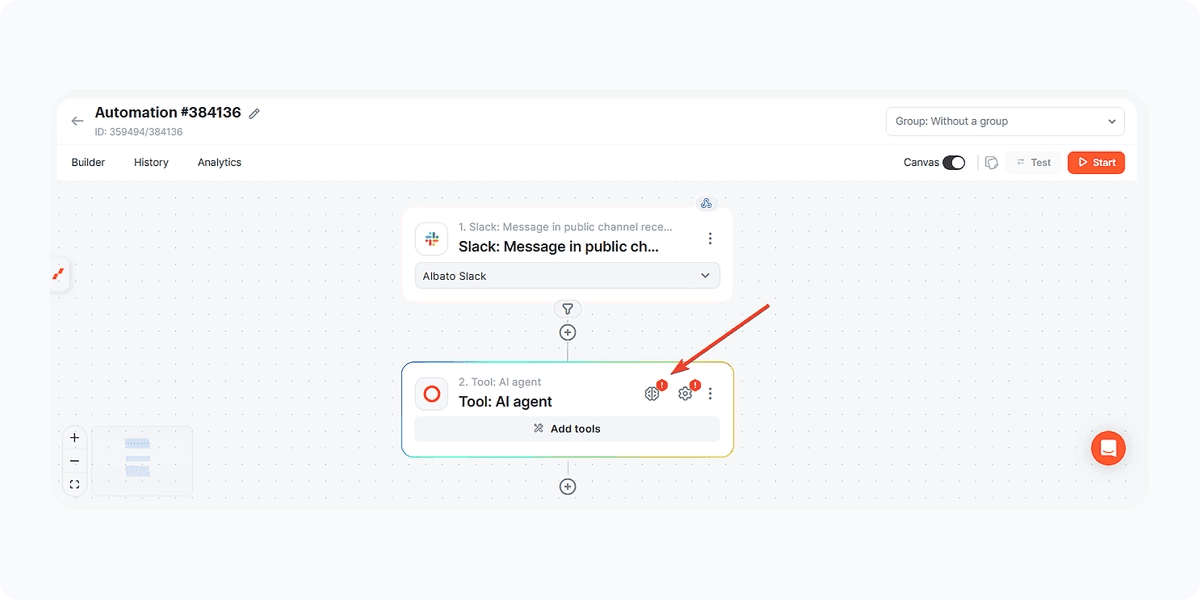
Click the brain icon to define what type of AI we will use behind the agent being created.
If you have the Albato AI feature available in your plan, simply select it.
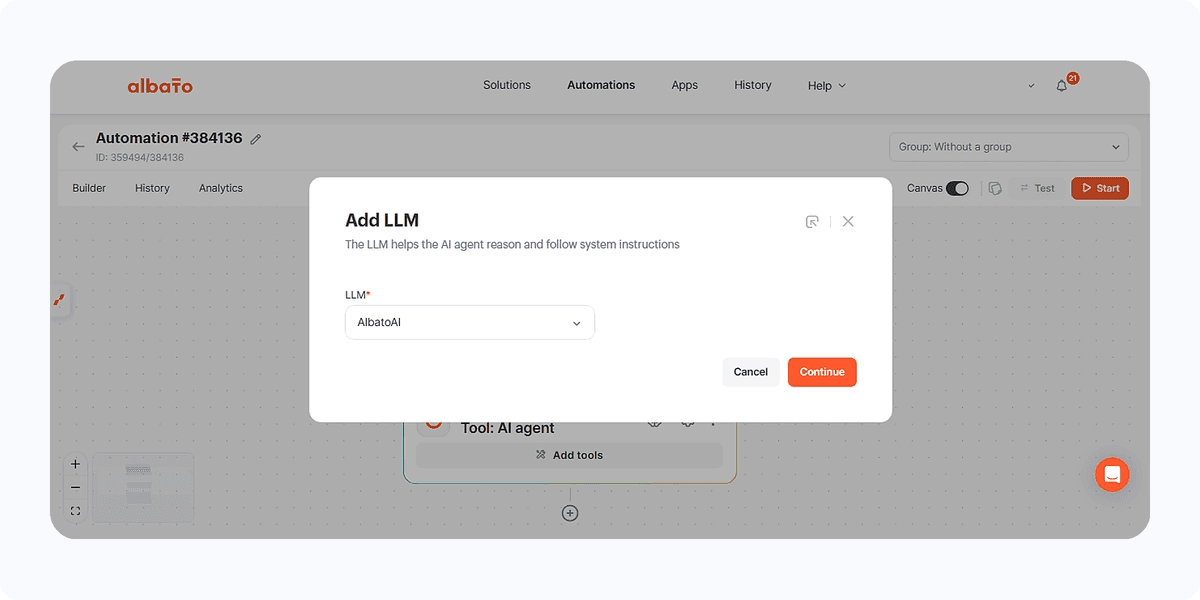
Otherwise, you will need to connect your account from one of the following apps: Claude, Gemini, OpenAI, or DeepSeek.
Next, click here to add the agent instructions.
This step is what turns the automation from a fixed workflow into an intelligent assistant.
The first step is to set the received data as the message received in Slack.
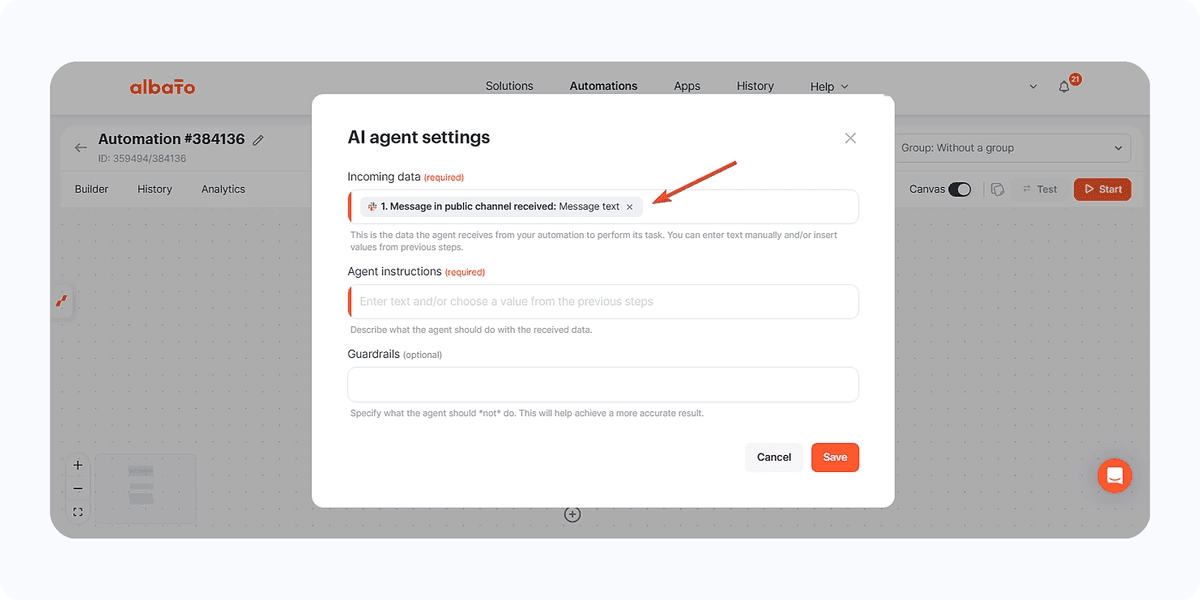
Next, configure a detailed prompt.
These instructions tell the agent how to interpret each Slack message, which apps it can use, and what result it should produce.
A good prompt should describe the possible requests, the apps the agent can use, and the rules it must follow before taking action.
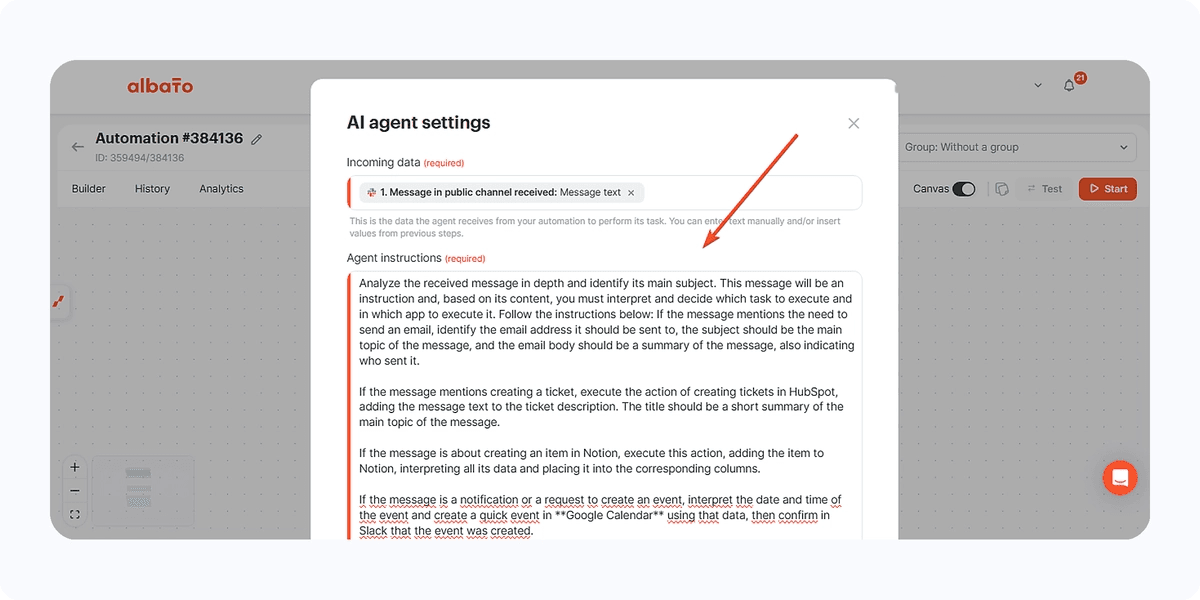
See an example prompt.
Analyze the received message in depth and identify its main subject.
This message will be an instruction and, based on its content,
you must interpret and decide which task to execute and in which app to execute it.
Follow the instructions below:
If the message mentions the need to send an email, identify the email address it should be sent to, the subject should be the main topic of the message,
and the email body should be a summary of the message, also indicating who sent it.
If the message mentions creating a ticket, execute the action of creating tickets in HubSpot, adding the message text to the ticket description.
The title should be a short summary of the main topic of the message.
If the message is about creating an item in Notion, execute this action, adding the item to Notion, interpreting all its data and placing it into the corresponding columns.
If the message is a notification or a request to create an event, interpret the date and time of the event and create a quick event in Google Calendar using that data,
then confirm in Slack that the event was created.
Finally, if it is not possible to execute the action or something is not understood, send a message to a private user in Slack, asking them to review this request.
After adding the prompt, this step will look like this.
Next, we will click here to add the tools so this agent can operate.
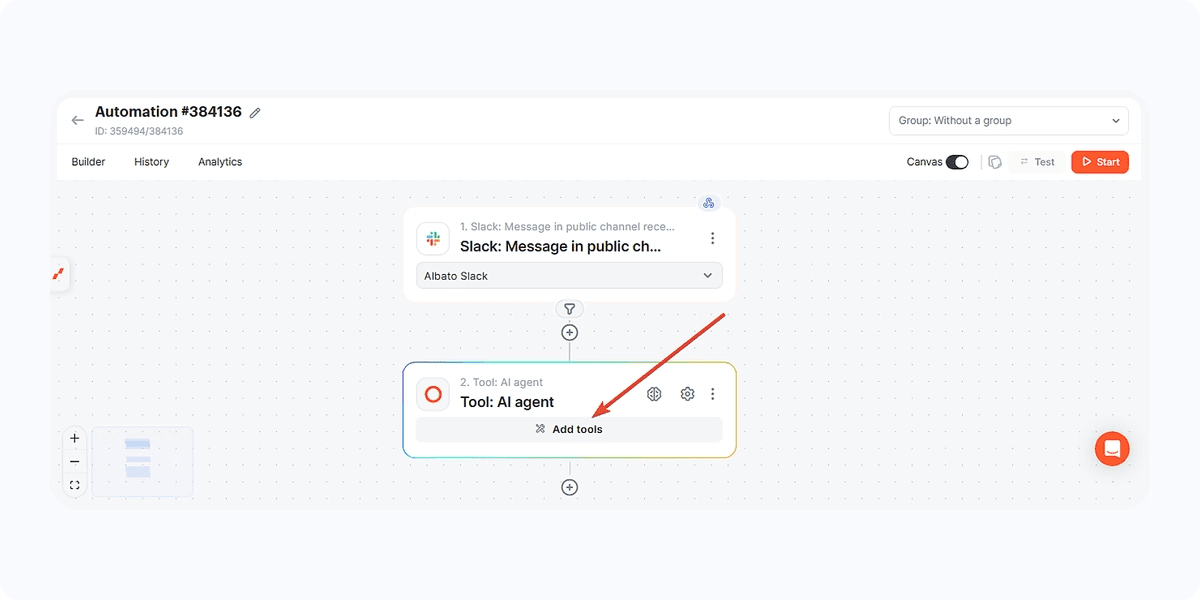
Tools are the actions in connected apps that the AI Agent is allowed to execute. Add them one by one based on the tasks the agent should handle.
First, add the Google Calendar action Create event.
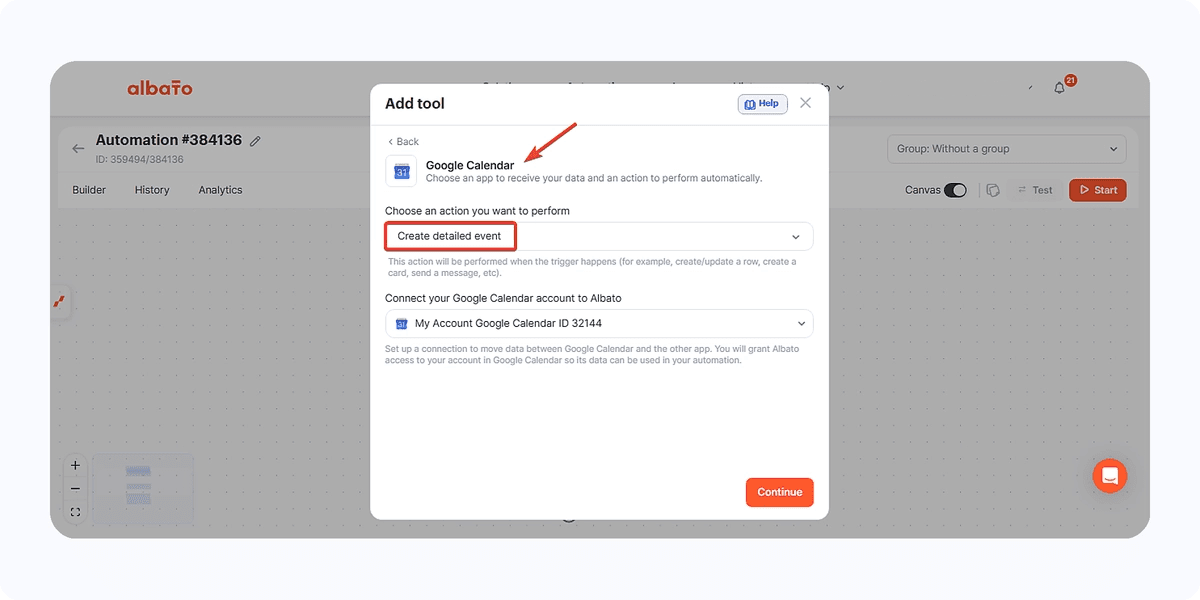
Once you add this step, you will see the fields to be filled in.
Here, you will select your Google Calendar schedule from a list value.
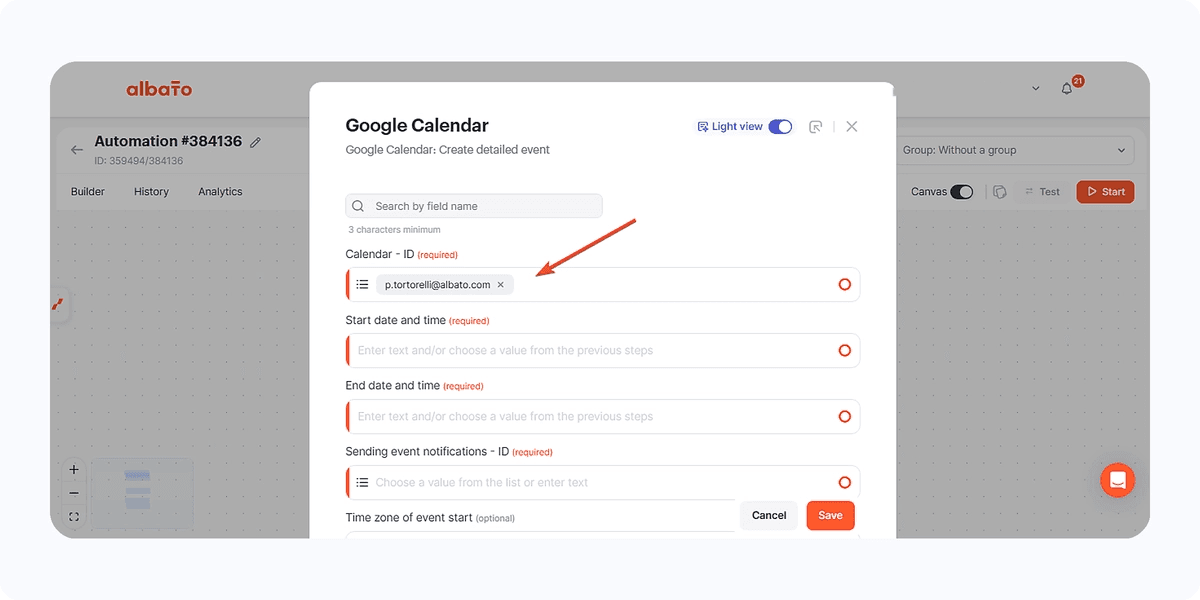
Click here for the remaining fields.
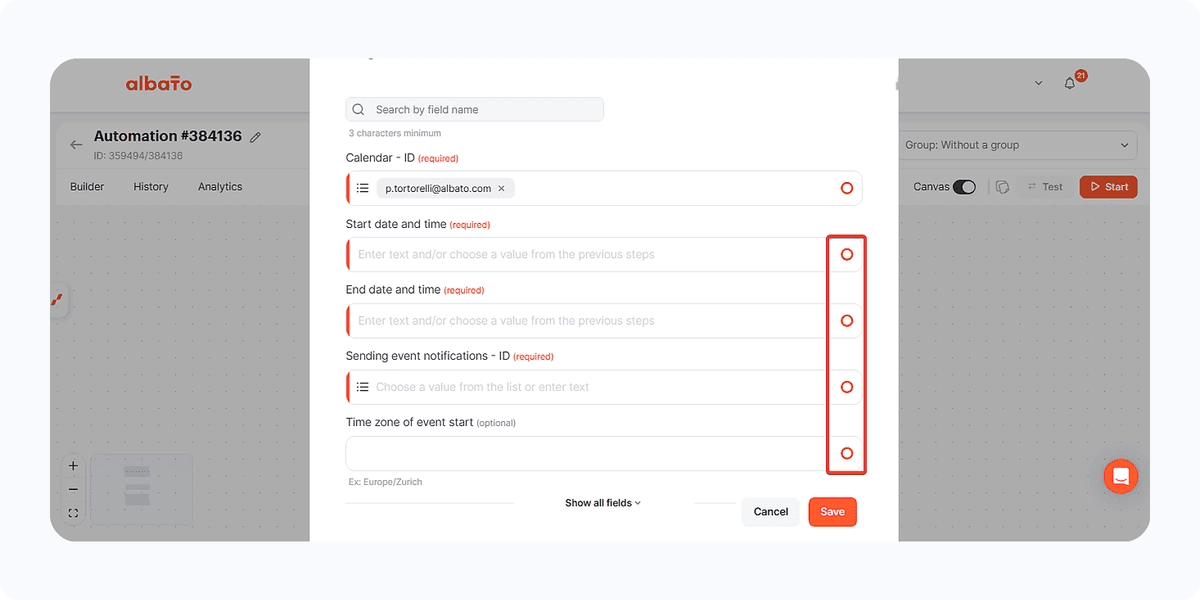
This icon allows the agent to decide which data should be used in the field. It will look like this.
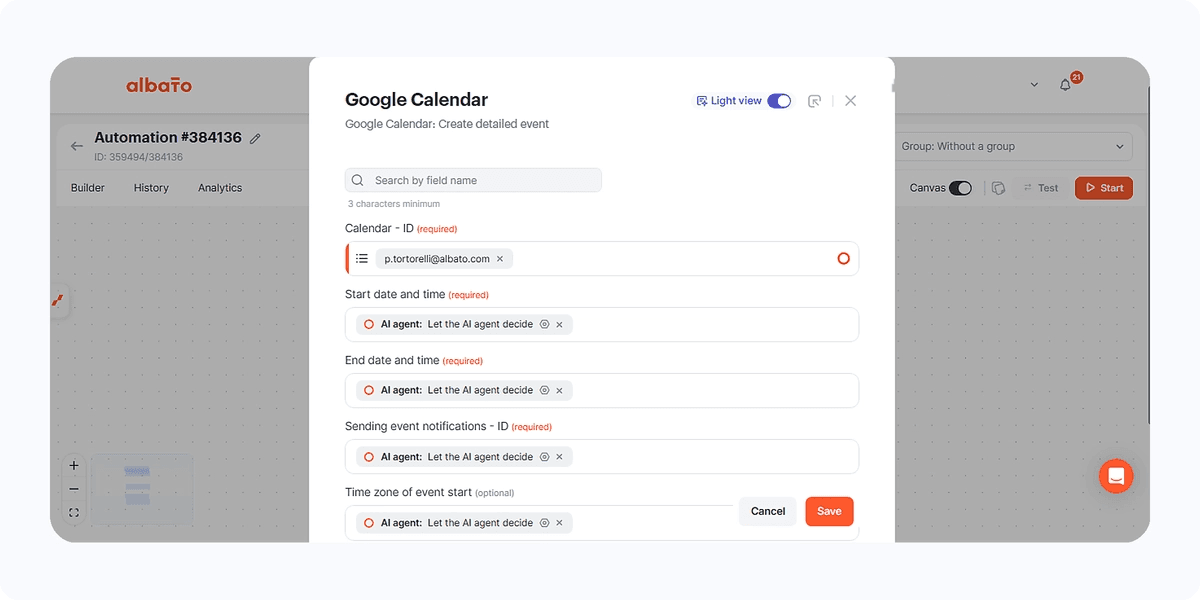
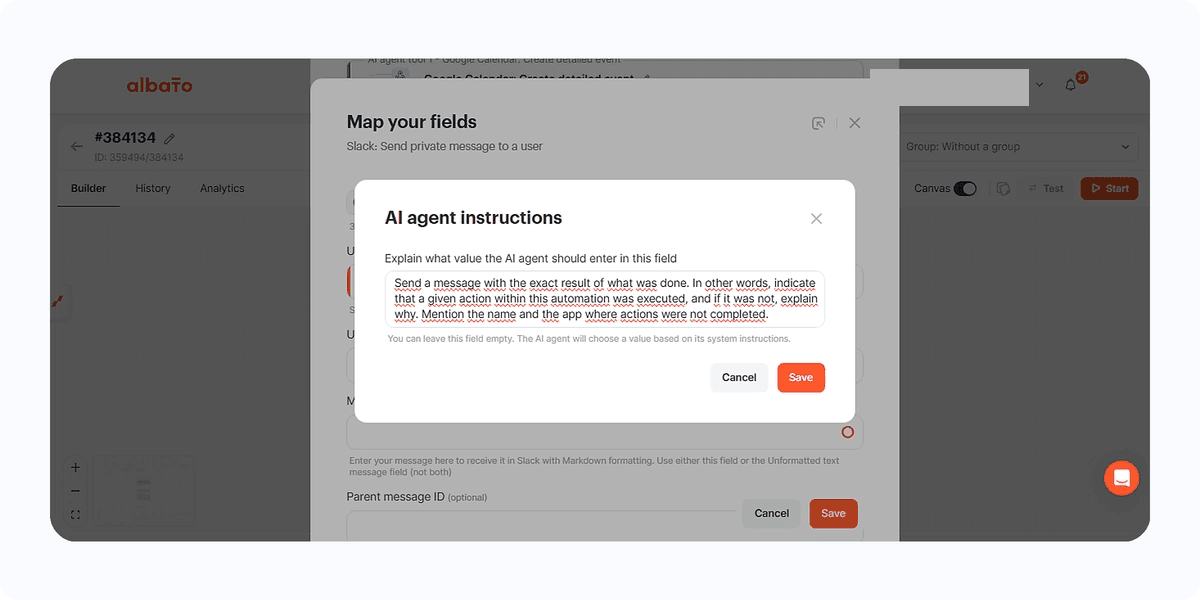
You can also click here to add more specific instructions for each field.
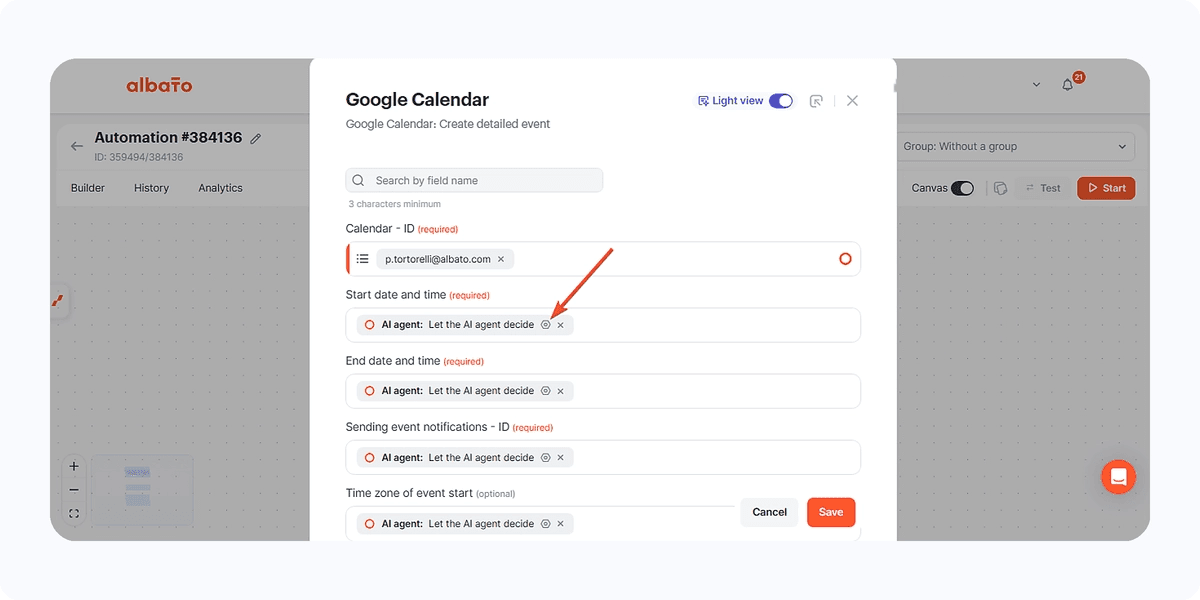
Then click save, and next click here to add the remaining steps.
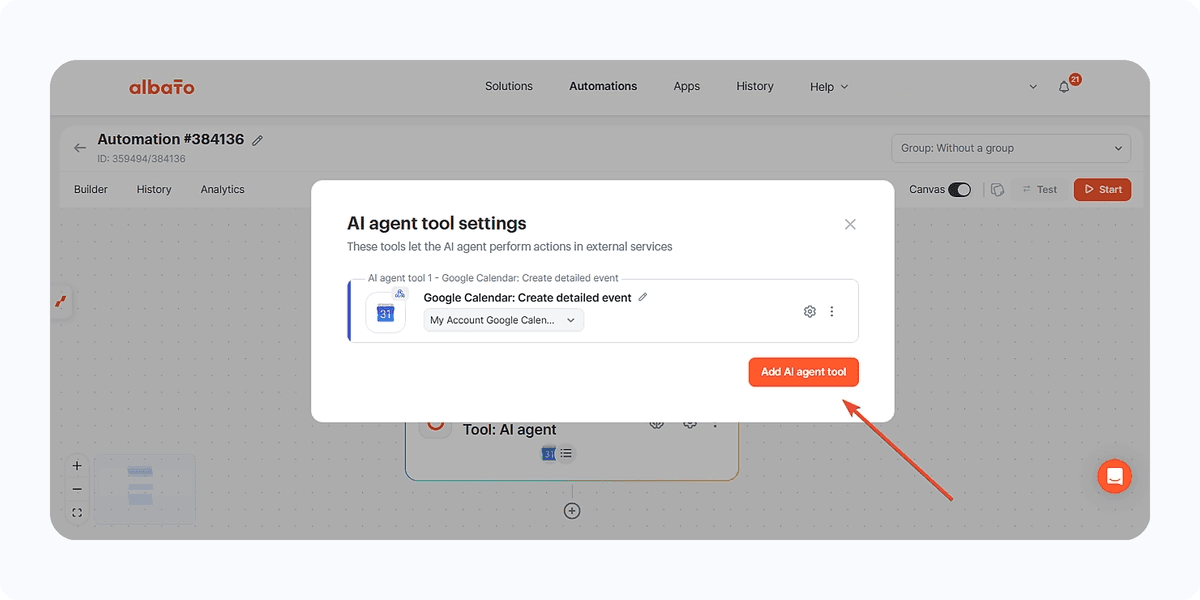
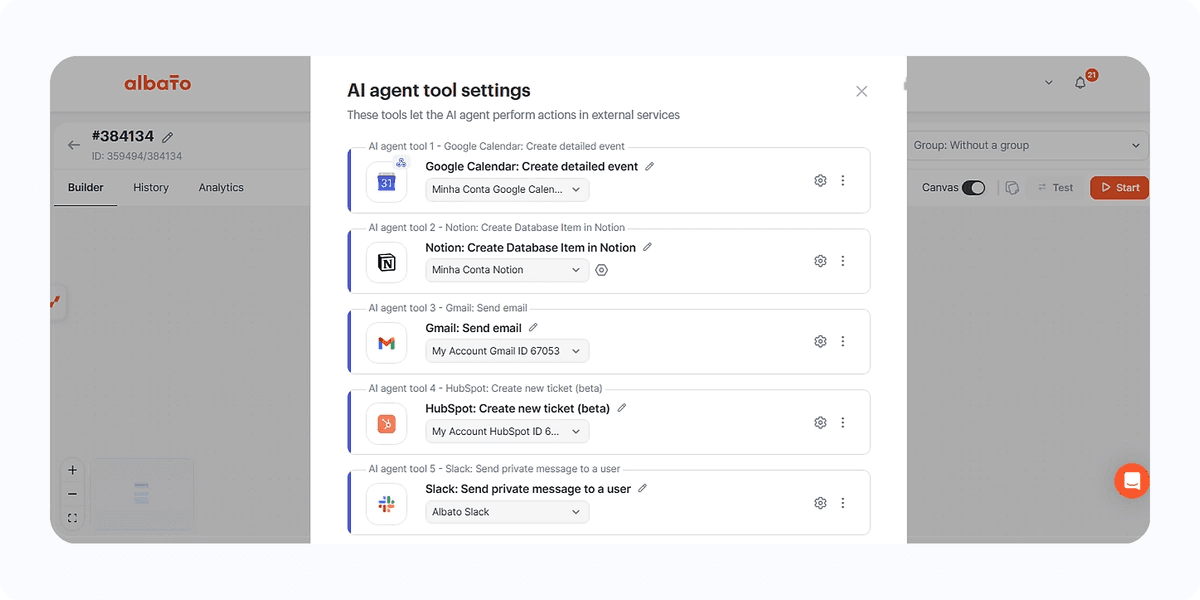
At the end, you will see that all steps are added like this.
Let’s look at another example.
In the Slack step, for example, set that the private user who should receive the message is the desired user. And in the unformatted message field, allow the agent to decide what to send.
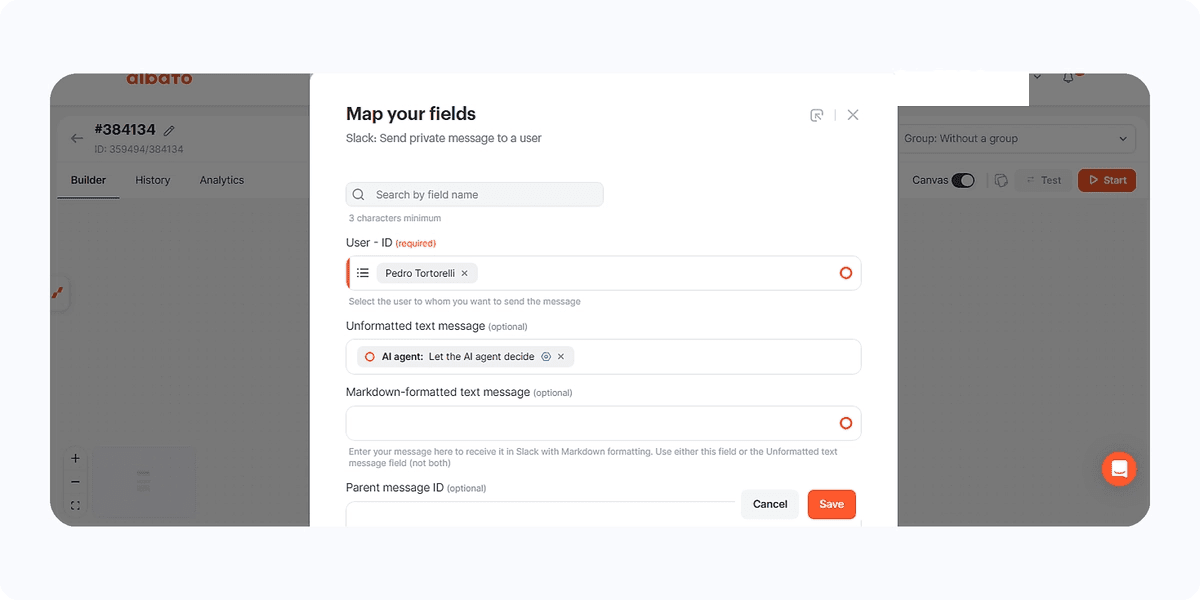
But additionally, set instructions on what type of message it should send.
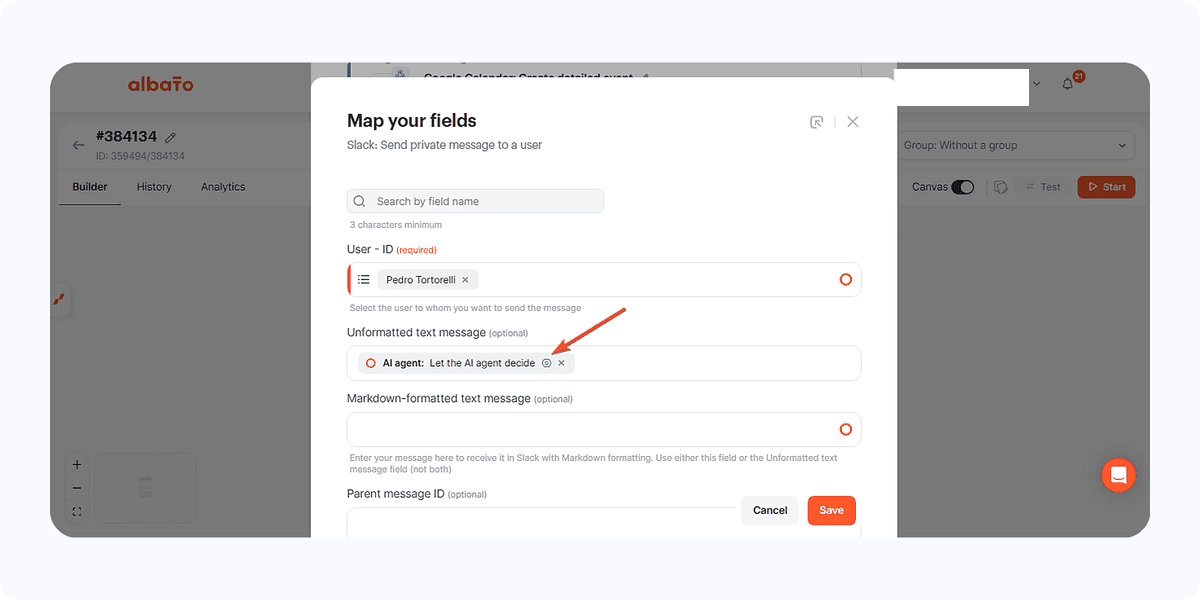
Example
Send a message with the exact result of what was done. In other words, indicate that a given action within this automation was executed, and if it was not, explain why. Mention the name and the app where actions were not completed.
Review all steps and ensure all fields are filled as desired. Remember that you can add as many apps as you want and give the agent the ability to perform these actions as needed.
Finally, your automation will look like this.

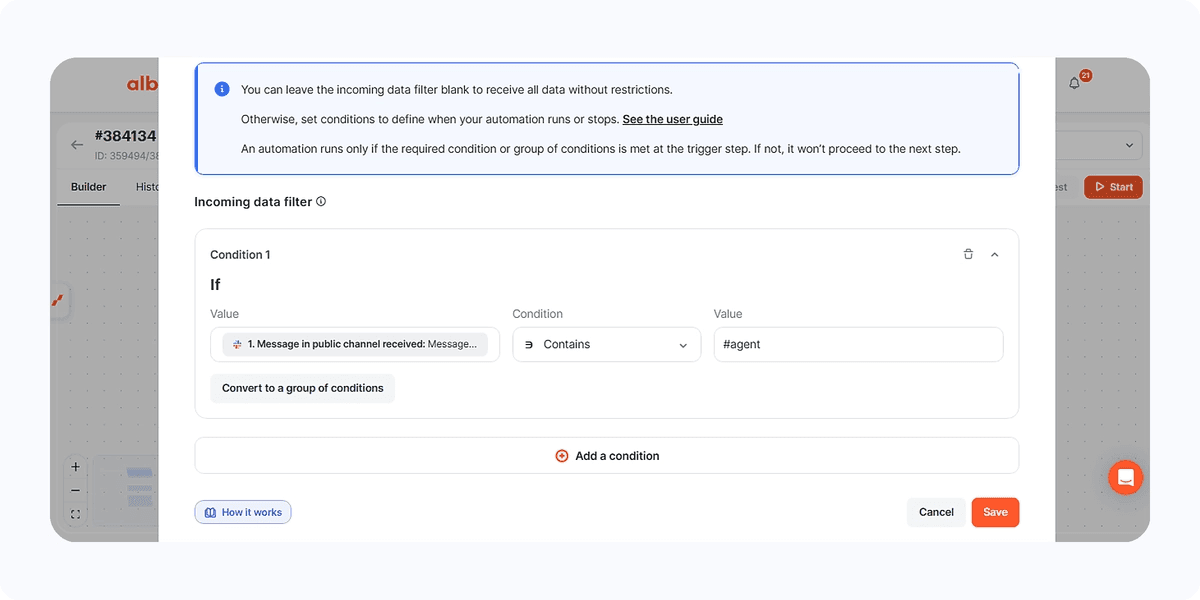
Now just click here to add a filter.
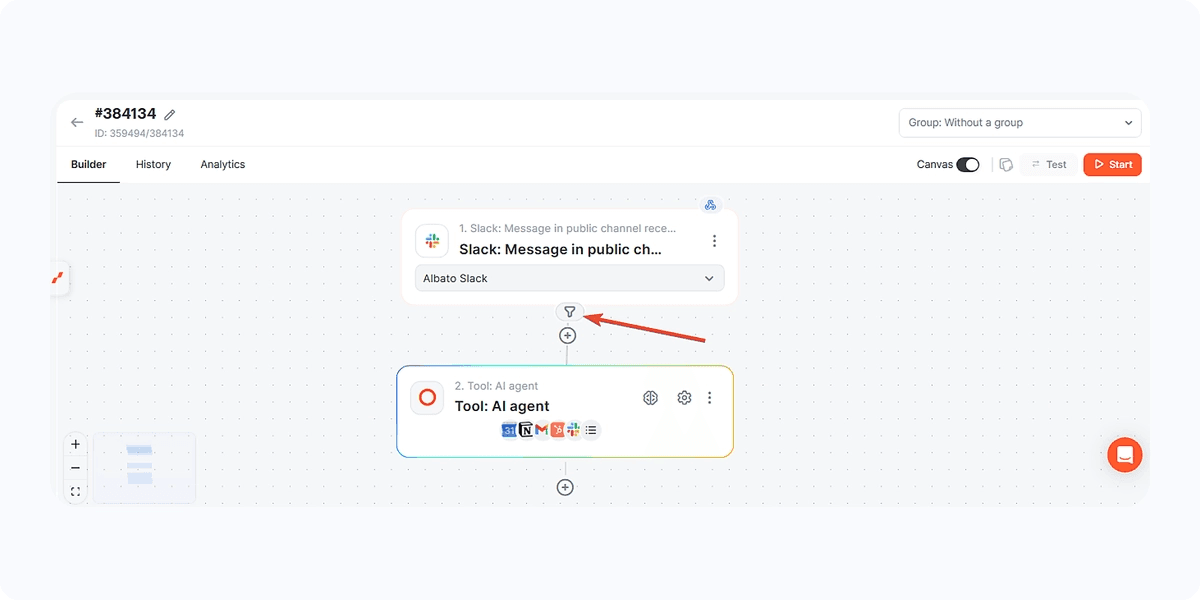
The idea is to ensure that not every received message triggers the automation.
Therefore, think of a code, for example, the automation should only run if the Slack message text contains a certain word.
You can choose a word, a code, or something that must be used in your Slack messages to trigger the agent.
We will use the code #agent in this example.
Then it will look like this.
Conclusion
Now, workflows with AI Agents are easier to configure: instead of building a separate branch for every possible request, you describe the logic, connect the tools, and let the agent decide which action should be performed.
If the agent does not behave exactly as expected, adjust the prompts used in the agent step and in the fields configured inside each tool.
Did this answer your question?