

How to Route Intercom Chats with AI in Albato
IN THIS ARTICLE
Some Intercom conversations need a first reply before they are passed to another team. For example, a support chat may need to be routed to marketing, finance, or another department that does not work inside Intercom.
In this guide, we will create an Albato automation that receives a new Intercom conversation, generates a first response with AI, sends the reply back to the customer, closes the chat, and notifies the responsible team in Slack.
Connect the Apps
Before creating the automation, connect the apps you will use.
- Intercom
- Albato AI or another AI app
- Slack, Telegram, email, or another notification app
In this example, we will use Slack.
Attention: If Albato AI is not available in your plan, you can use another AI app connected to Albato, such as OpenAI, Claude, Gemini, or Perplexity. If you do not want to use AI, you can skip the AI step and send a fixed response instead.
Go to the Apps section and click Add a connection.
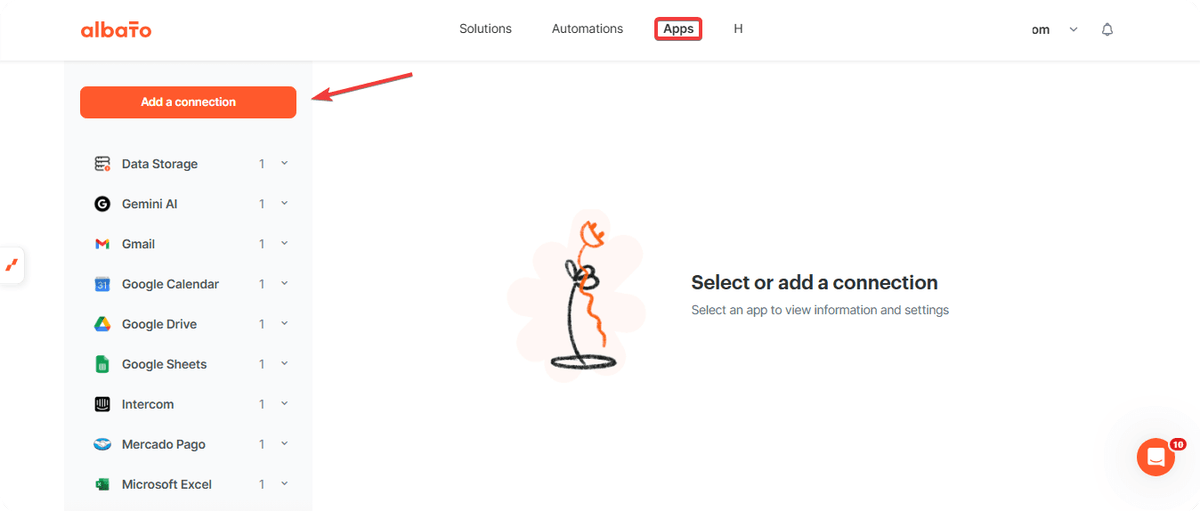
Search for each app and follow the connection instructions until the connection is created.
Create the Automation
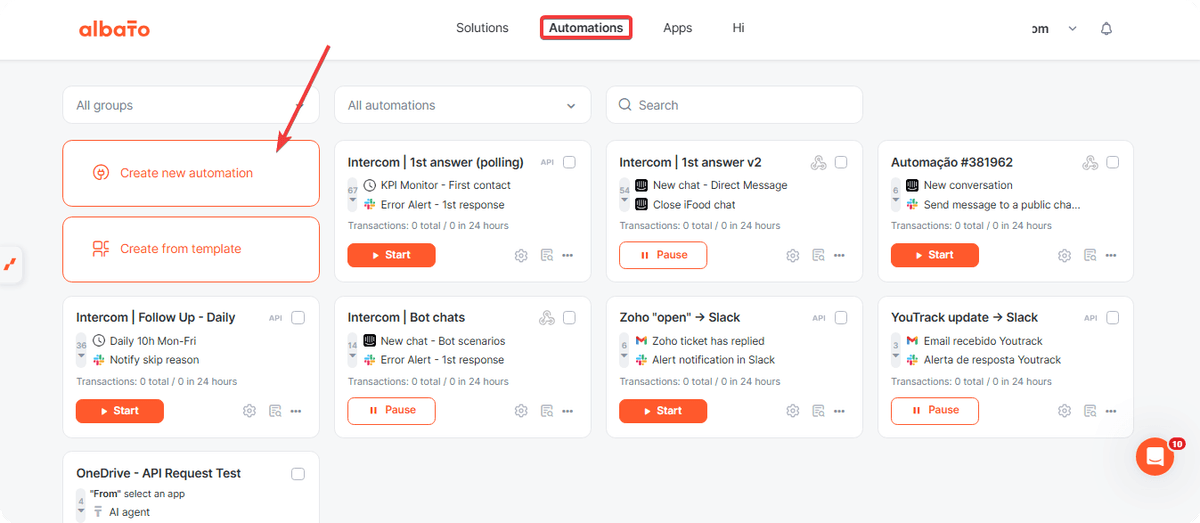
Go to the Automations section and click Create New Automation.
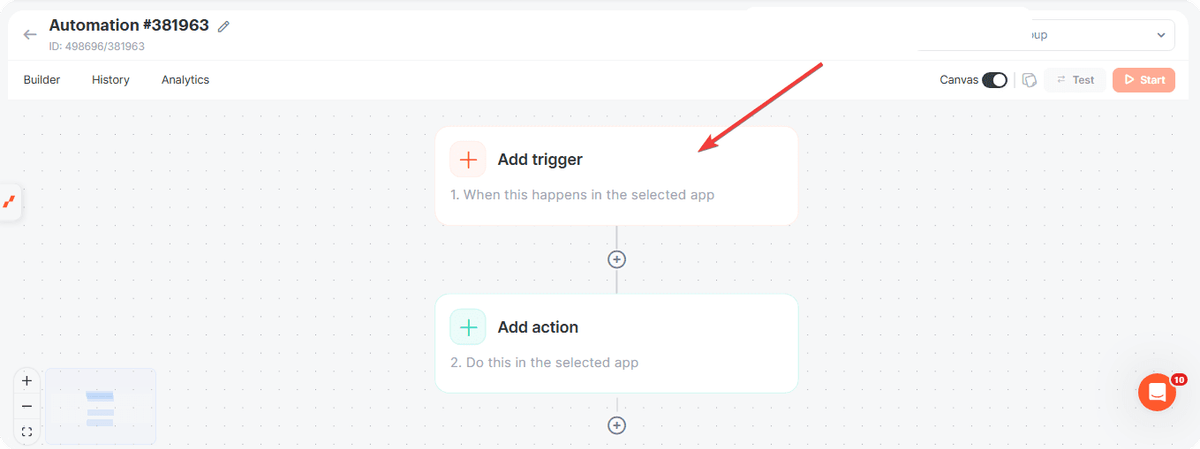
Click Add trigger.
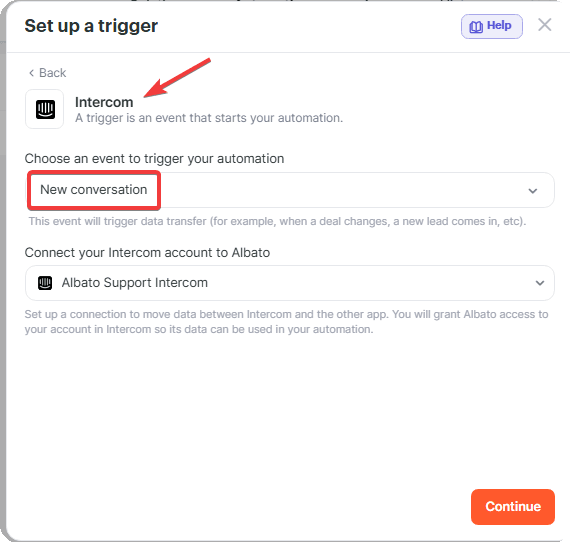
Select the Intercom trigger New conversation.
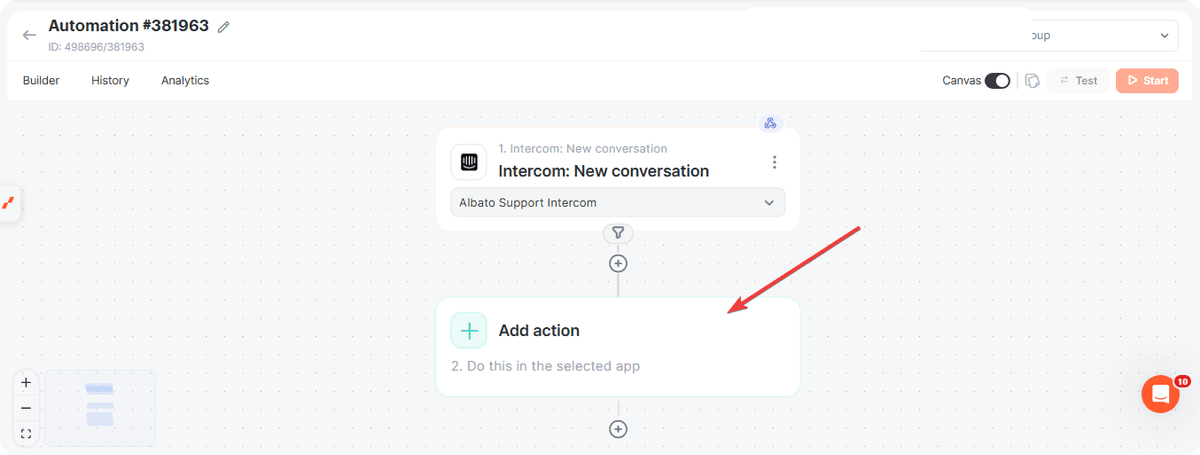
Click Add action to add the next step.
Select Albato AI.
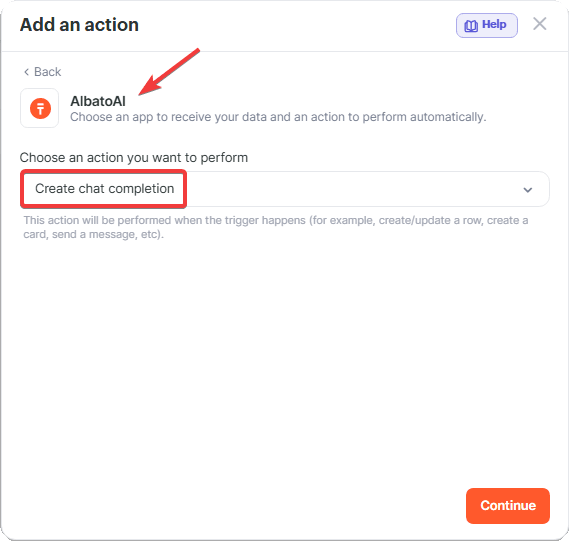
Attention: If you use another AI app instead of Albato AI, select that app here. The logic is the same: pass the Intercom message to the AI step and use the generated answer in the next action.
In the Albato AI step, fill in only the fields needed to generate the response.
- Role: user
- Message: a prompt that uses the Intercom message from the trigger
Example prompt.
Analyze the message received here: add the Body Source parameter from the trigger. Consider this to be the first message from a customer who contacted us through the support channel. Generate a response using a neutral and friendly tone, without technical terms. Confirm that the request was received, thank the customer, and explain that the message belongs to another responsible department, so it will be forwarded to the appropriate team. If the customer mentioned their name or company name, use this information in the response. The response should contain a maximum of two paragraphs and be ready to send to the customer.
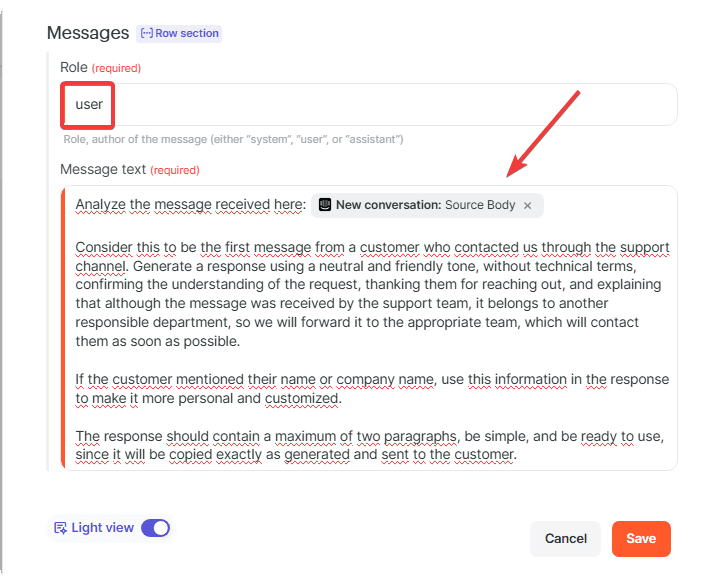
Attention: This is only an example prompt. The required part is the Body Source parameter from the Intercom trigger. It gives the AI step the message text that should be analyzed.
Next, click Add action.
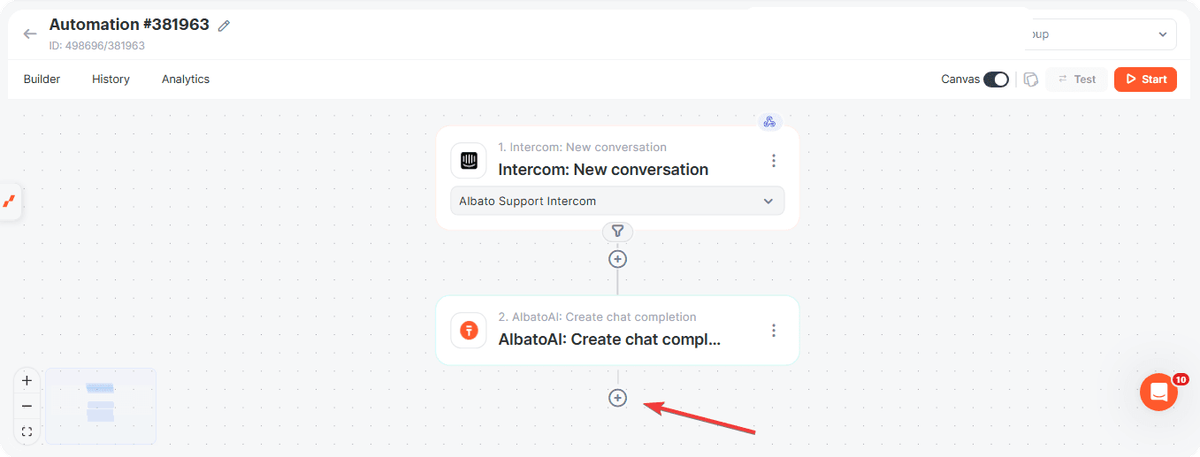
Select the Intercom action Custom API request.
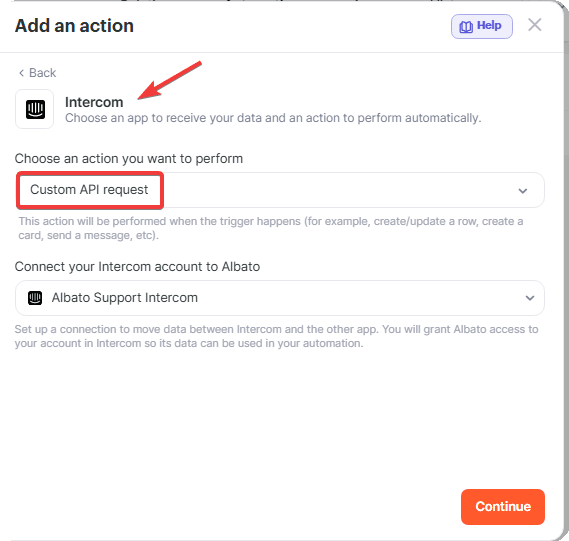
Use this action to send the AI-generated reply to the customer.
Set the request fields as follows.
- URL: https://api.intercom.io/conversations/{add the Item ID here}/reply
- Request Method: POST
- Format Method: JSON
In Request Parameters, add these fields.
- body in String format: use the value returned by the previous AI step
- type in String format: admin
- admin_id in String format: use the trigger value Admin Assignee ID
- message_type in String format: comment
The setup should look like this.
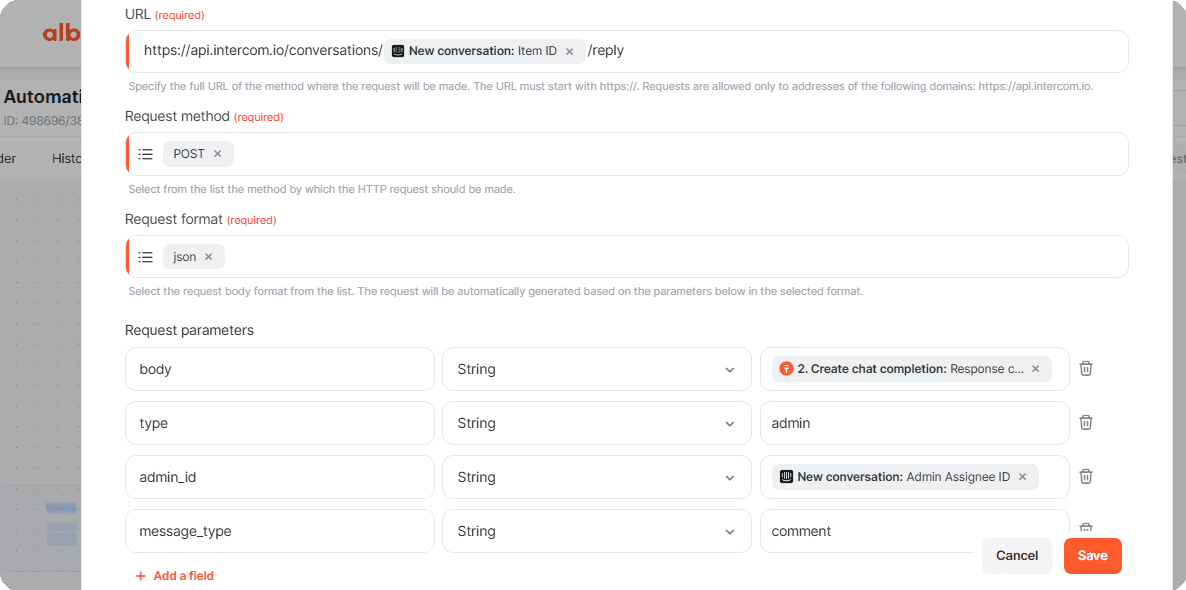
Fill in the values exactly as shown, using lowercase letters and no extra spaces.
Attention: If you are not using AI, enter a fixed response template in the body field. In this case, Albato will send the same response for every matching Intercom conversation.
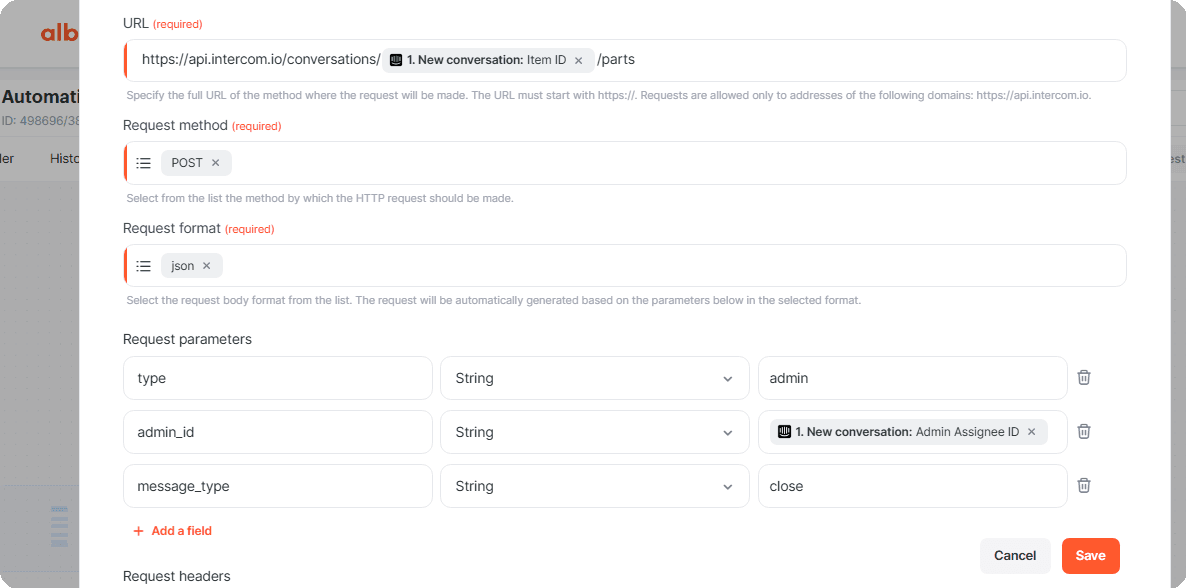
Now add another Intercom Custom API request action to close the conversation.
Configure the request as follows.
- URL: https://api.intercom.io/conversations/[Item ID collected from the trigger step]/parts
- Method: POST
- Request Format: JSON
In Request Parameters, add these fields.
- type in String format: admin
- admin_id in String format: use the trigger value Admin Assignee ID
- message_type in String format: close
The setup should look like this.
Attention: If Intercom requires a custom attribute before closing the conversation, add one more Custom API request step before the closing step.
To update a custom attribute, configure the request as follows.
- URL: https://api.intercom.io/conversations/[Item ID collected from the trigger step]
- Method: PUT
- Request Format: JSON
In Request Parameters, add the attribute name on the left side in this format.
custom_attributes.AttributeName
For example, if the attribute is called Result, use this field name.
custom_attributes.Result
Set the format to String. On the right side, enter the value that should be saved. In this example, the value is marketing.
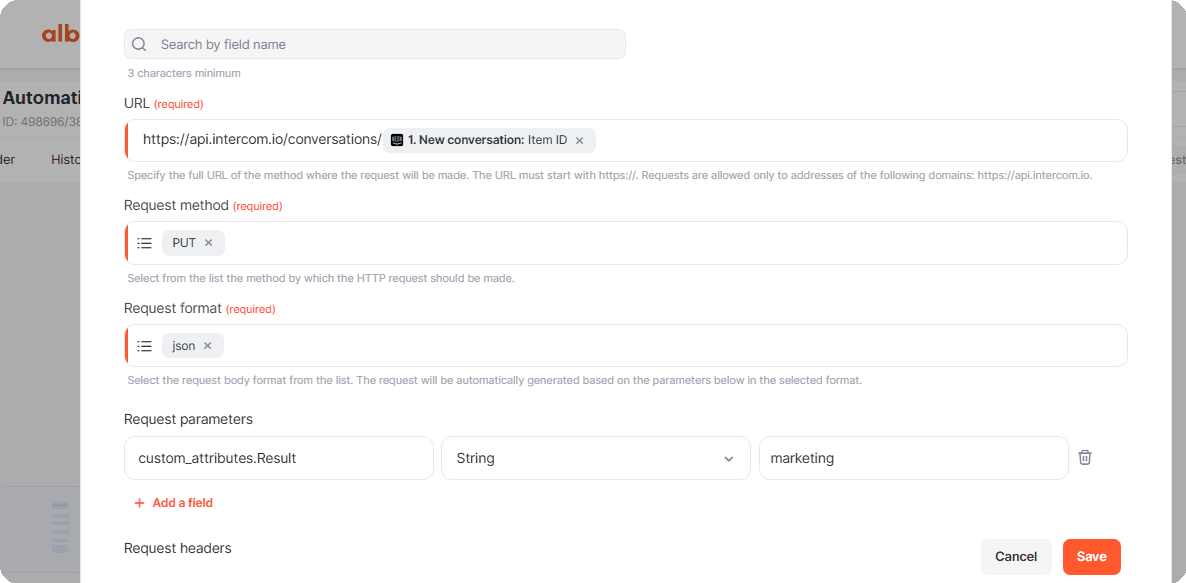
If you do not have mandatory custom attributes, you can skip this step. The previous step that closes the conversation is enough.
Notify the Responsible Team
Now notify the team that should handle the request. You can use Slack, Telegram, email, or another app connected to Albato.
In this example, we will send a message to a Slack channel.
Click Add action and select the Slack action Send message to a public channel.
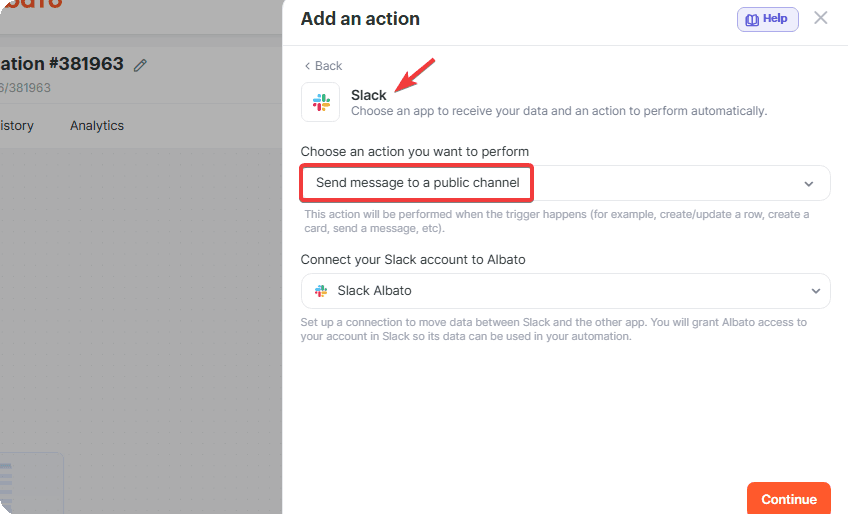
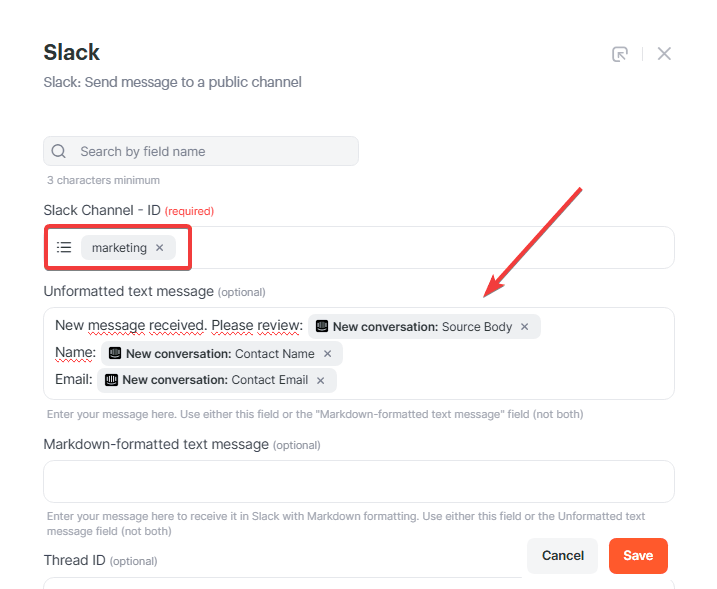
Select the channel and configure the message text.
Example message.
New message received. Please review: add the trigger parameter Body Source.
You can also include the sender's name and email address.
The setup should look like this.
Add Routing Filters
Before activating the automation, add a filter to route only the conversations that match your scenario.
Click the trigger step and add a filter.
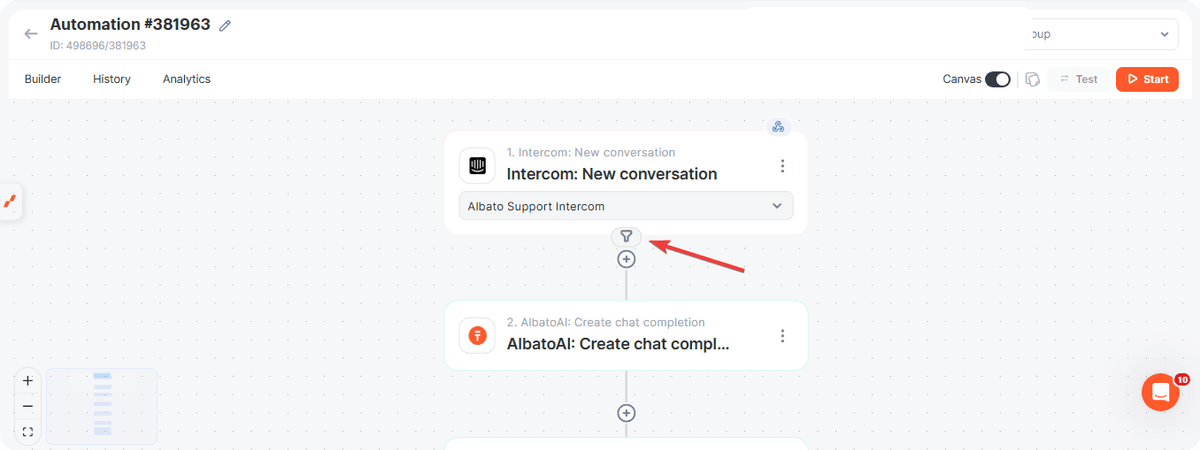
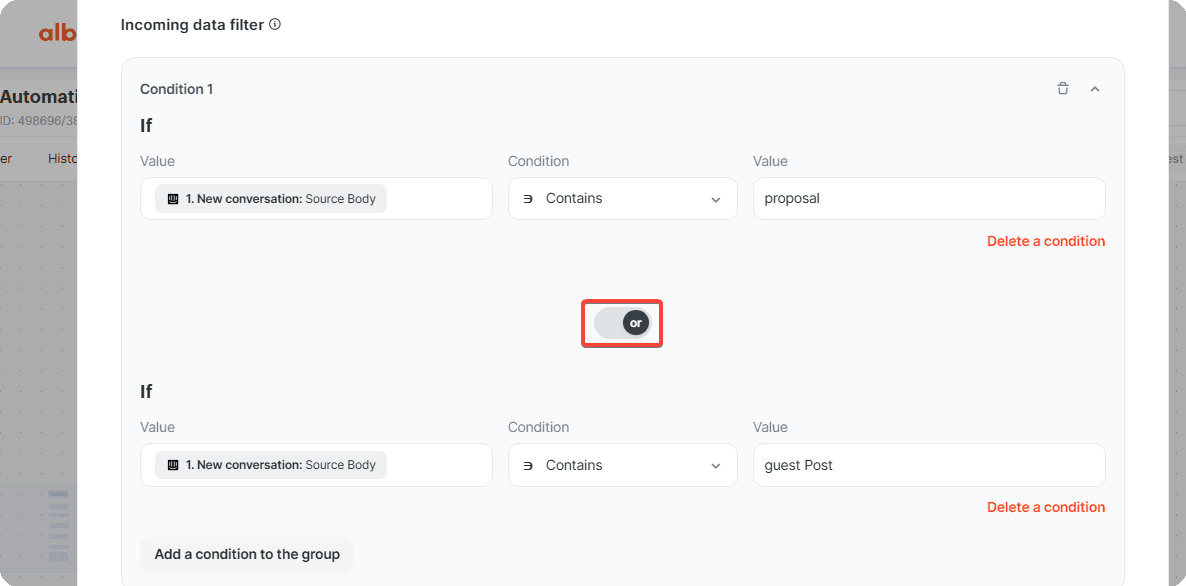
Set a condition where Body Source contains a specific keyword.
Repeat this condition for each keyword you want to use.
For example, if this automation routes requests to the marketing team, you can add keywords such as proposal, guest post, collaboration, or partnership.
The filter should look similar to this.
If you need the same logic for another team, duplicate the automation.
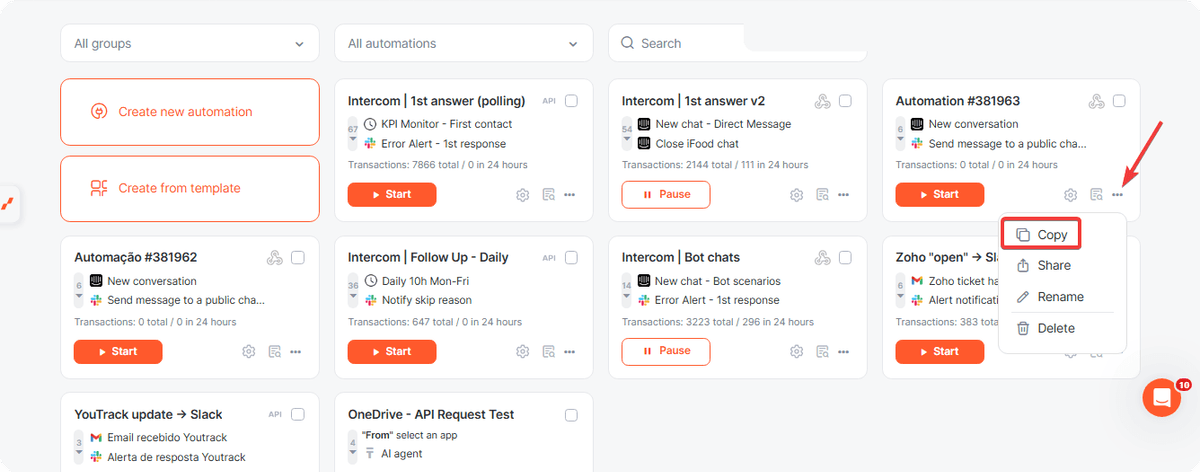
Then update the filter keywords and the team or channel used in the notification step.
Activate the automation when the setup is ready. From this point, matching Intercom conversations will receive the configured first response and be routed to the responsible team automatically.
Did this answer your question?