

How to Create an AI-Powered Email Analyzer
IN THIS ARTICLE
This automation helps you triage incoming emails. Albato sends each new email to AI, checks whether it is relevant, stops the flow for low-priority messages, creates a ClickUp task for important emails, and can generate a short reply.
Connecting the apps
The first step to creating this automation is to connect the apps we will use.
In this example, we will use Gmail. You can adapt the same logic for Outlook or for an email connection through SMTP/IMAP.
We will also connect ClickUp, to send tasks to this app whenever an email is relevant. Other apps that could be used include Monday, Trello, Microsoft To Do, among others.
Finally, for the AI part, we will use Albato’s native AI feature (available in paid plans and Trial version). If you are using a Tier plan, you will also need to connect an external AI app such as Claude, ChatGPT, Perplexity, among others.
- Go to the Apps section in Albato and click Add a Connection.
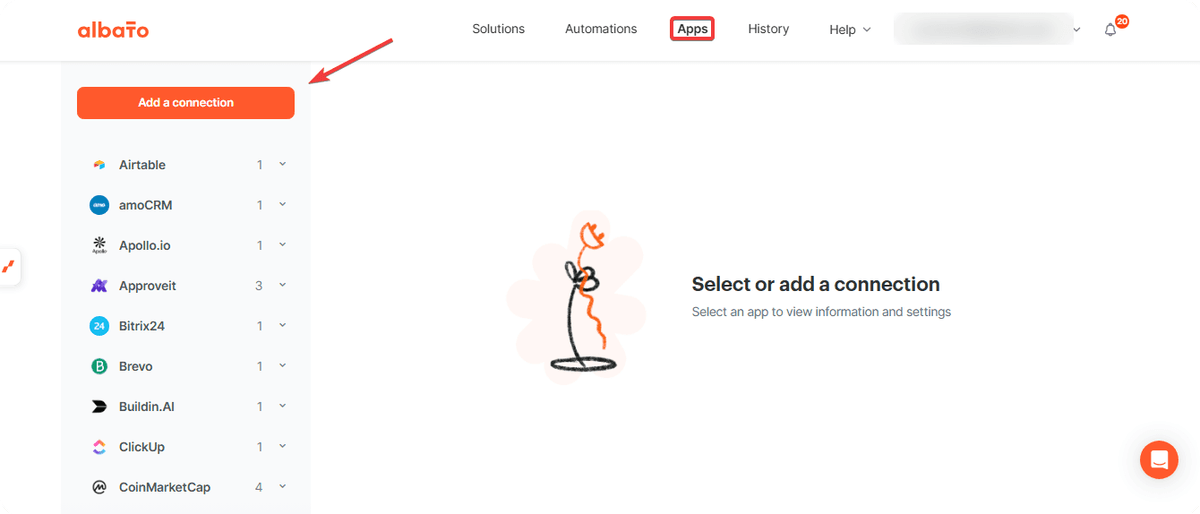
Search for the desired app and follow the instructions that appear. After completing the first connection, repeat the process for the remaining apps.
Creating the automation
- Go to the Automations section and click Create New Automation.
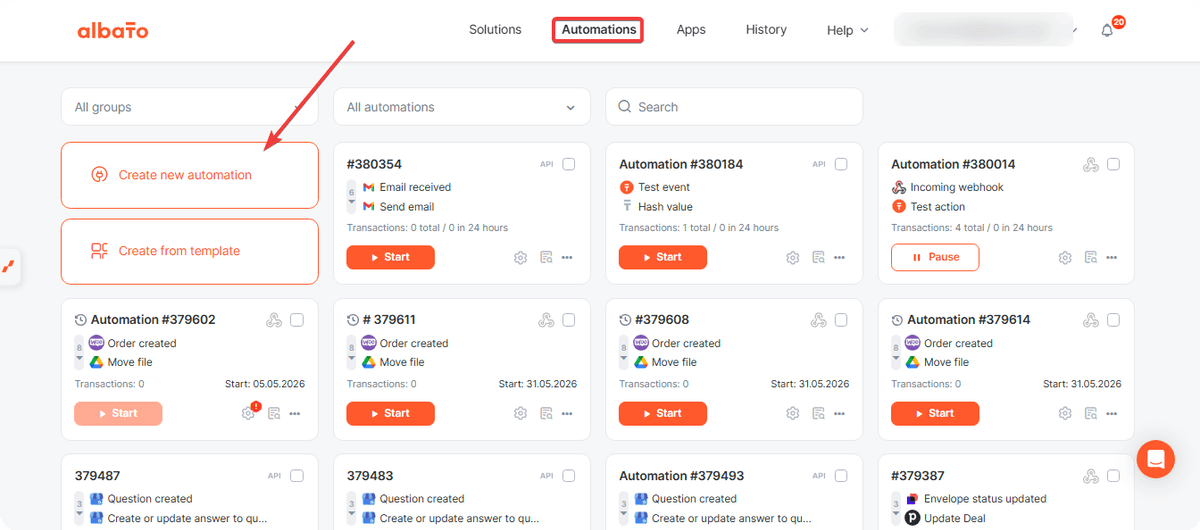
Next, click to add a trigger.
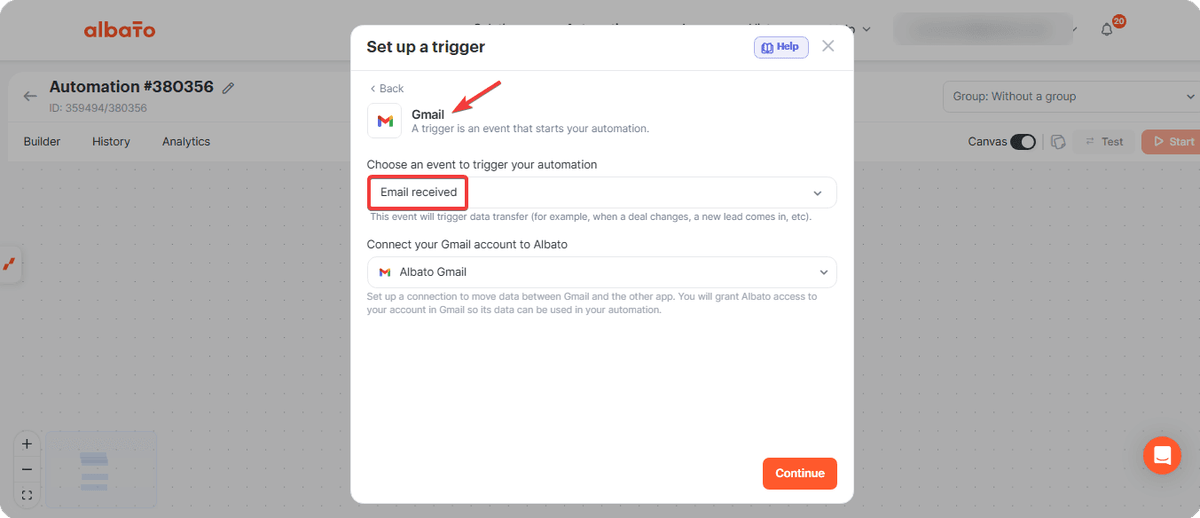
Select the Gmail app and the New Email Received event.
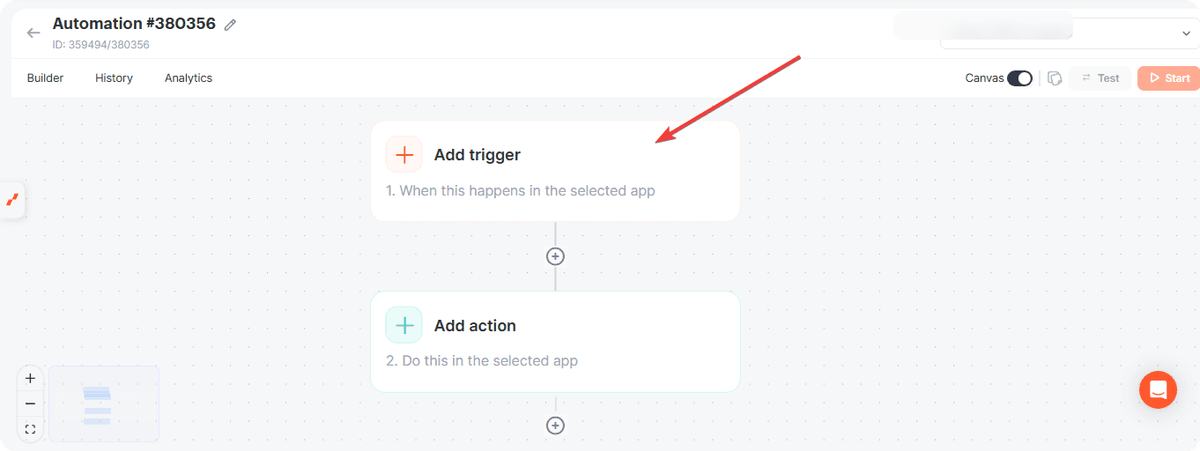
Then, click to add an action.
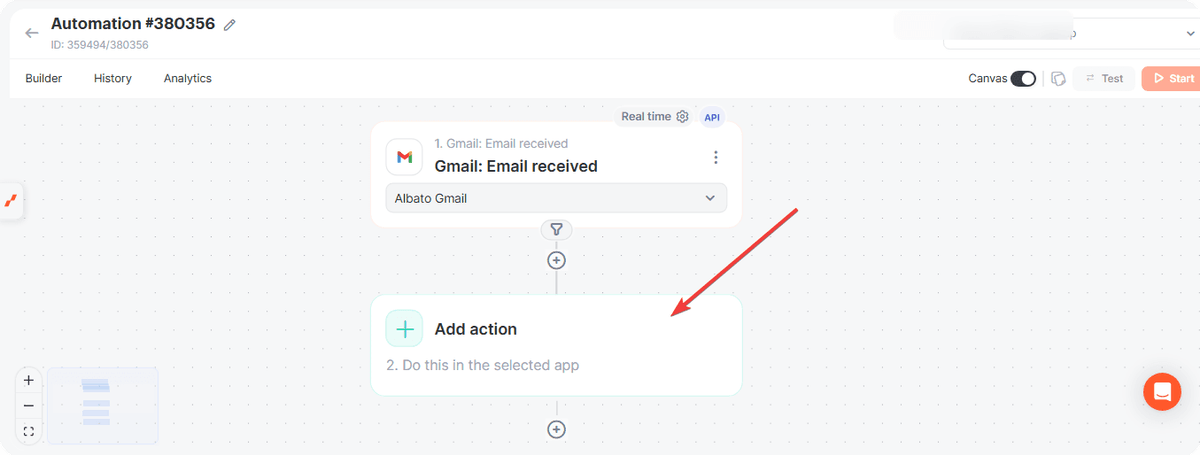
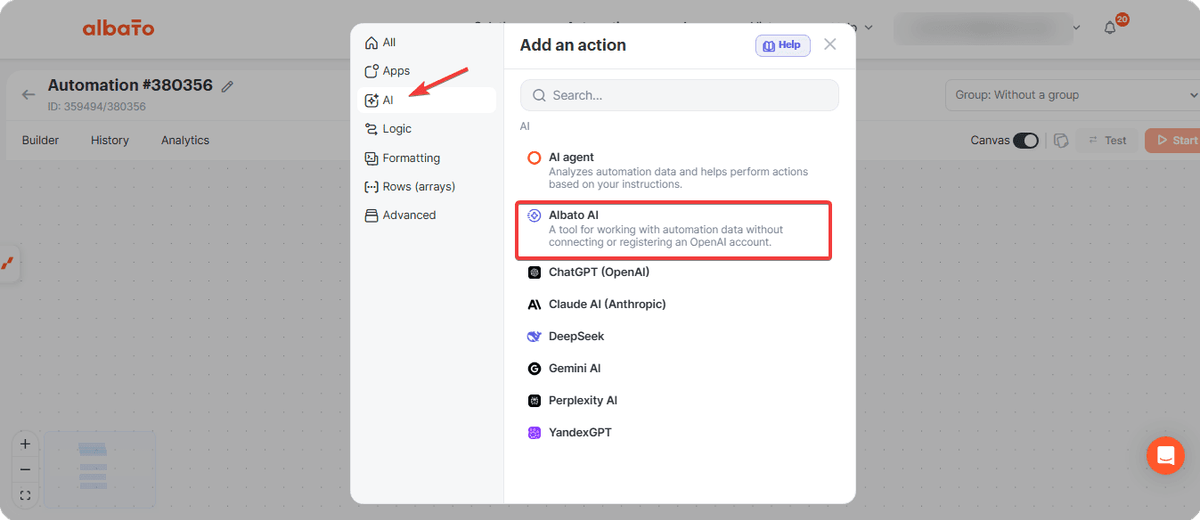
In the AI section, select Albato AI.
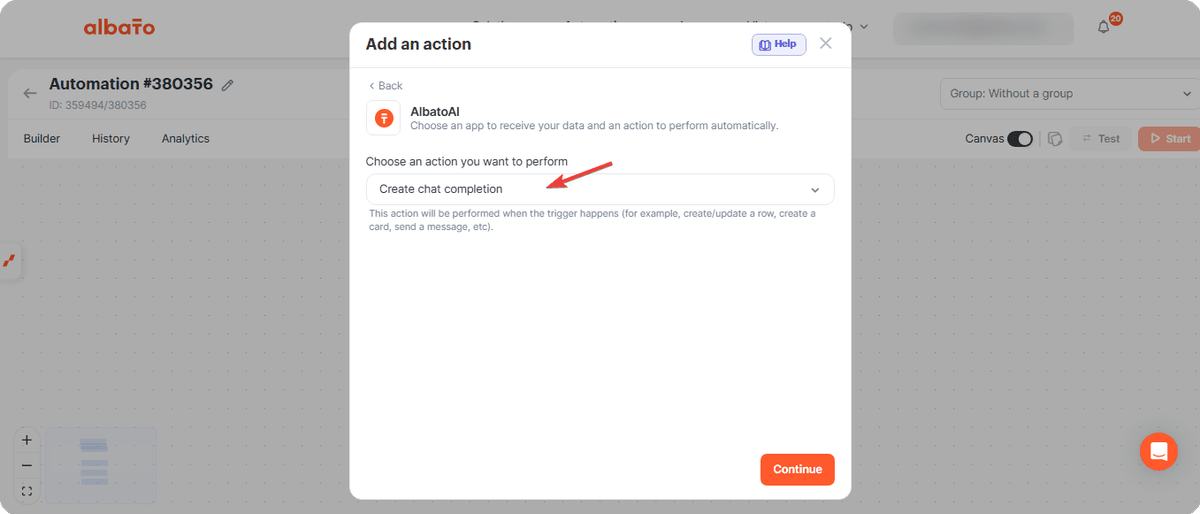
Choose Create Chat Completion.
Fill in the Role field with the value user (typed manually).
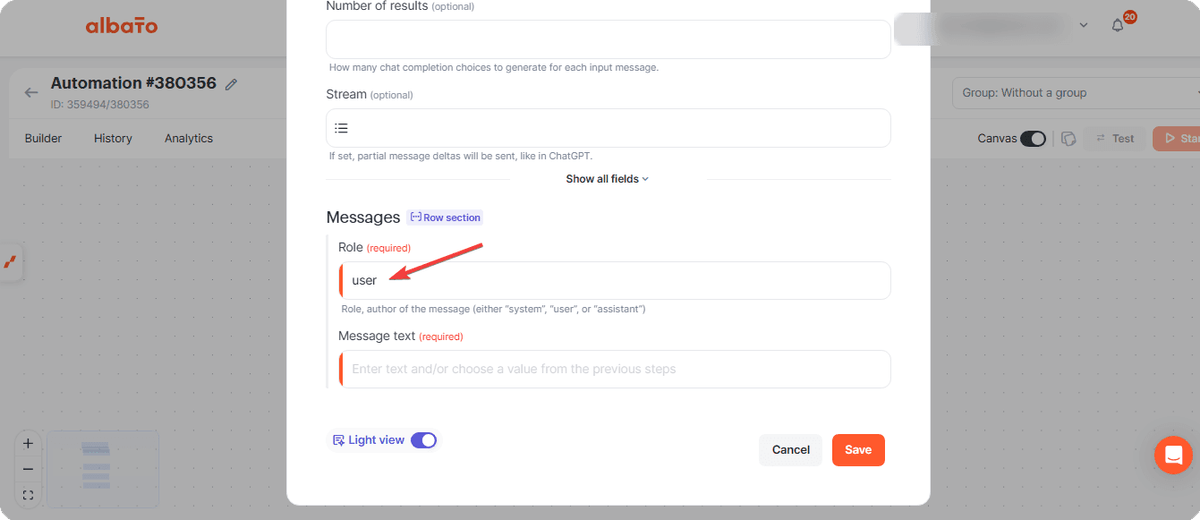
In the Message field, write a custom prompt.
Here, it is very important to provide all instructions on how the email should be analyzed and define that the final response must be **YES or NO **, to enable relevance filtering.
Prompt example.
Sender: (insert the sender’s email) Analyze the following email: (insert the email message parameter here). Identify whether this email is relevant or not. The final answer must be only YES if it is relevant, or NO if it is not relevant. Consider it relevant when it appears to be a new proposal, questions about our product, scheduled meetings, notifications of pending contracts, important pending payments, or any message sent from the following emails: (insert list of relevant emails). It should be considered NOT relevant in cases of advertisements, spam, reply messages, or general promotions. The final answer must be only YES or NO.
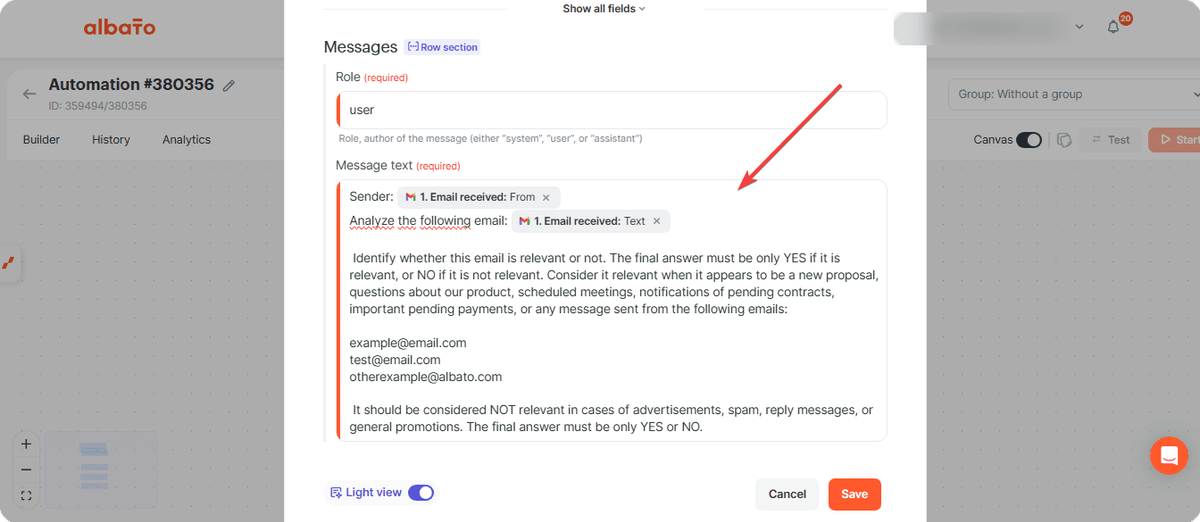
Attention: customize the prompt according to your needs, including specific criteria and using the sender and message content parameters.
After configuring this step, add a logic step to stop the automation under a specific condition.
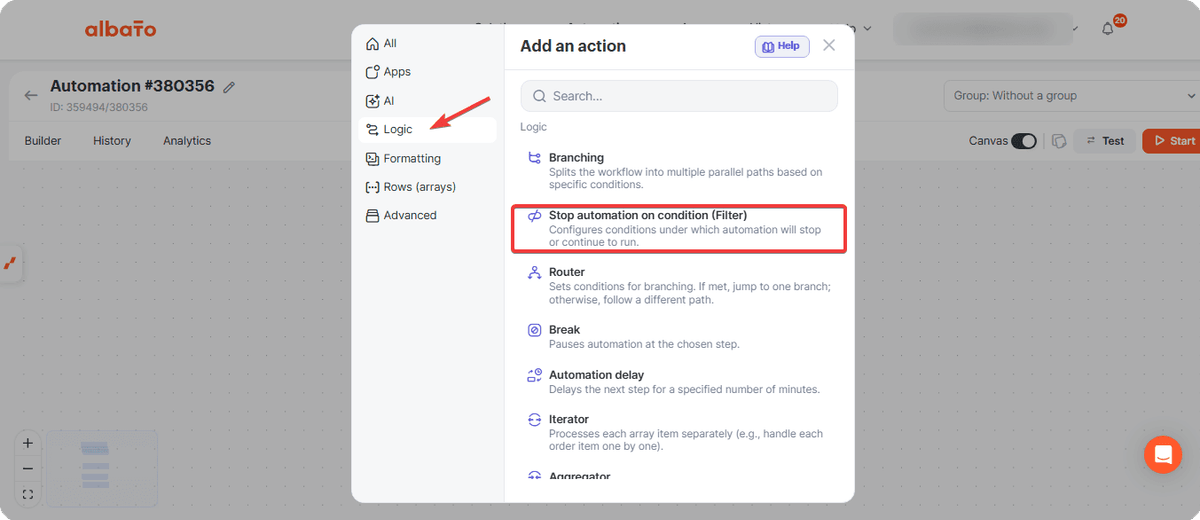
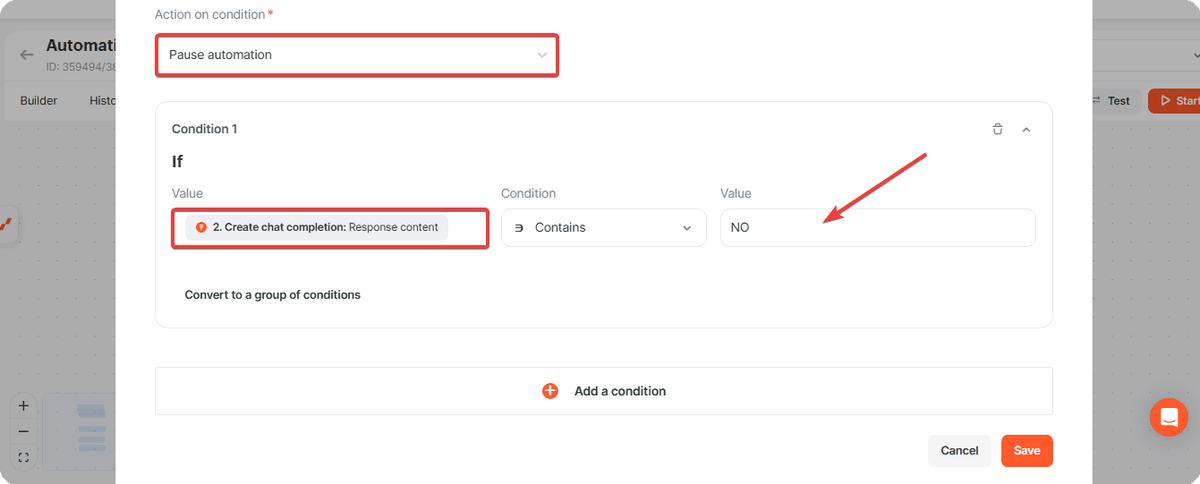
Set the automation to stop if the AI response contains the word **NO **. This way, only important emails will proceed to the next steps.
Now, add the step to create a task in ClickUp.
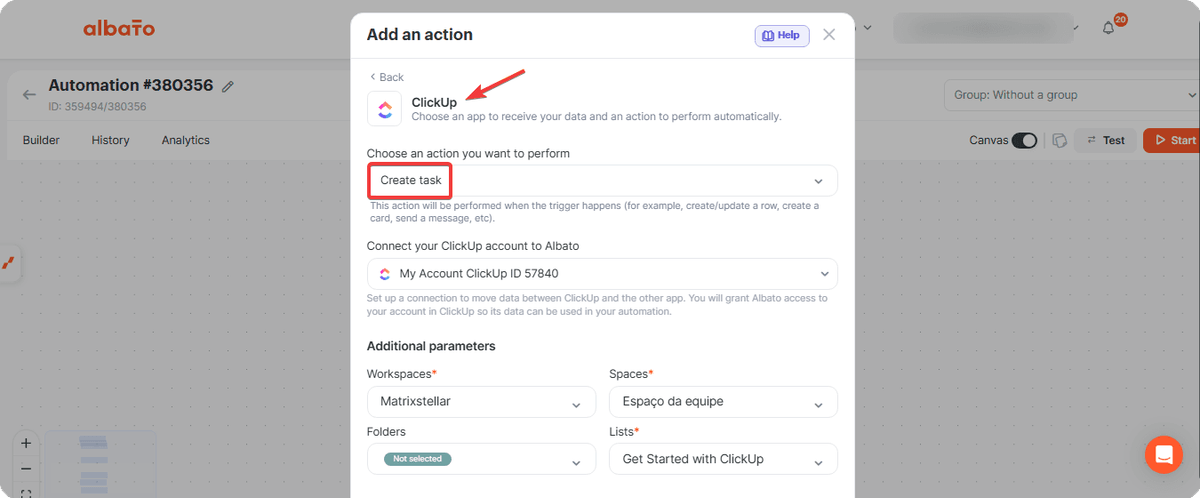
Configure the task with the desired information, for example: “Check important email” as the task name, status, and more details about the email.
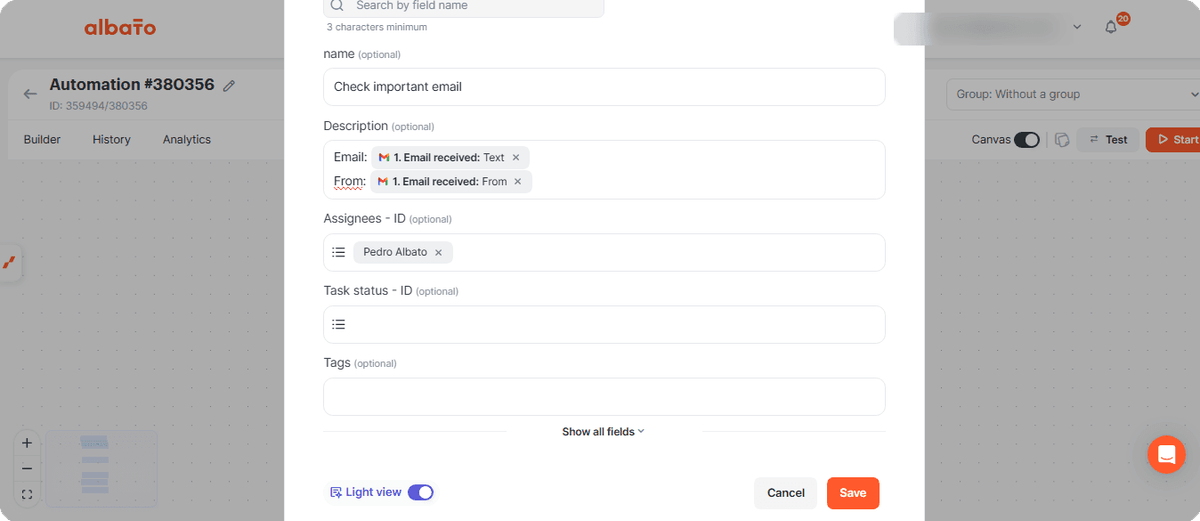
Next, add another Albato AI step, but this time to generate a response.
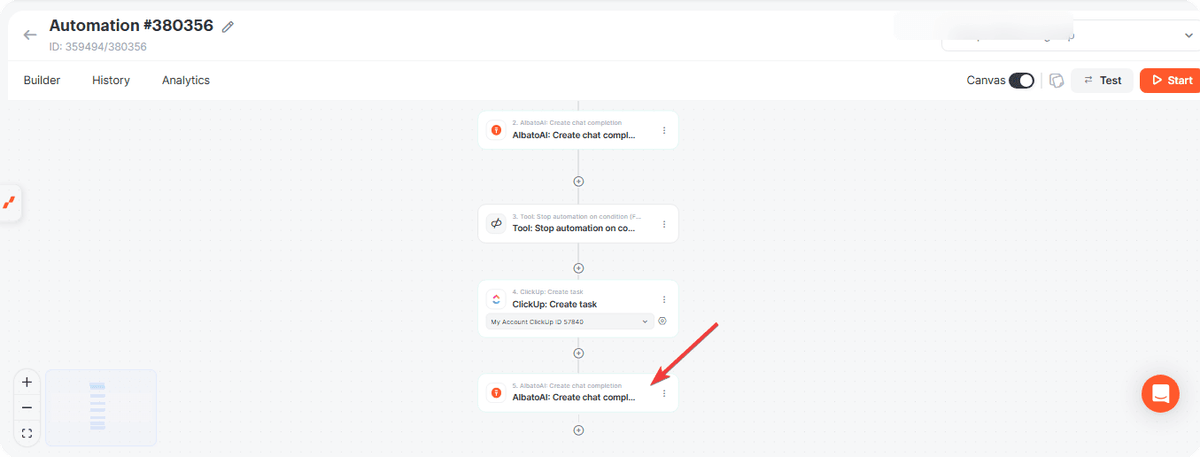
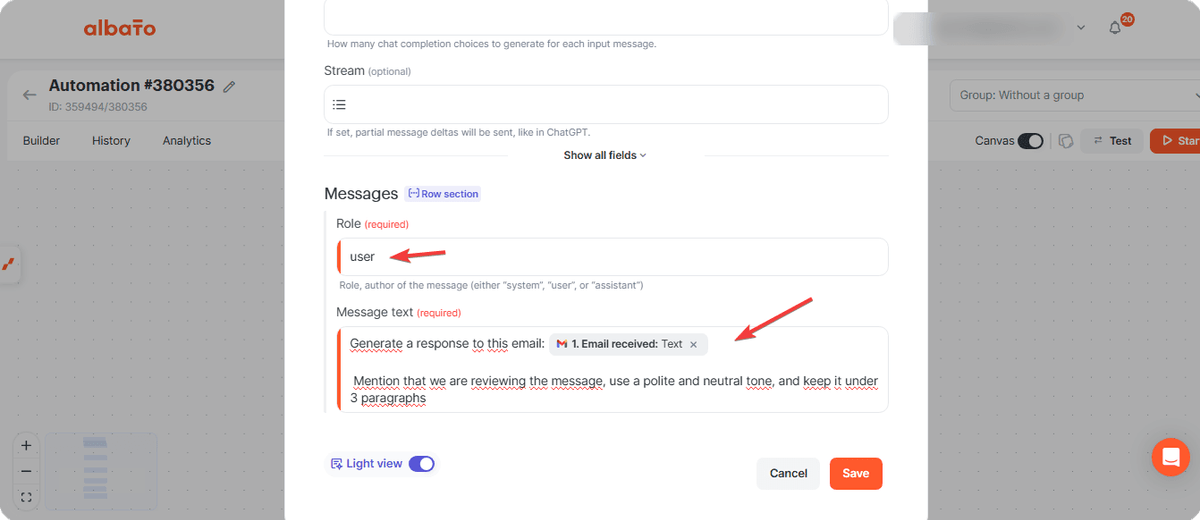
Use user again in the role field and create a prompt like.
“Generate a response to this email. Mention that we are reviewing the message, use a polite and neutral tone, and keep it under 3 paragraphs.”
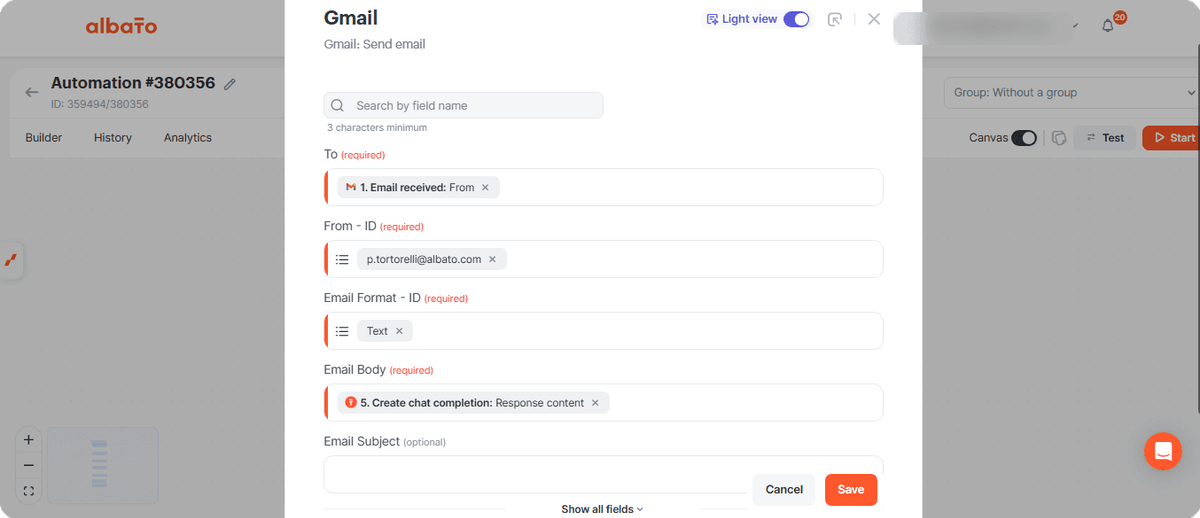
After that, add the Send Email in Gmail step.
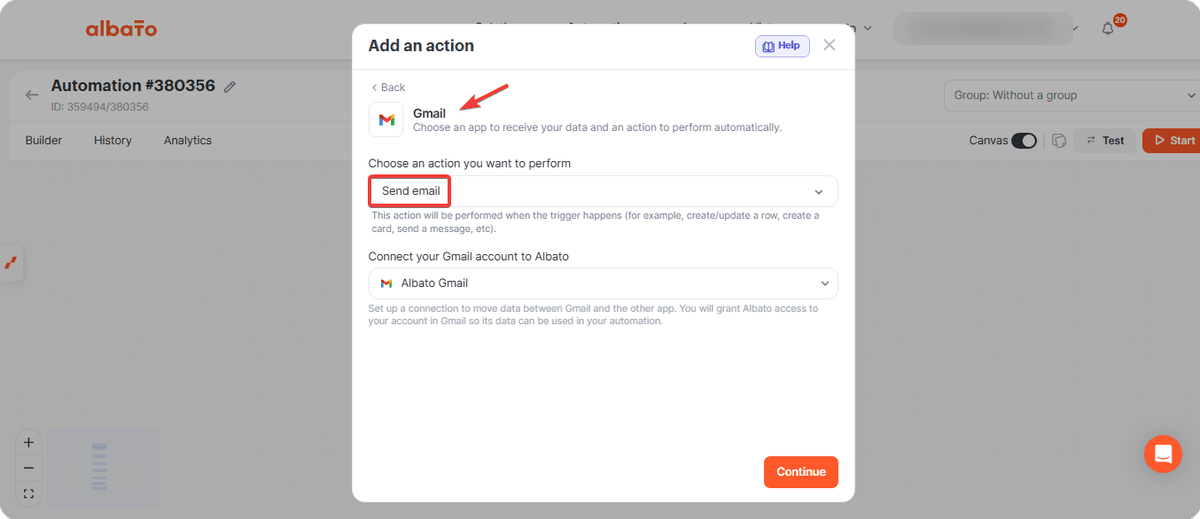
Set the recipient as the sender’s email and, in the message field, use the AI-generated response. The subject can be configured as you prefer or left blank.
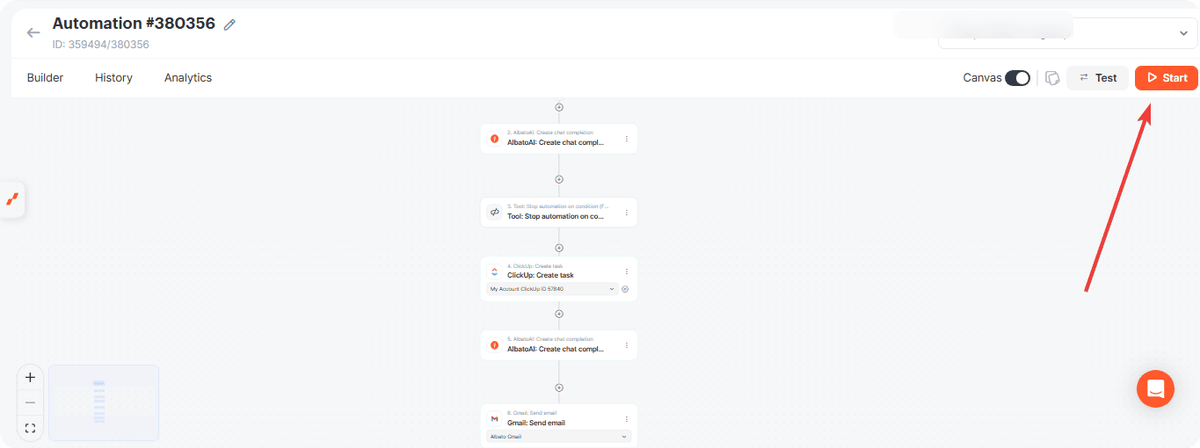
Activate the automation when every step is configured.
You can keep the same workflow logic and replace Gmail or ClickUp with other apps that fit your process. If you have any questions, reach out to the support team via the chat.
Related Articles
- Connecting Email via SMTP and IMAP
- Incoming Data Filter
- How to Connect ClickUp to Albato
- ChatGPT (OpenAI) Integrations
Did this answer your question?