

How to Create an AI Agent on WhatsApp to Schedule Events in Google Calendar
IN THIS ARTICLE
Customers often contact a company through WhatsApp to schedule an appointment, consultation, service, or meeting.
The manual process usually takes several steps: reading the message, checking the requested date and time, confirming availability, creating the event, and replying to the customer.
With Albato, you can create an AI Agent that reads incoming WhatsApp messages, checks availability in Google Calendar, creates an event when the requested time is free, and sends a reply back through WhatsApp.
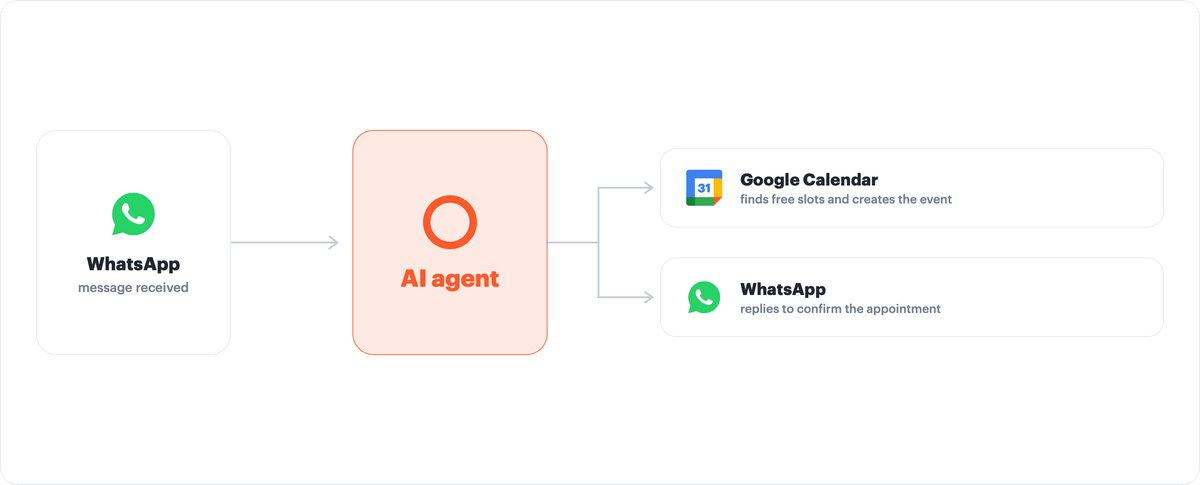
Below, we’ll show how to configure this automation and use AI Agent as the decision-making layer between WhatsApp and Google Calendar.
Connecting the apps
The first step is to connect the applications we will use for this type of automation.
Go to the Apps tab and click Add a Connection.
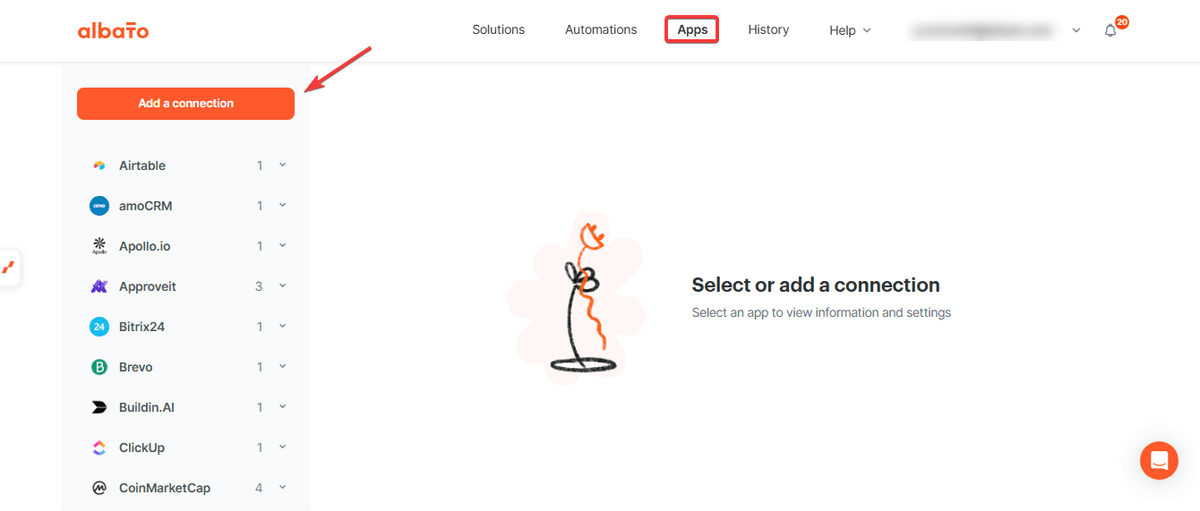
Next, search individually for the applications we will use.
In this case, we will need to create connections for WhatsApp and Google Calendar.
Important: If Albato AI is not available in your plan, connect another AI app that can process the customer message, such as Gemini, Claude, DeepSeek, or OpenAI.
If you have any questions about the WhatsApp connection, see the WhatsApp Business API connection guide.
Once the apps are connected, you can build the automation.
Creating the automation
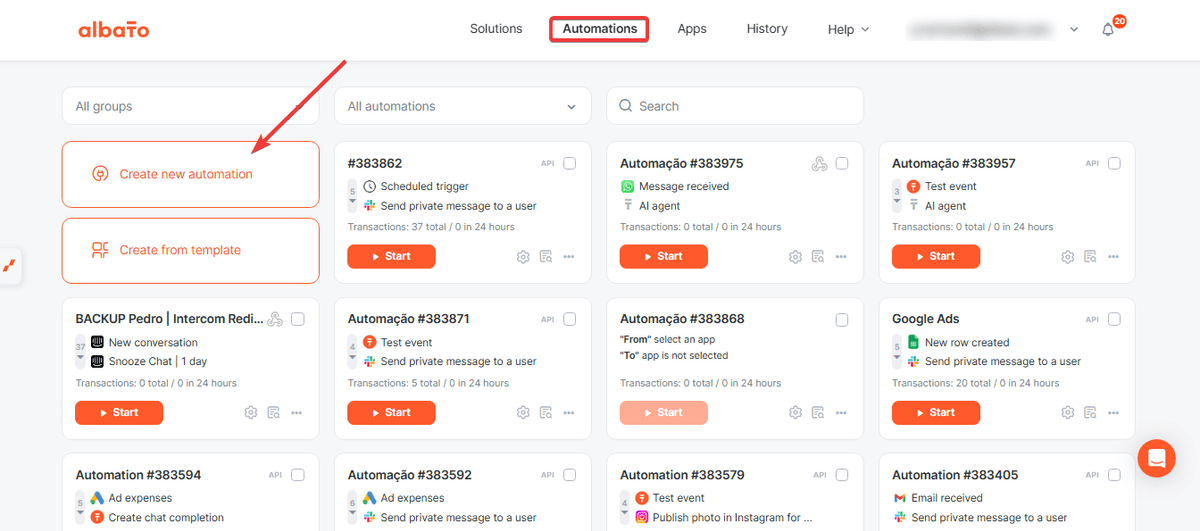
Go to the Automations tab and click Create new automation.
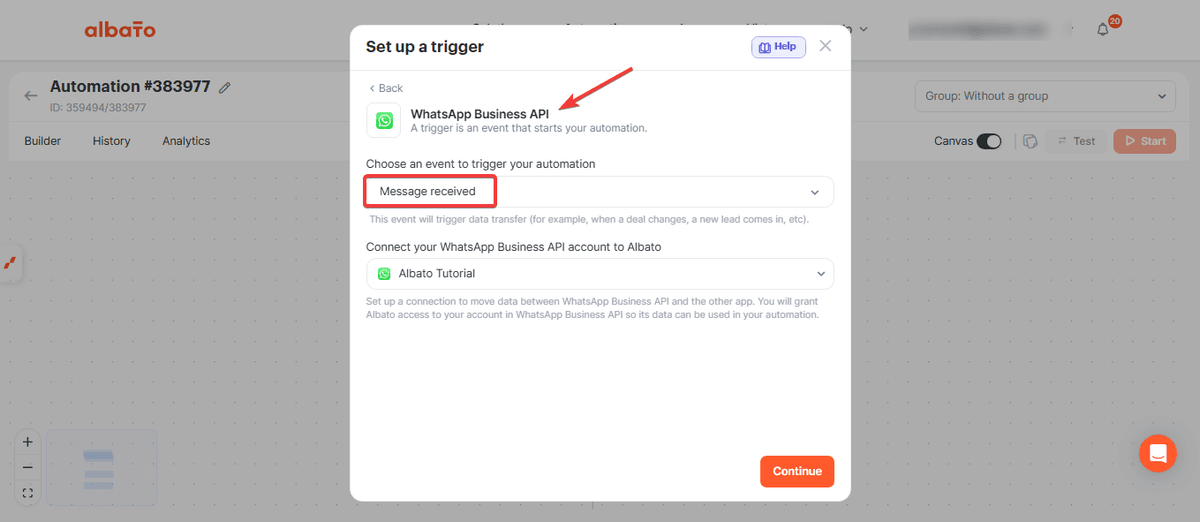
Then click Add a trigger.
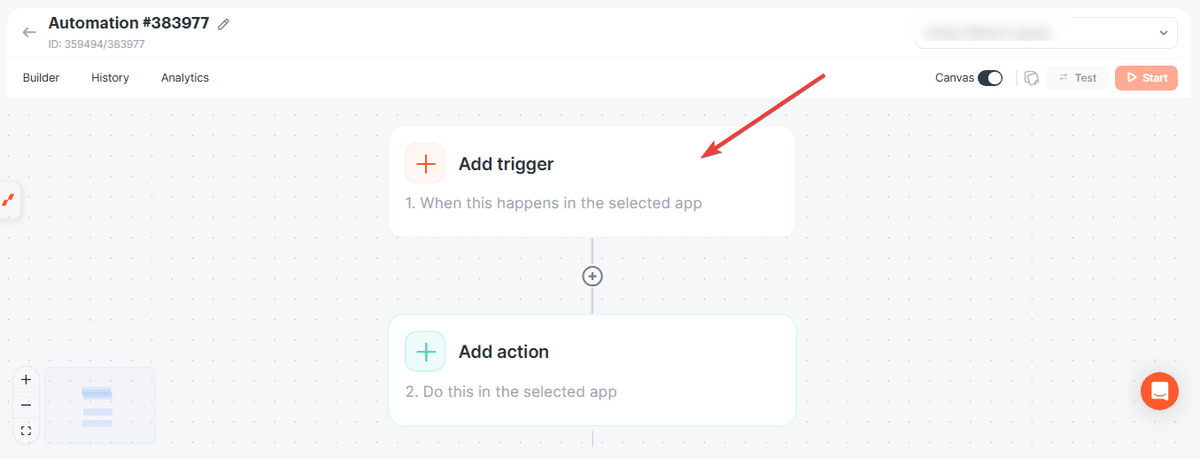
Select the WhatsApp application and the Message Received trigger.
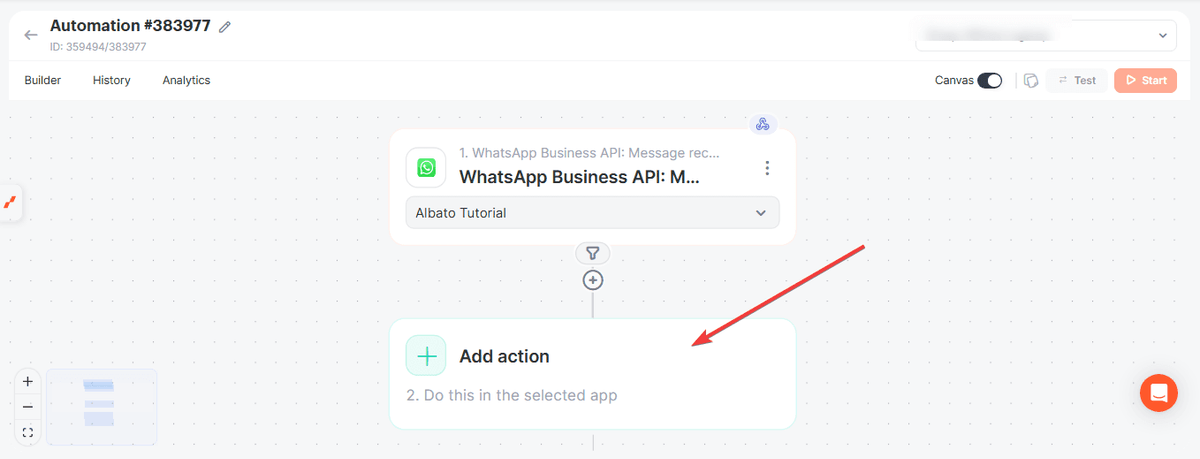
Next, click Add an action.
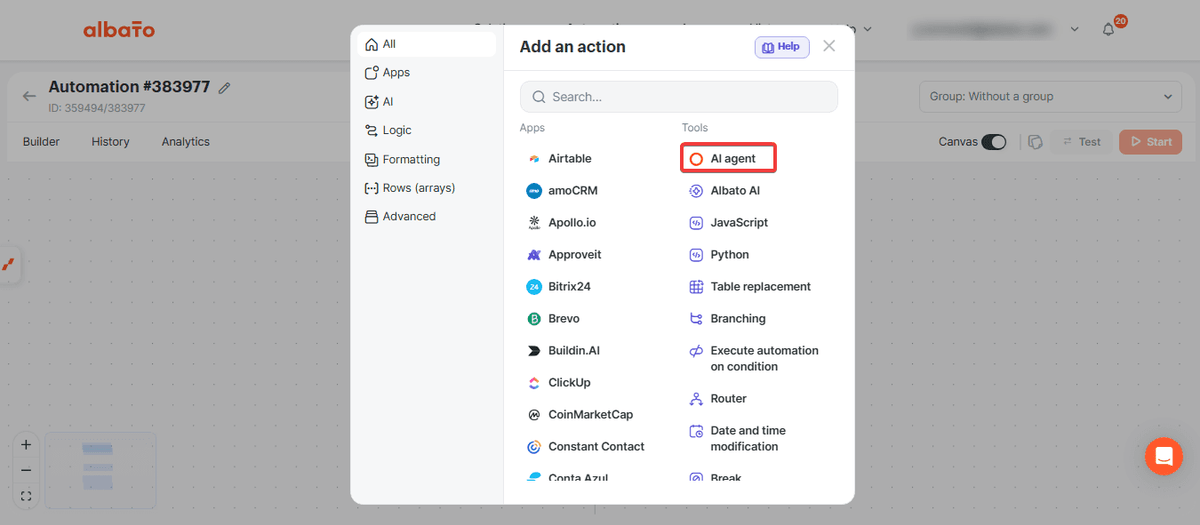
This time, select AI Agent.
You can learn more about what an AI Agent is and how to set it up in this article.
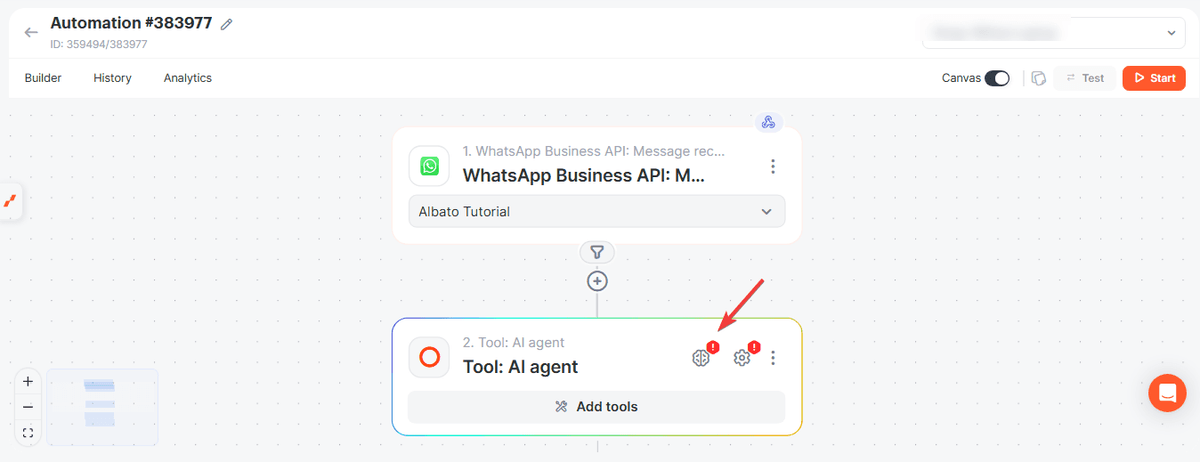
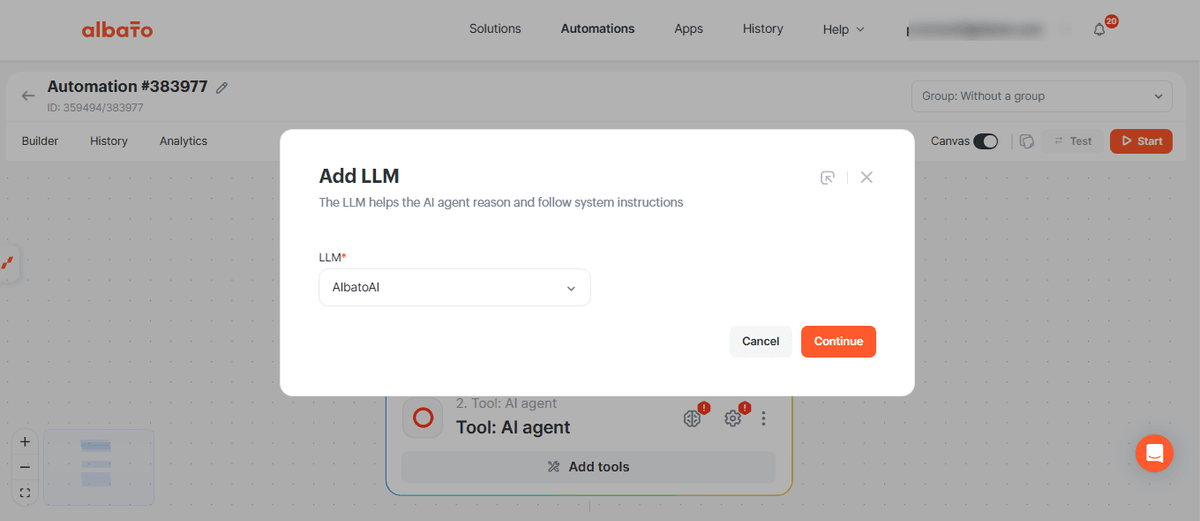
First, click the brain icon.
Here, define which AI model the agent will use. If you have Albato AI available, simply select it. Otherwise, select another option, as long as you have already added the connection to the desired application.
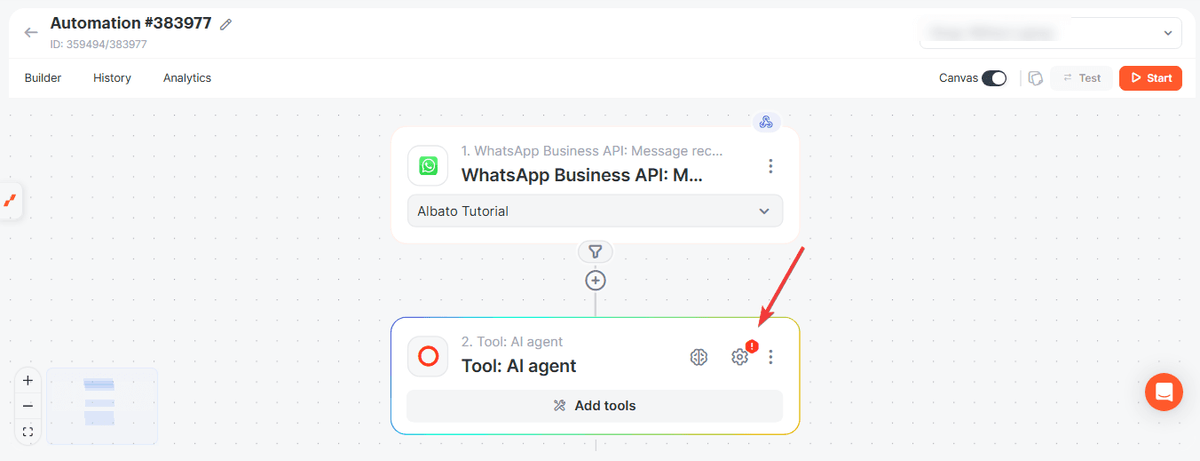
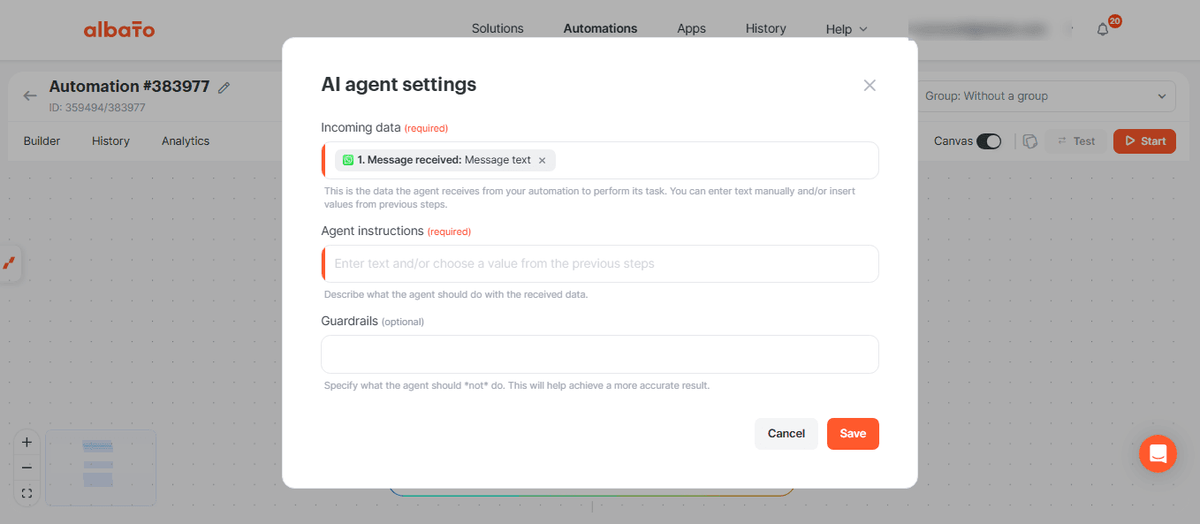
Then add the received data and the agent behavior instructions.
Under Received Data, select the new message parameter from WhatsApp, specifically the message text.
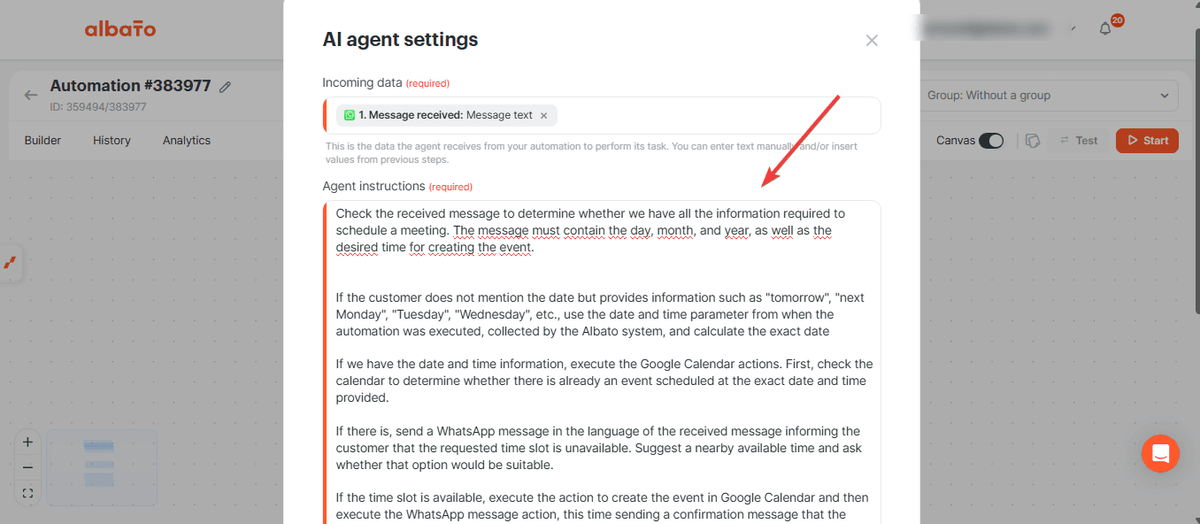
For the instructions, we will create a very specific prompt that will help ensure the automation works correctly.
For example, here is a template we could use.
Check the received message to determine whether we have all the information required to schedule a meeting. The message must contain the day, month, and year, as well as the desired time for creating the event. - If the customer does not mention the date but provides information such as "tomorrow", "next Monday", "Tuesday", "Wednesday", etc., use the date and time parameter from when the automation was executed, collected by the Albato system, and calculate the exact date. - If we have the date and time information, execute the Google Calendar actions. First, check the calendar to determine whether there is already an event scheduled at the exact date and time provided. - If there is, send a WhatsApp message in the language of the received message informing the customer that the requested time slot is unavailable. Suggest a nearby available time and ask whether that option would be suitable. - If the time slot is available, execute the action to create the event in Google Calendar and then execute the WhatsApp message action, this time sending a confirmation message that the appointment was successfully scheduled, also in the original language of the received message. - If the message does not contain details about the desired date and time for the appointment, or if it is about any other subject, generate an automatic response instructing the customer to provide the desired date and time. This message must also be sent through the WhatsApp message action and in the original language of the received message.
This prompt is detailed because the agent needs clear rules before it can choose the right tools and responses.
You can customize the prompt with your company details, tone-of-voice rules, words to avoid, and other instructions. Keep the same basic structure: check the request, verify availability, create the event, and send the right WhatsApp reply.
Once the prompt is configured, this step will look like this.
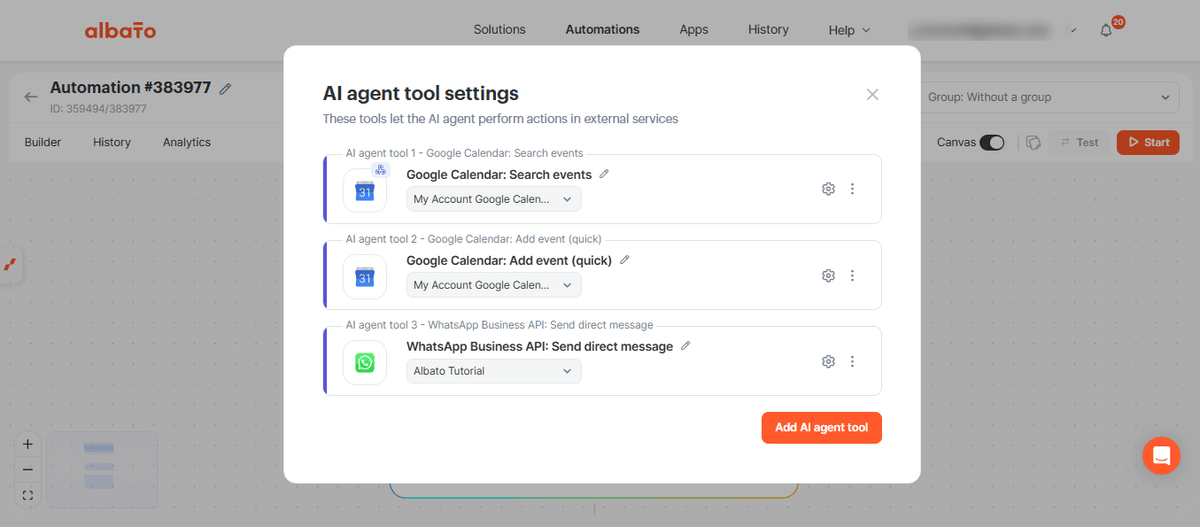
Now click Add tools to choose which actions the agent can use.
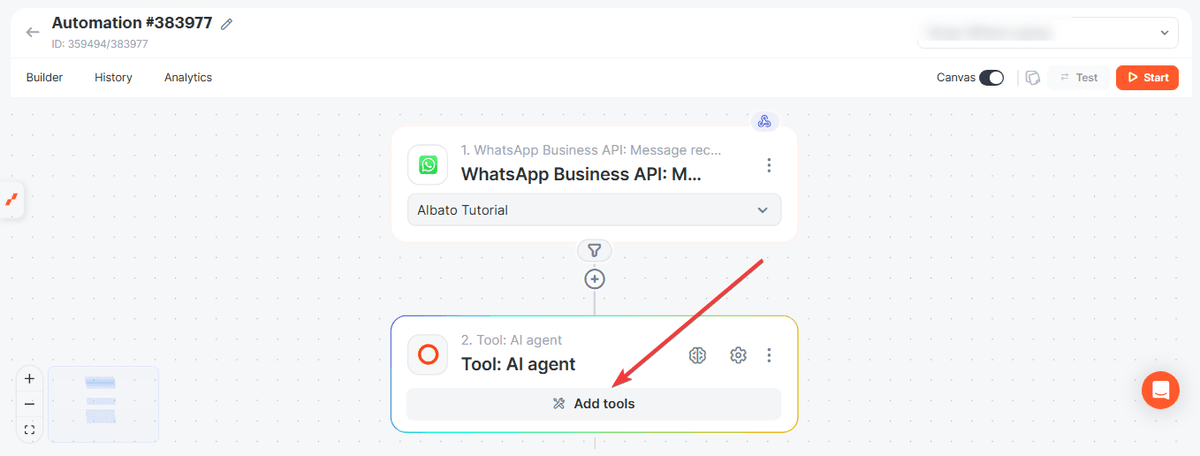
The first one will be the Google Calendar action called Search Events.
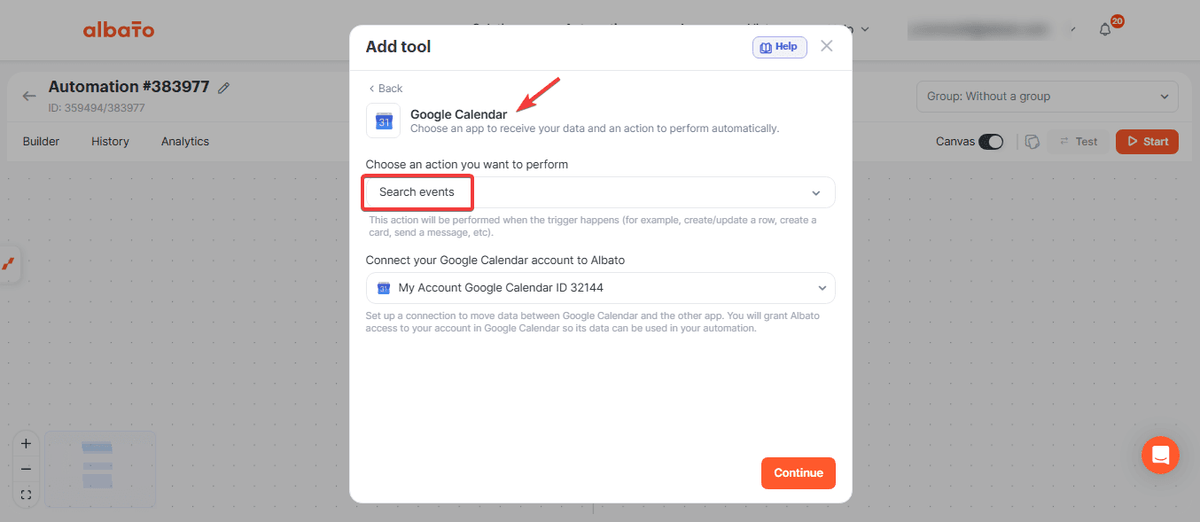
Enter the Calendar ID that the agent should check. For the remaining fields, allow the agent to decide which data to use.
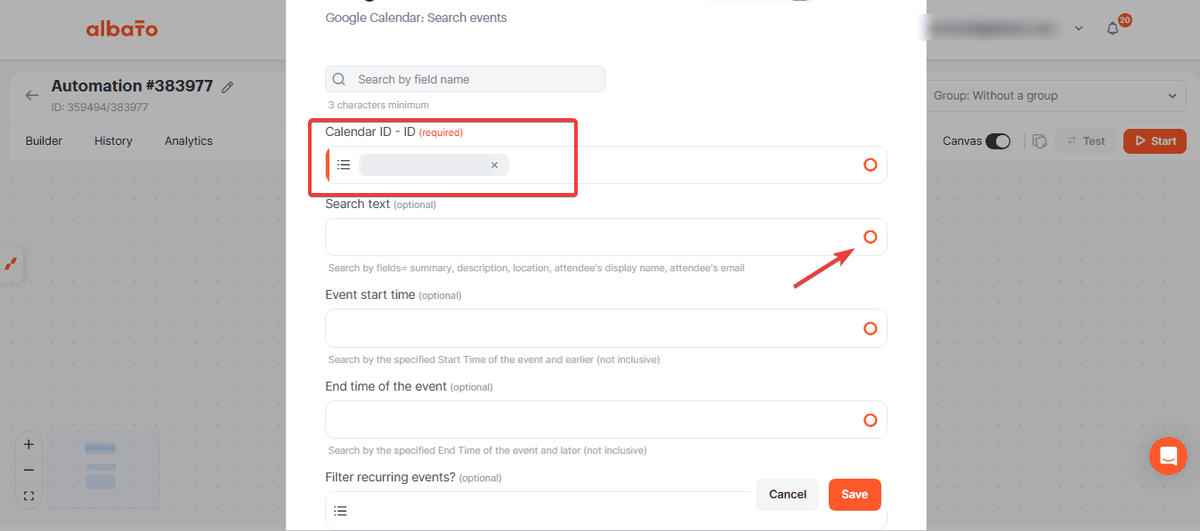
However, in the event start and end fields, click to add additional instructions:
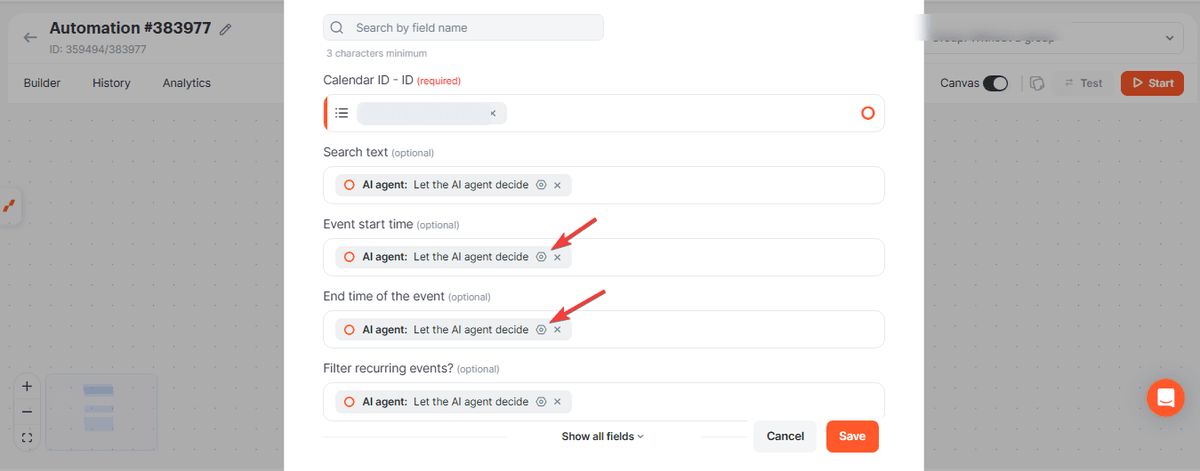
Add more details to better guide the agent, such as the exact time range in which events should be searched.
Example:
Search only for event availability during business hours, Monday through Friday, from 8:00 AM to 9:00 PM. If the customer requests a time outside this range, inform them that no availability exists.
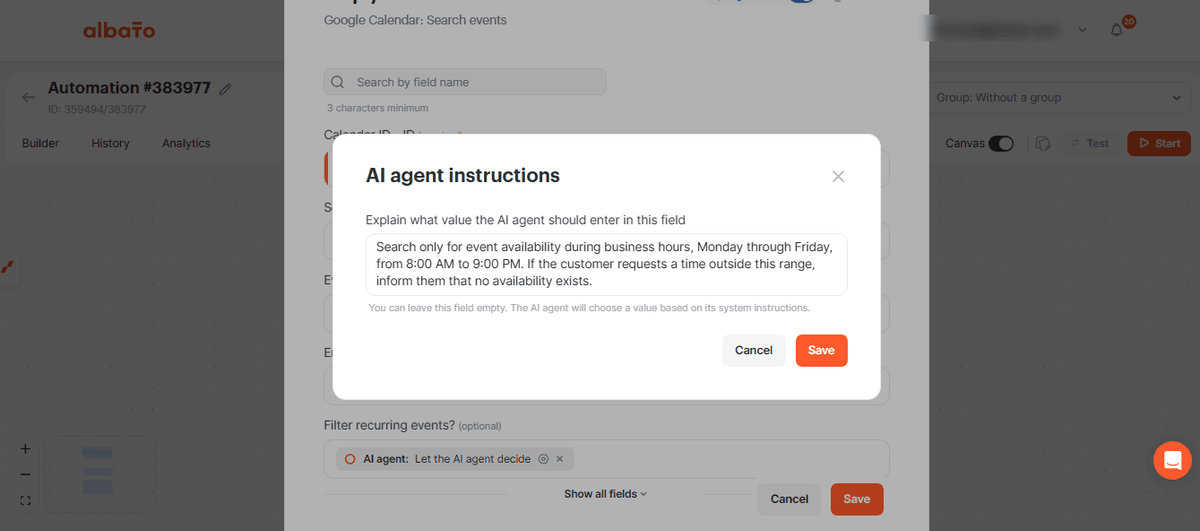
After that, save this step.
Now click Add a new step.
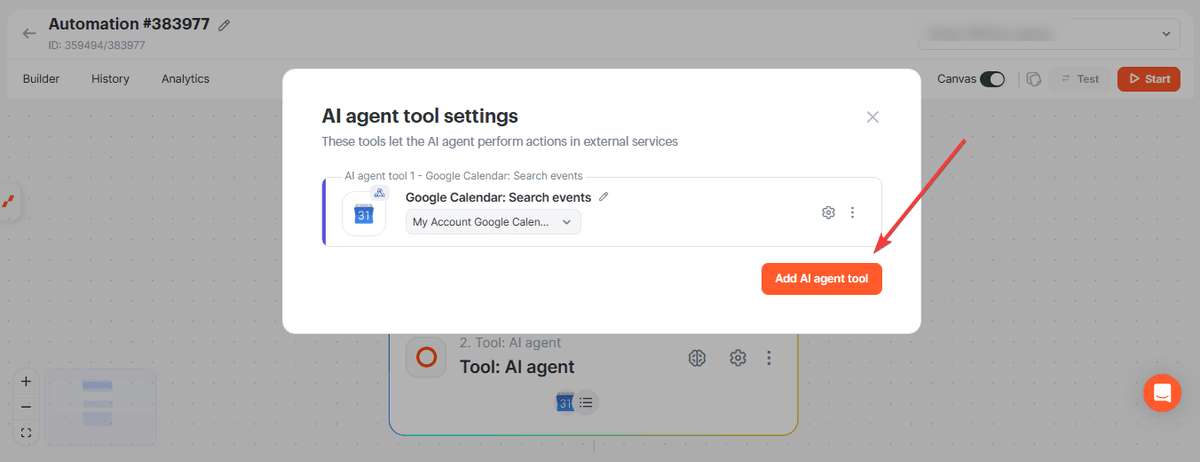
This time, select the Google Calendar application again, but use the Add Event action.
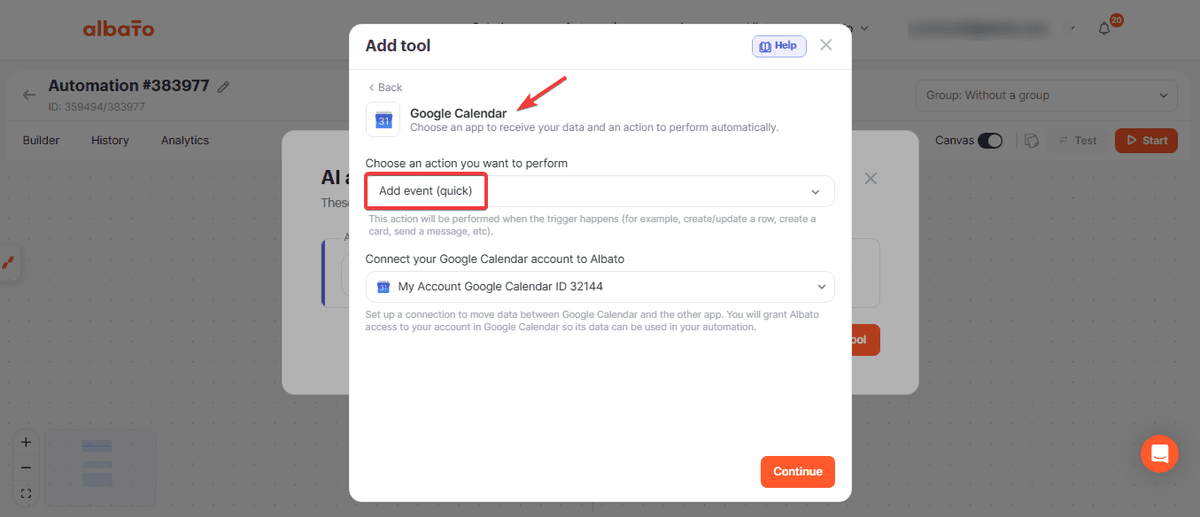
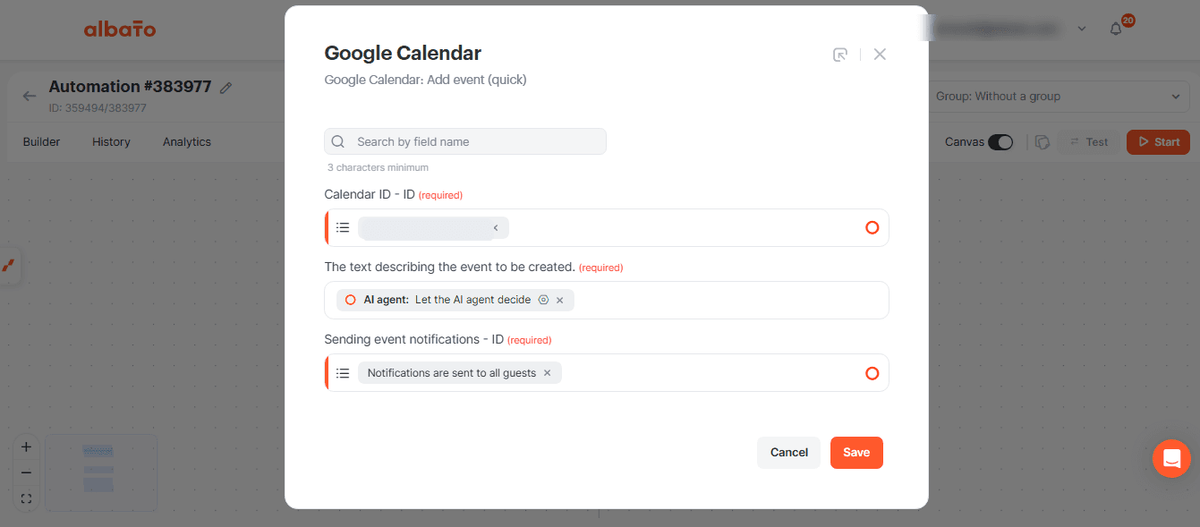
Again, allow the agent to decide how the fields should be filled.
Finally, add the WhatsApp step called Send Direct Message.
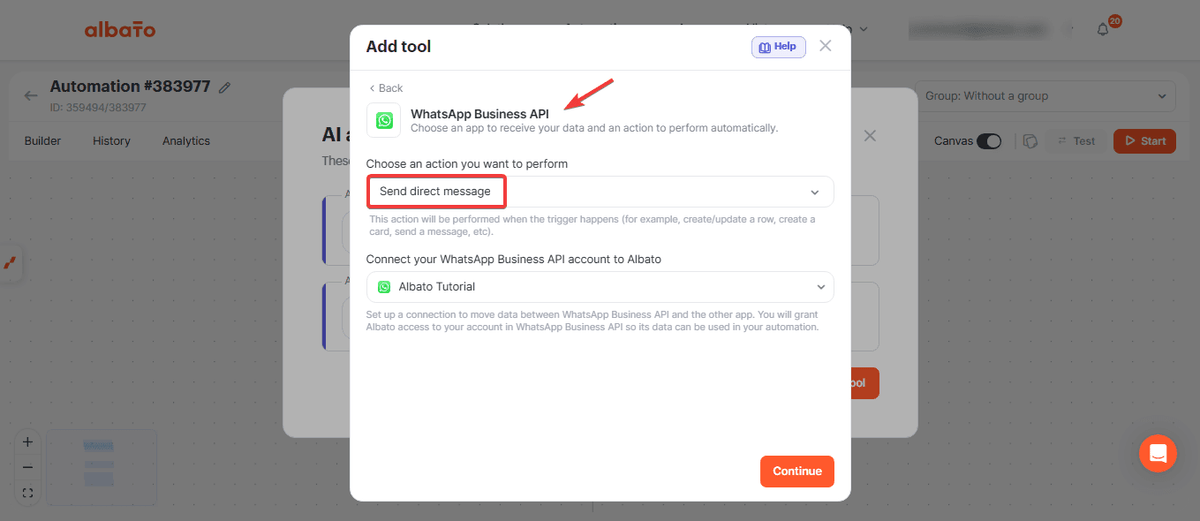
Fill in the Phone ID field of the message recipient using the value from the trigger, and in the first field (sender phone ID) manually enter your WhatsApp ID.
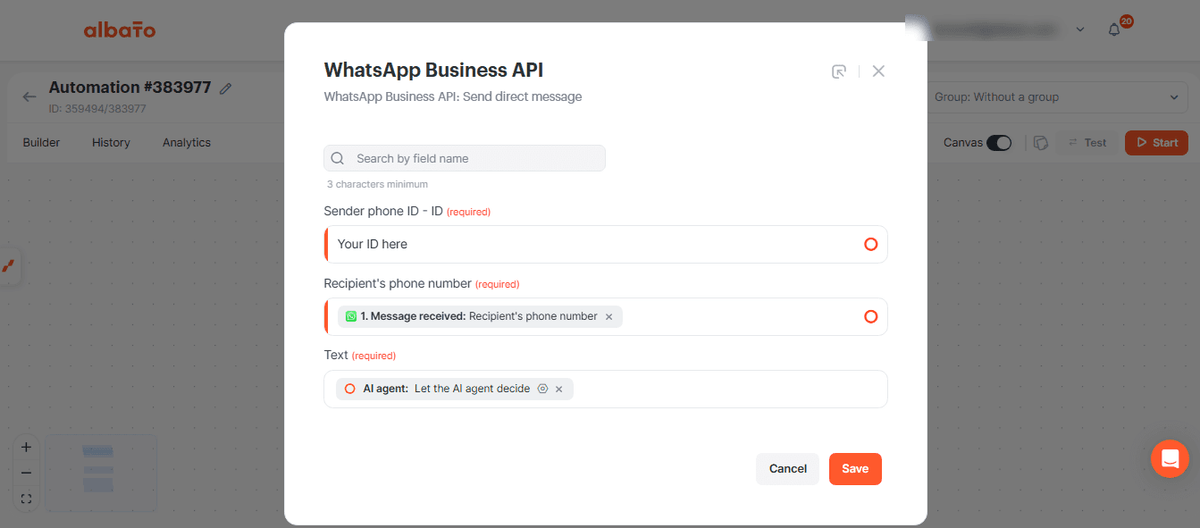
The remaining fields can also be configured so that the agent chooses the values automatically.
As a suggestion, you can also adjust this text step so that the response follows the expected standard more closely.
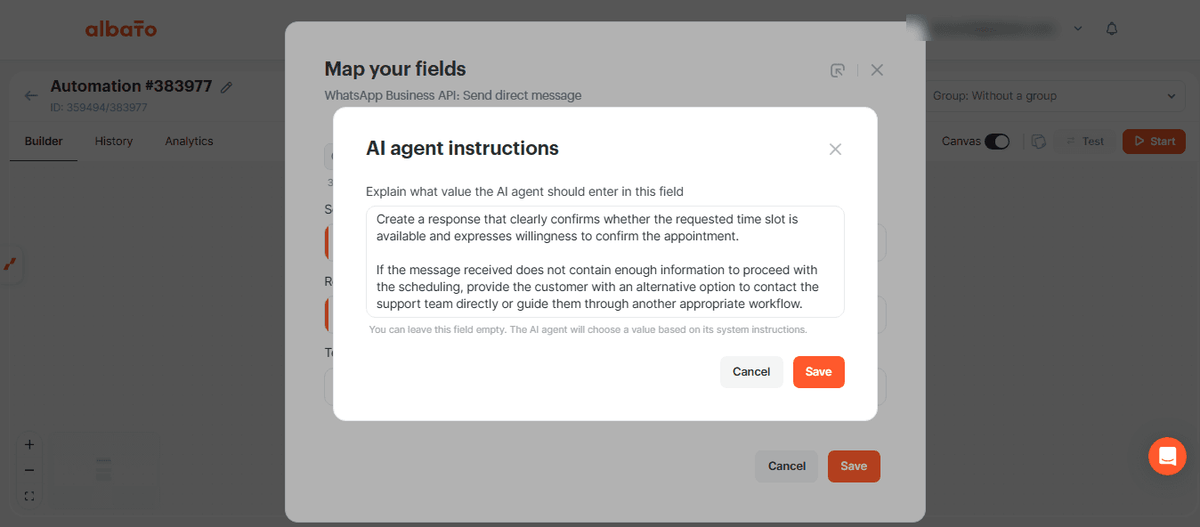
For example, you can make it clear that the requested time slot is available and that you will be happy to confirm the appointment. Likewise, if the message received does not yet contain enough information to complete the process, you can provide the customer with the option to contact your support team directly or follow another appropriate workflow.
These adjustments can be made here.
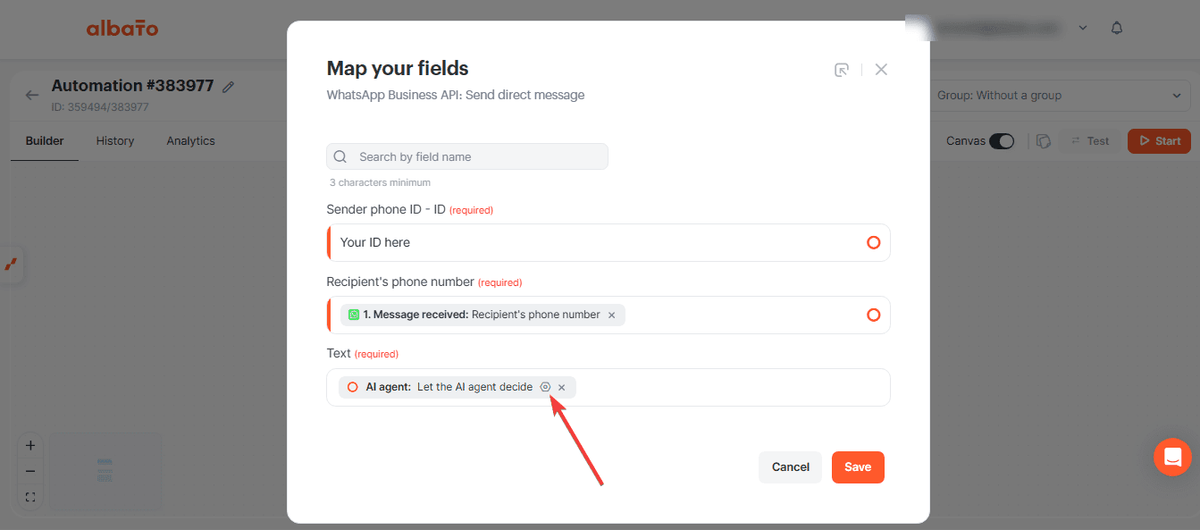
After that, simply add the instructions and guidance you would like the assistant to follow for each scenario.
After saving, your automation will look like this.
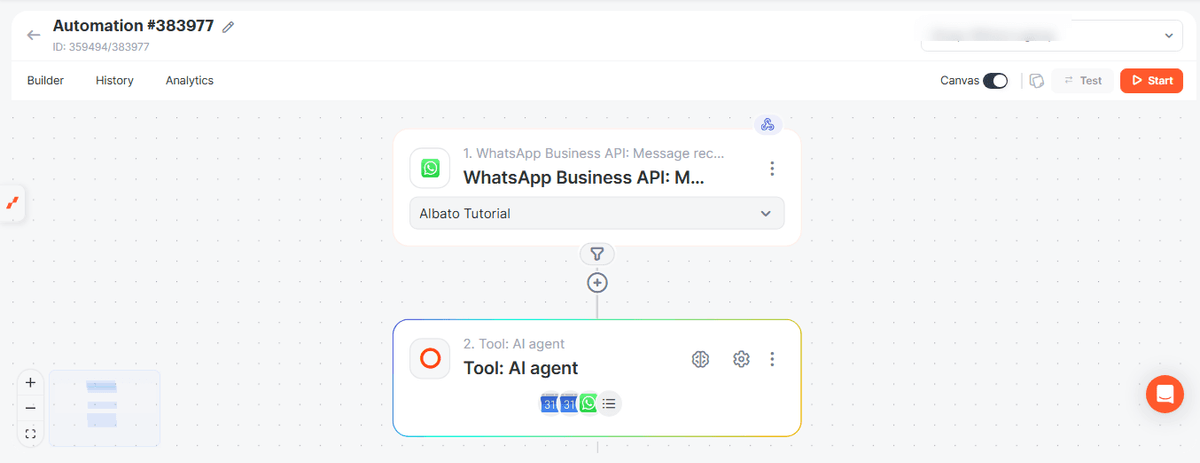
Now simply activate it and perform some tests to verify that everything is working as expected.
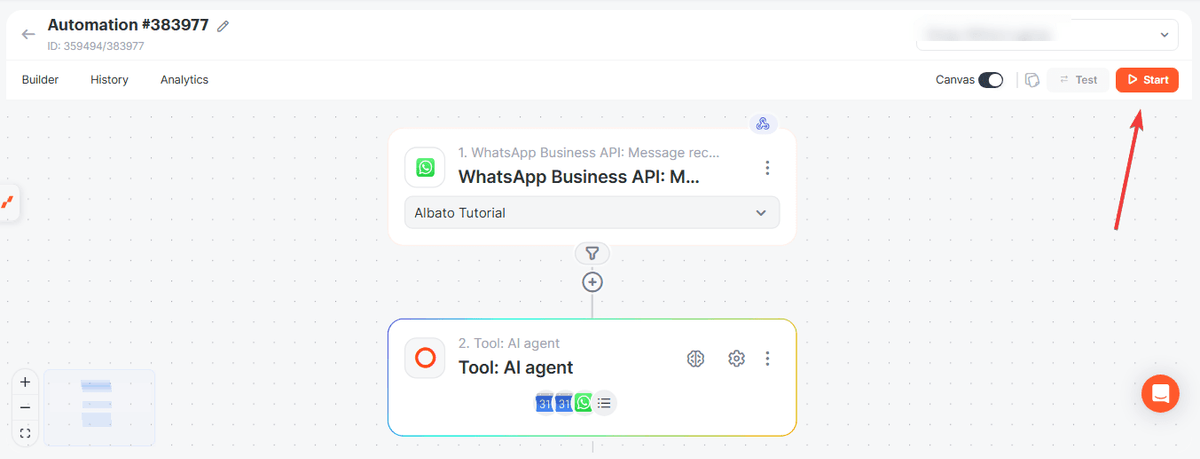
Some minor adjustments to the prompt may be necessary depending on the messages received. Review each step to confirm that the behavior occurred as expected and adjust the agent instructions whenever necessary.
Now you can use an AI Agent to help schedule appointments from WhatsApp and create events in Google Calendar. If you have any questions, contact our support team through the chat in your Albato account.
Did this answer your question?