

Break
IN THIS ARTICLE
In Albato, the Break tool stops an automation at a specific step. When the flow reaches the Break step, execution is completely terminated, no further actions run. This makes Break especially useful for controlling logic in automations with conditions, validation, or branching.
How to Use Break
As an example, imagine you receive leads from Google Sheets and need to prevent duplicate records from being processed. Here is how to set up the automation.
Step 1. Set up the initial steps
Open the Automation Builder and add the following steps:
- Step 1 — Google Sheets: New row created
- Step 2 — Tool: Automation delay (optional, ensures data is fully loaded)
- Step 3 — Google Sheets: Find a row by number
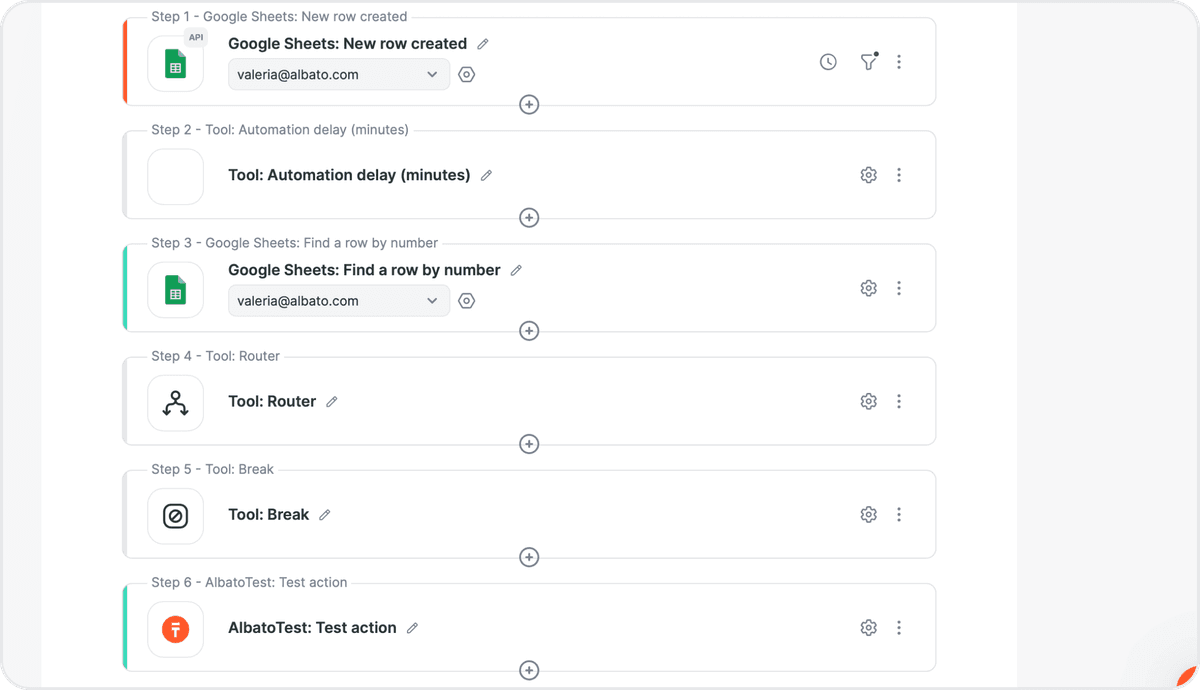
Step 2. Add a Router
Add a Router step to create branching logic. Configure the condition:
- Field — value from the trigger (for example, email or phone);
- Condition — Not equal to;
- Value — result from the search step.
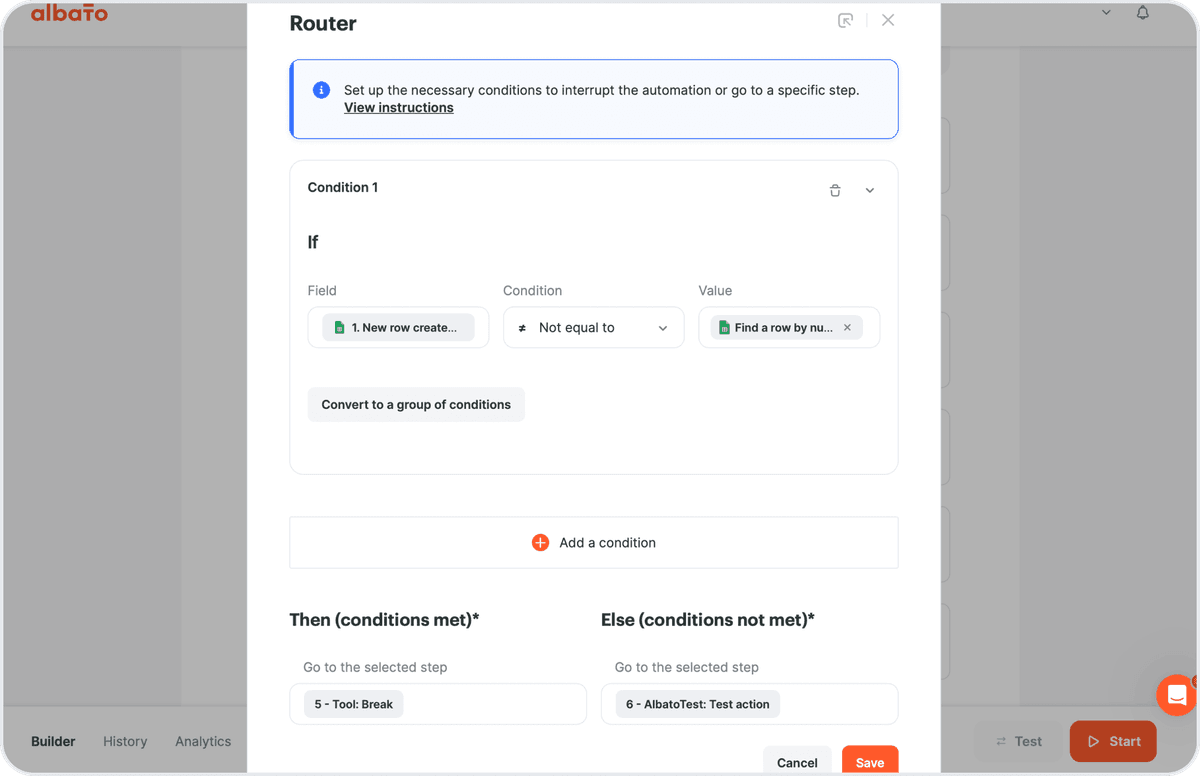
This splits the flow into two branches:
- Then (conditions met) — record not found → the automation stops (Break).
- Else (conditions not met) — record found → the automation continues to the next step.
Step 3. Add Break to the branch
Add the Break tool to the branch where the automation should stop. The tool does not require any configuration, once triggered, it immediately stops the execution.
Step 4. Define the next action in the other branch
In the branch where the automation should continue, add the next step, for example, create a contact or update a row.
Result
- Record not found → automation stops at Break
- Record found → automation continues to the next step
Break vs. Automation Delay
Do not confuse Break with Automation delay:
- Break — completely stops the automation
- Automation delay — pauses the automation for a set time, then continues execution
Use Automation delay before a search step to ensure the data is fully processed before the check runs. Use Break when the automation must stop entirely.
When to Use Break
Use the Break tool when you need to stop execution completely:
- Preventing duplicate records.
- Stopping processing of invalid data.
- Blocking actions when required conditions are not met.
- Handling edge cases in branching logic.
The Break tool gives you full control over when your automation should stop. When combined with Router, it allows you to build clean and predictable flows. Use Automation delay when you need to pause, and Break when you need to stop.
Example. Send a Custom Alert When an Automation Step Fails
Break can also help you build a custom error alert flow. In this example, the automation should stop when all previous steps are completed successfully. If one of the important steps fails, Albato redirects the flow to a notification step after Break and sends an alert to the responsible person.
You can send the alert to Slack, Telegram, Google Sheets, a CRM, or another app. In this example, we will use Slack.
Step 1. Add Break at the End of the Main Flow
Add the Break tool after the last step that should run in the main scenario. If the automation reaches this step, it stops and does not send the error alert.
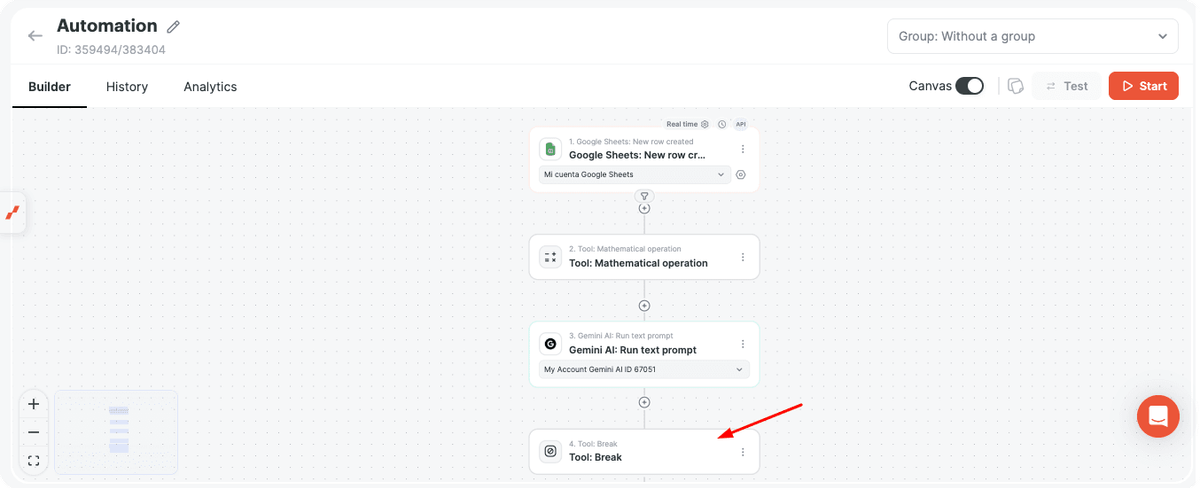
Step 2. Add a Notification Step After Break
Click the + button after the Break step and add the app that should send the alert.
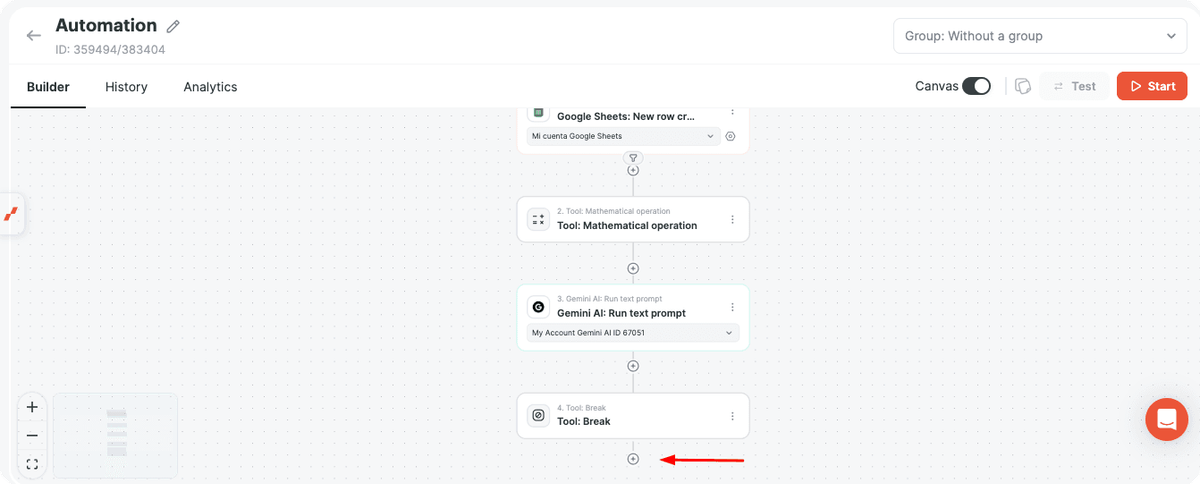
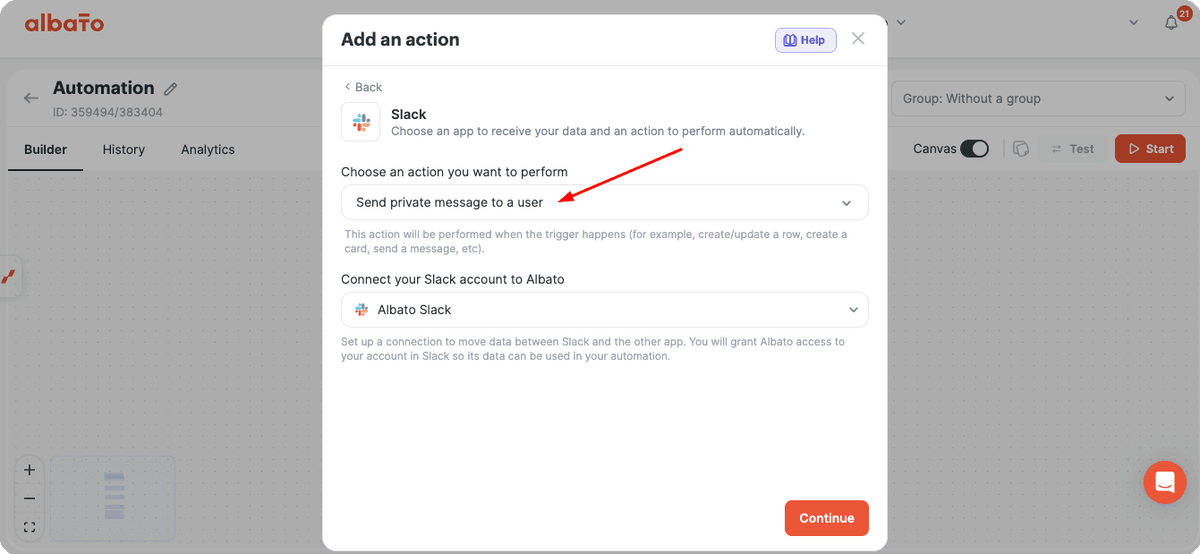
In this example, select Slack and choose the Send private message to a user action.
Step 3. Configure the Alert Message
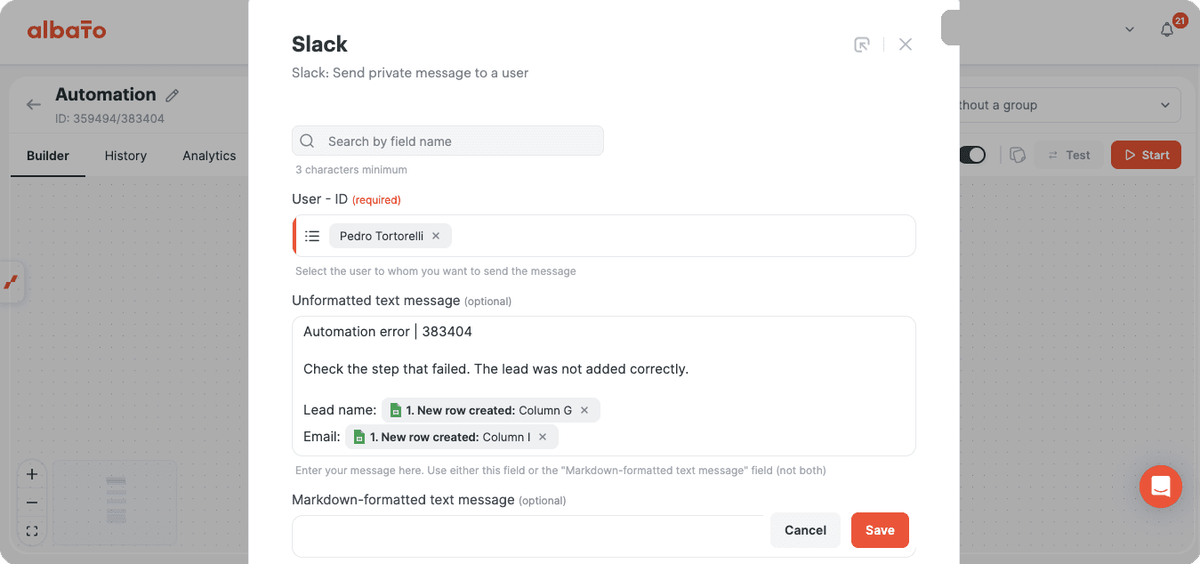
Select the user who should receive the message and add a clear error text. You can use fixed text and dynamic values from previous steps, for example:
- Automation error
- Check the step that failed. The lead was not added correctly.
- Lead name
Step 4. Open Error Handler for Previous Steps
Go to every important step before Break, except the trigger, and open the step menu.
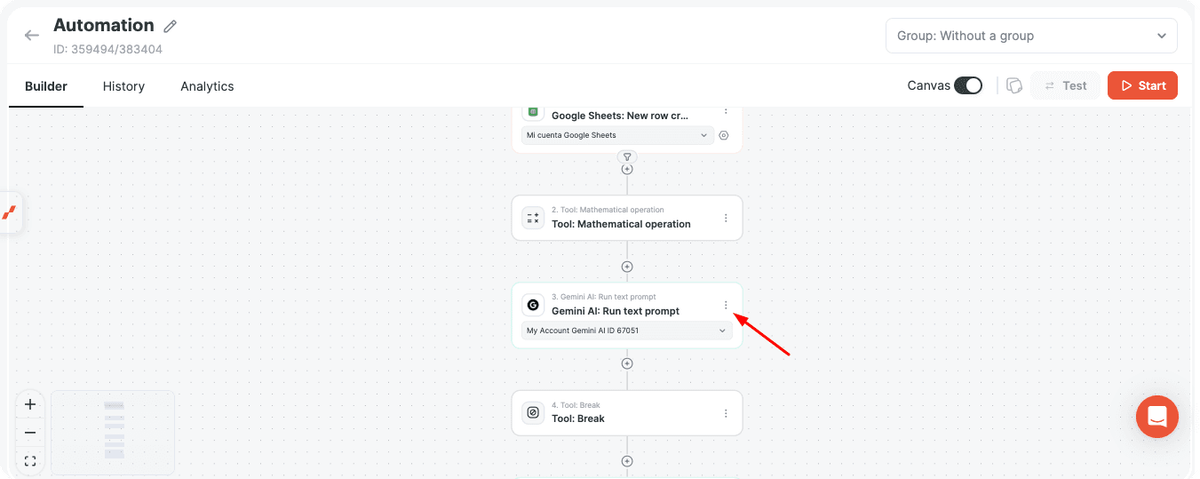
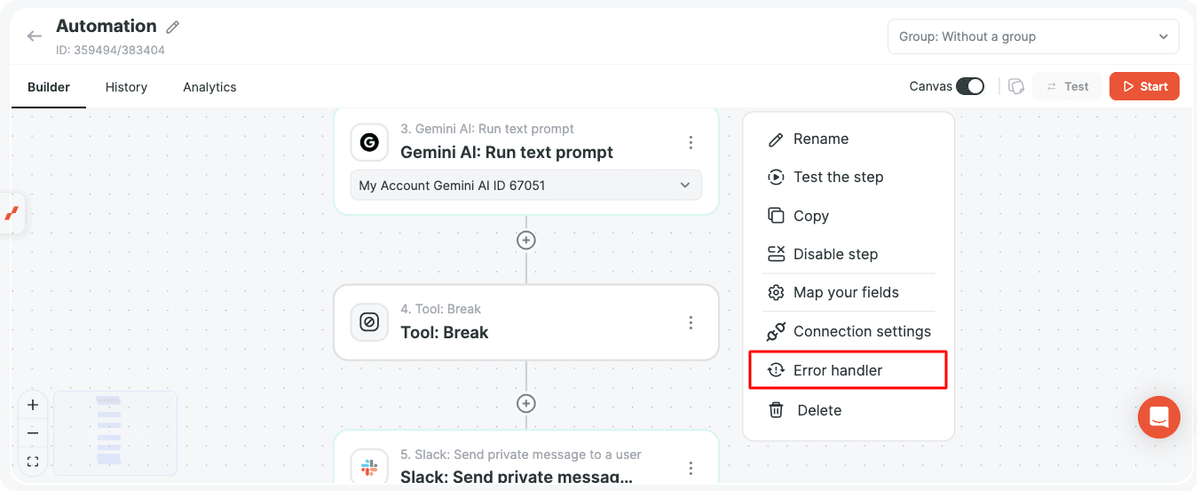
Select Error handler.
Step 5. Redirect Errors to the Alert Step
In Error handler, choose Move on to the selected step below and select the notification step that you added after Break.
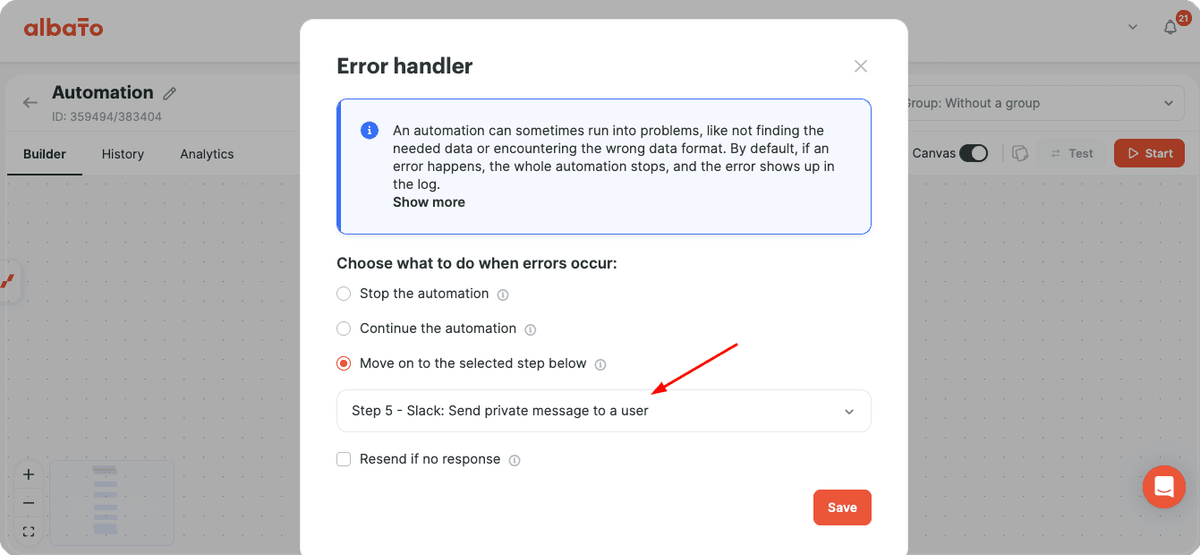
Attention: repeat the Error handler setup for every step where you need an alert. If you only need alerts for one specific action, configure Error handler only for that step.
After setup, the automation will look like this.
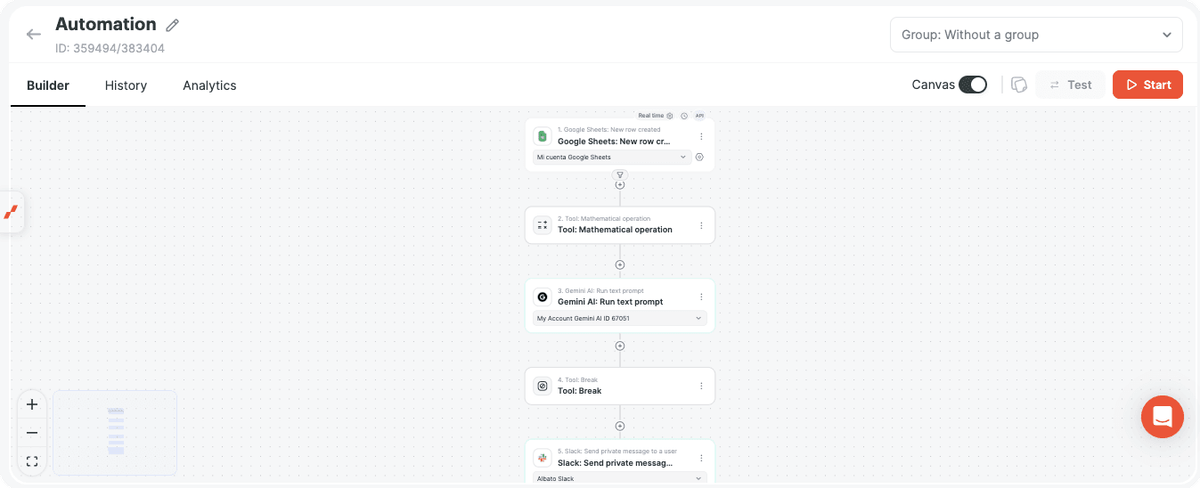
Now activate the automation. If one of the configured steps fails, Albato will redirect the flow to the alert step and send the notification.
If you have any questions, contact our support team via the chat.
Did this answer your question?